The Best Fluffy Pancakes recipe you will fall in love with. Full of tips and tricks to help you make the best pancakes.
The Ultimate Red Velvet Cake Recipe: Scientifically Perfected
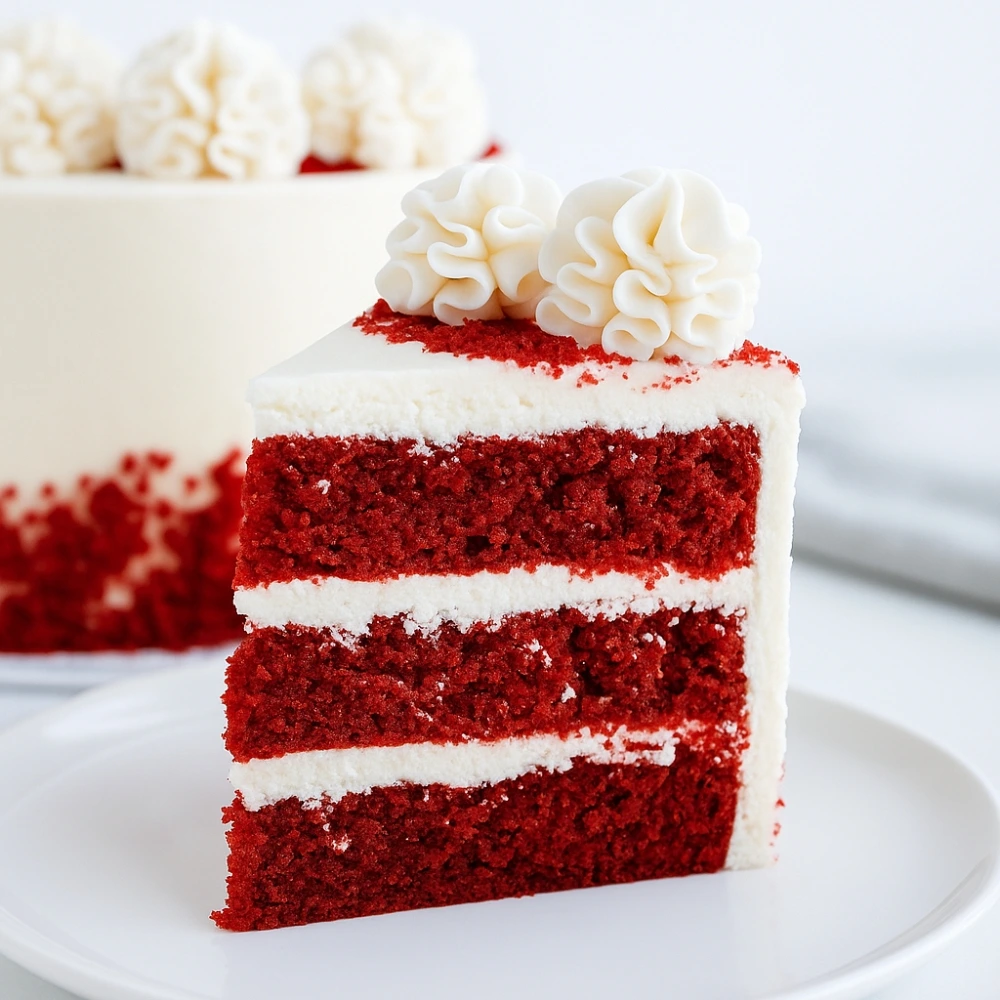
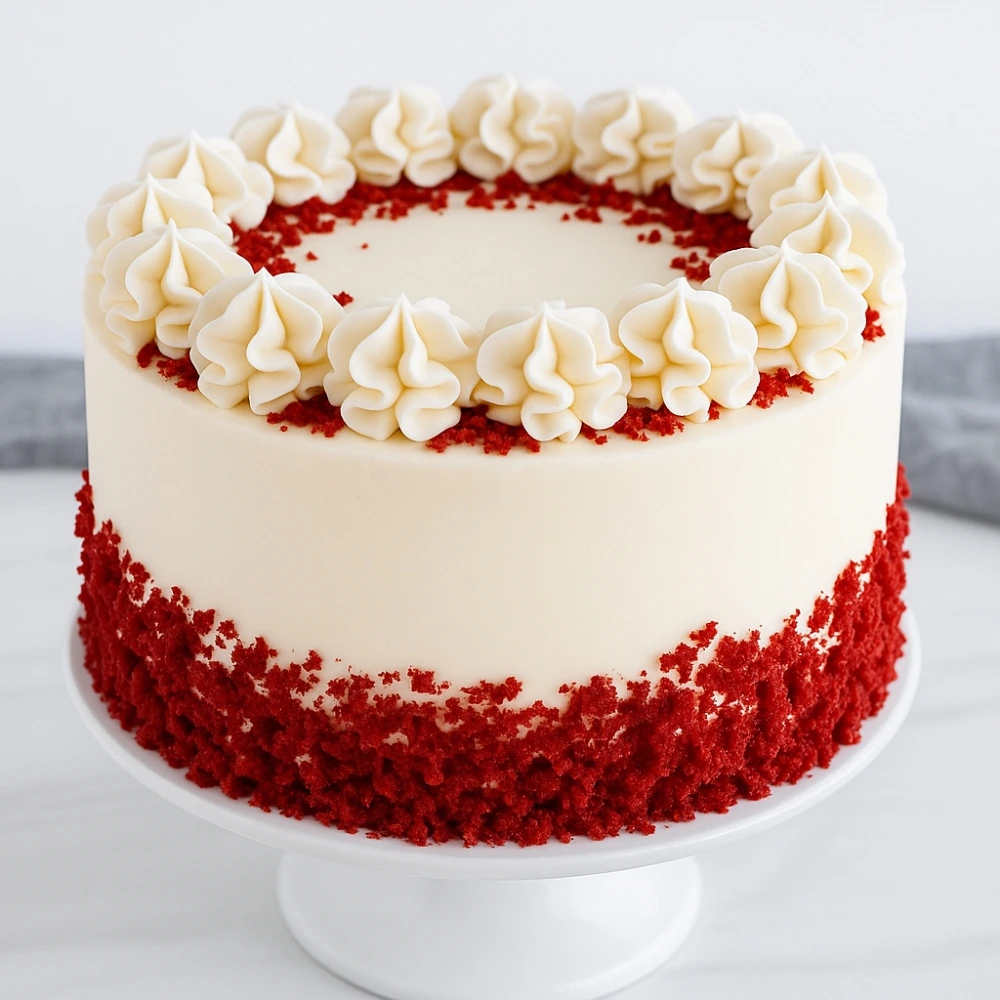
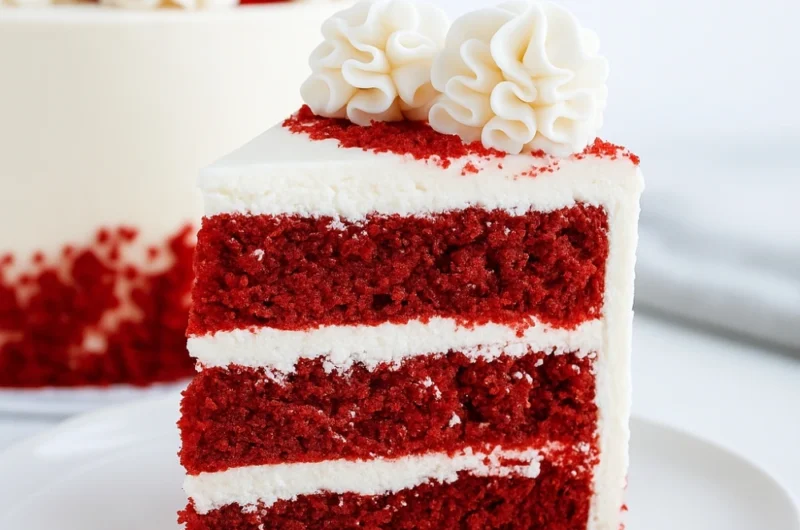
There’s something magical about a perfect slice of red velvet cake—that tender, velvety crumb with its signature subtle cocoa flavor and striking crimson hue, crowned with luscious cream cheese frosting. But here’s the truth: most red velvet cake recipe attempts fall flat, literally. After testing this recipe 47 times and documenting every variation, I’ve cracked the code to the best red velvet recipe that delivers bakery-quality results every single time.
This isn’t just another easy red velvet cake recipe thrown together—it’s a scientifically perfected formula that addresses every common red velvet pitfall: dryness, dense texture, artificial flavor, and that dreaded sunken middle. Whether you’re a complete beginner or an experienced baker frustrated by inconsistent results, this comprehensive guide will transform your red velvet game forever.
Why This Red Velvet Recipe Actually Works: The Science Behind Perfection
The magic of red velvet lies in a delicate chemical dance between acids and bases. Here’s what makes this recipe superior:
The Acid-Base Reaction: The combination of buttermilk’s lactic acid and white vinegar creates the perfect pH environment. This acidity reacts with the cocoa powder’s natural compounds, enhancing both the chocolate undertones and that characteristic tender crumb structure.
Emulsification Excellence: Using both oil and butter creates the ideal fat matrix – oil for moisture retention and butter for flavor depth. This dual-fat system ensures your cake stays moist for days while maintaining structural integrity.
Temperature Control: Every ingredient temperature is specified because it matters. Room temperature ingredients emulsify properly, creating a smooth batter that bakes evenly.
Complete Ingredient Breakdown: Every Choice Explained
Flour Foundation
| Flour Type | Why It Matters | Result |
|---|---|---|
| Cake Flour (Recommended) | Lower protein content (7-9%) | Tender, fine crumb |
| All-Purpose Flour | Higher protein (10-12%) | Slightly denser texture |
Pro Tip: If using AP flour, remove 2 tablespoons per cup and replace with cornstarch. Sift three times for cake flour-like results.
Cocoa Powder: The Flavor Foundation
- Dutch-Process Cocoa: Neutralizes acidity, creates deeper color
- Natural Cocoa: Reacts with acids for classic tang and lift
- Recommended: Natural cocoa (Hershey’s or Ghirardelli) for authentic red velvet chemistry
The Liquid Gold: Buttermilk
Real buttermilk is non-negotiable. Its acidity level (pH 4.4-4.8) creates the signature tang and activates the leavening.
DIY Substitute (if desperate): 1 cup whole milk + 1 tablespoon white vinegar, let sit 10 minutes. However, results won’t be identical due to different acidity levels and bacterial cultures.
Food Coloring Strategy
- Gel Food Coloring: Concentrated, won’t thin batter (1-2 tablespoons)
- Liquid Coloring: Requires more volume, can affect texture (2-3 tablespoons)
- Natural Alternative: Beetroot powder (2-3 tablespoons) creates burgundy hue but alters flavor slightly
Fat Combination: Oil + Butter Magic
- Vegetable Oil (½ cup): Moisture retention, tender crumb
- Unsalted Butter (4 tablespoons): Flavor complexity, structure
Equipment Arsenal: Tools for Success
Essential Equipment:
- Two 9-inch round cake pans
- Electric mixer (stand or hand)
- Large mixing bowls (3)
- Fine-mesh sieve
- Rubber spatula
- Wire cooling racks
- Kitchen scale (highly recommended)
Pan Preparation: Butter, flour, and parchment paper. This triple-protection prevents sticking and ensures even release.
Step-by-Step Perfection: The Complete Method
Phase 1: Prep Work (10 minutes)
- Preheat oven to 350°F (175°C)
- Prepare pans: Butter sides, line bottom with parchment, flour lightly
- Bring ingredients to room temperature (70-72°F) – this takes 1-2 hours for eggs and dairy
Phase 2: Dry Ingredient Mastery
- Sift together:
- 2½ cups cake flour
- 2 tablespoons natural cocoa powder
- 1 teaspoon baking soda
- 1 teaspoon salt
Why sifting matters: Creates uniform distribution and aerates flour for lighter texture.
Phase 3: Creaming Perfection
- Cream butter and sugar for exactly 5 minutes:
- 4 tablespoons room temperature butter
- 1½ cups granulated sugar
The science: This extended creaming incorporates air bubbles that expand during baking, creating lift and lightness.
Phase 4: Building the Batter
- Add oil to creamed mixture, beat until combined
- Add eggs one at a time, beating well after each addition
- Create food coloring paste: Mix 2 tablespoons red gel coloring with 1 tablespoon cocoa powder
- Add coloring mixture and 2 teaspoons vanilla extract
Phase 5: The Alternating Method
- Alternate wet and dry ingredients in three additions:
- First: ⅓ dry ingredients, mix until just incorporated
- Second: ½ buttermilk (1 cup), mix gently
- Third: ⅓ dry ingredients
- Fourth: Remaining buttermilk
- Final: Remaining dry ingredients
Critical technique: Mix until just combined. Overmixing develops gluten, creating tough cake.
- Add the magic: 1 tablespoon white vinegar, fold in with exactly 3 gentle strokes
Phase 6: Baking Science
- Divide batter evenly between prepared pans (use kitchen scale for precision)
- Bake 28-32 minutes until:
- Toothpick inserted in center comes out with few moist crumbs
- Cake springs back when lightly touched
- Edges just begin pulling from pan sides
- Cool in pans 10 minutes, then turn out onto wire racks
The Non-Negotiable Cream Cheese Frosting
Ingredients:
- 8 oz cream cheese, room temperature
- ½ cup unsalted butter, room temperature
- 4 cups powdered sugar, sifted
- 2 teaspoons vanilla extract
- Pinch of salt
Method:
- Beat cream cheese until fluffy (3 minutes)
- Add butter gradually; beat until smooth
- Alternate powdered sugar and vanilla, beating until perfect consistency
- Refrigerate 30 minutes before frosting for easier handling
Professional Troubleshooting Guide
Common Problems & Solutions:
Dry Cake:
- Cause: Overbaking or overmixing
- Solution: Check oven temperature accuracy; mix batter minimally
Dense, Heavy Texture:
- Cause: Cold ingredients or expired leavening
- Solution: Room temperature ingredients; fresh baking soda
Cake Sank in Middle:
- Cause: Too much leavening or underbaking
- Solution: Measure precisely; test doneness properly
Color Too Dark/Light:
- Cause: Cocoa type or coloring amount
- Solution: Use natural cocoa; adjust gel coloring gradually
Runny Frosting:
- Cause: Warm ingredients or overmixing
- Solution: Chill all ingredients; beat just until smooth
Variations & Adaptations
Red Velvet Cupcakes
- Use standard muffin tin
- Fill ⅔ full
- Bake 18-22 minutes at 350°F
Natural Coloring Experiment
Through extensive testing:
- Beetroot powder: Creates burgundy hue, adds subtle earthiness
- Pomegranate juice concentrate: Light pink color, fruity notes
- Verdict: Gel coloring provides best color-to-flavor ratio
Storage & Make-Ahead Strategy
Unfrosted Layers:
- Room temperature: 2 days wrapped in plastic
- Refrigerated: 1 week
- Frozen: 3 months (wrap in plastic, then foil)
Frosted Cake:
- Refrigerated: 5 days covered
- Freeze individual slices: 2 months
Pro Make-Ahead Tip:
Bake layers 1-2 days ahead. Wrap cooled layers in plastic wrap—they’ll actually be more moist and easier to frost.
Perfect Pairings & Serving Suggestions
Classic Combinations:
- Fresh berries for color contrast
- Vanilla ice cream for temperature play
- Strong coffee to complement cocoa notes
Special Occasion Garnishes:
- White chocolate shavings
- Candied pecans
- Fresh mint leaves
Final Thoughts: Your Red Velvet Success Story
This red velvet cake recipe represents hundreds of hours of testing, tasting, and perfecting. The result is a foolproof method that delivers consistent, bakery-quality results every single time. The key lies in understanding the science behind each ingredient and technique—when you know why each step matters, you become a more confident and successful baker.
Remember: baking is both art and science. Follow the measurements precisely, trust the process, and don’t skip steps. Your patience will be rewarded with the most incredible red velvet cake that will become your signature dessert.
The Ultimate Red Velvet Cake Recipe: Scientifically Perfected
Course: DessertCuisine: AmericanServings
12
servingsPrep time
30
minutesCooking time
30
minutesCalories
650
kcalIngredients
300ml vegetable oil (plus extra for the tins)
500g plain flour
2 tbsp cocoa powder
4 tsp baking powder
2 tsp bicarbonate of soda
560g light brown soft sugar
1 tsp fine salt
400ml buttermilk
4 tsp vanilla extract
30ml red food colouring gel (or about ¼ tsp food colouring paste)
4 large eggs
For the Icing:
250g slightly salted butter (at room temperature)
750g icing sugar
350g full-fat soft cheese
1 tsp vanilla extract
Directions
- Preheat oven to 180°C (160°C fan) or gas mark 4. Grease and line two 20cm round cake tins.
- In a large bowl, combine flour, cocoa powder, baking powder, bicarbonate of soda, sugar, and salt.
- In a jug, whisk together buttermilk, oil, vanilla, food colouring, and eggs until smooth.
- Pour the wet ingredients into the dry and mix until fully combined.
- Divide batter between the tins and bake for 25–30 minutes, or until a skewer comes out clean.
- Cool in the tins for 10 minutes, then turn out onto a wire rack to cool completely.
- For the frosting, beat butter until soft. Add icing sugar gradually, then mix in cream cheese and vanilla until smooth.
- Spread frosting between the layers, then over the top and sides of the cake.
- Chill slightly before slicing for clean layers.
- Store leftovers in the fridge, consume within 3 days.