The Best Fluffy Pancakes recipe you will fall in love with. Full of tips and tricks to help you make the best pancakes.
Chicken Pot Pie
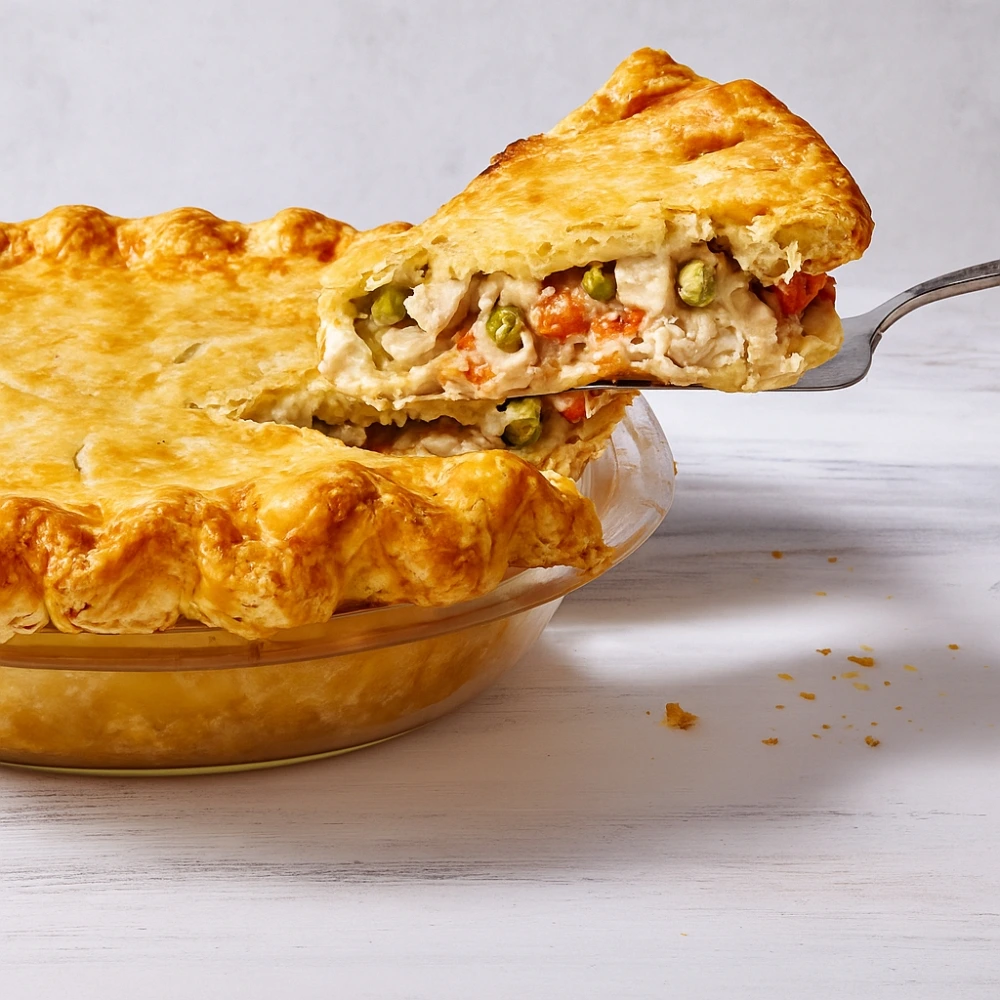
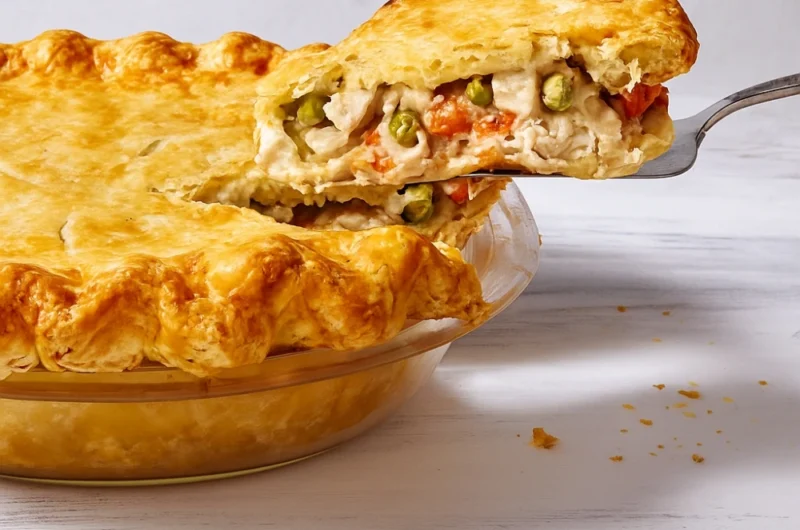
There’s something magical about the moment you slice into a chicken pot pie and watch the steam escape, revealing layers of golden, flaky crust protecting a rich, creamy filling studded with tender chicken and vibrant vegetables. It’s the ultimate comfort food—a warm hug on a plate that transforms simple ingredients into something extraordinary.
But here’s the truth: most homemade chicken pot pie recipes leave you with soggy crusts, bland fillings, or complicated techniques that intimidate even experienced home cooks. After perfecting this recipe through countless kitchen experiments and feedback from fellow food enthusiasts, I’ve cracked the code to creating the best chicken pot pie recipe that delivers consistent, restaurant-quality results every single time.
This isn’t just another recipe—it’s your complete guide to mastering every element of chicken pot pie from scratch, complete with professional techniques, troubleshooting tips, and creative variations that will make this dish your signature comfort food masterpiece.
The Perfect Chicken Pot Pie Recipe
For the Flaky Crust:
| Ingredient | Amount | Notes |
|---|---|---|
| All-purpose flour | 2½ cups | Sifted for lighter texture |
| Cold butter | 1 cup (2 sticks) | Cut into small cubes |
| Ice water | 6-8 tablespoons | Add gradually |
| Salt | 1 teaspoon | Enhances flavor |
| Sugar | 1 tablespoon | Balances saltiness |
For the Creamy Filling:
| Ingredient | Amount | Substitutions |
|---|---|---|
| Chicken thighs | 2 pounds | Or 1½ lbs chicken breast |
| Butter | 4 tablespoons | Or olive oil |
| Yellow onion | 1 large, diced | Sweet onion works too |
| Carrots | 2 large, diced | Fresh or frozen |
| Celery | 3 stalks, diced | Adds crucial flavor base |
| Frozen peas | 1 cup | Fresh peas (blanched) |
| All-purpose flour | ⅓ cup | For thickening |
| Chicken broth | 2½ cups | Low-sodium preferred |
| Heavy cream | ½ cup | Half-and-half works |
| Fresh thyme | 2 teaspoons | Or 1 tsp dried |
| Fresh sage | 1 teaspoon | Or ½ tsp dried |
| Salt & pepper | To taste | Season generously |
| Egg | 1 large | For egg wash |
Ingredient Deep Dive: Choosing the Best for Your Pot Pie
The Chicken Choice That Changes Everything
Chicken thighs are the secret to incredibly moist, flavorful pot pie. Unlike chicken breast, thighs remain tender during the cooking process and infuse the filling with rich flavor. However, if you prefer white meat, use a combination of breast and thighs (1:1 ratio) for the best of both worlds.
Crust Fundamentals: Why Temperature Matters
The key to a flaky chicken pot pie crust lies in keeping your butter cold throughout the process. Cold butter creates steam pockets during baking, resulting in those coveted flaky layers. European-style butter with higher fat content produces even better results.
Vegetable Selection Strategy
- Carrots: Choose large, firm carrots and dice uniformly for even cooking
- Celery: Don’t skip this—it provides essential aromatic foundation
- Peas: Frozen peas maintain their bright color and pop of sweetness better than fresh
Step-by-Step Instructions: Your Path to Perfection
Phase 1: Creating the Perfect Crust (30 minutes)
- Prepare Your Flour Mixture
- Combine flour, salt, and sugar in a large bowl
- Why this works: Sugar isn’t traditional, but it balances the saltiness and helps with browning
- Master the Butter Integration
- Add cold, cubed butter to flour mixture
- Use pastry cutter or fingers to create pea-sized butter pieces
- Critical tip: If butter starts melting, refrigerate mixture for 10 minutes
- The Ice Water Technique
- Add ice water 1 tablespoon at a time
- Mix gently until dough just comes together
- Troubleshooting: Too wet? Add flour. Too dry? Add water gradually
- Rest and Roll
- Divide dough in half, wrap in plastic, refrigerate 30 minutes
- Roll each portion between parchment paper for easy handling
Phase 2: Building the Ultimate Filling (25 minutes)
- Cook Chicken to Perfection
- Season chicken thighs, sear in large pot until golden (6-8 minutes per side)
- Remove and shred when cool enough to handle
- Pro insight: Don’t fully cook—chicken finishes in the oven
- Create the Aromatic Base
- In same pot, sauté onions until translucent (5 minutes)
- Add carrots and celery, cook until slightly softened (4-5 minutes)
- Why this order matters: Builds layers of flavor from the fond
- Perfect the Roux
- Sprinkle flour over vegetables, stir constantly for 2 minutes
- Gradually whisk in chicken broth, preventing lumps
- Consistency check: Should coat the back of a spoon
- Finish the Filling
- Stir in cream, herbs, shredded chicken, and peas
- Season generously with salt and pepper
- Cool slightly before assembly
Phase 3: Assembly and Baking Mastery (45 minutes)
- Prevent Soggy Bottom Syndrome
- Roll bottom crust, place in 9-inch deep-dish pie pan
- Brush with beaten egg to create moisture barrier
- Game-changer tip: Pre-bake for 5 minutes at 425°F
- The Perfect Assembly
- Add cooled filling to prepared crust
- Top with second crust, seal edges with fork
- Cut 4-5 steam vents in decorative pattern
- The Golden Finish
- Brush top crust with egg wash for glossy finish
- Bake at 425°F for 15 minutes, reduce to 350°F for 30-35 minutes
- Done indicator: Crust is golden, filling bubbles through vents
Pot Pie Perfection: Pro Tips from a Home Cook
The Temperature Control Secret
“The difference between good and great pot pie lies in temperature management. Start high to set the crust, then reduce for gentle filling cooking.”
Essential Pro Techniques:
- Blind baking prevention: Use pie weights or dried beans for 5-minute pre-bake
- Steam control: Strategic venting prevents filling overflow while ensuring proper cooking
- Resting period: Let finished pie rest 10-15 minutes before serving for clean slices
Flavor Amplification Strategies
- Wine addition: 2 tablespoons white wine in the filling adds sophisticated depth
- Herb layering: Fresh herbs in filling + herb butter on crust = complex flavors
- Umami boost: 1 teaspoon soy sauce enhances savory notes without being detectable
Pot Pie Your Way: Endless Variations & Customizations
Crust Adventures
| Style | Description | Best For |
|---|---|---|
| Puff Pastry Top | Store-bought convenience | Quick weeknight dinners |
| Biscuit Crown | Drop biscuits instead of crust | Southern comfort style |
| Hash Brown Crust | Crispy potato bottom | Gluten-free option |
| Phyllo Layers | Light, crispy texture | Healthier alternative |
Filling Transformations
Protein Swaps:
- Turkey pot pie: Perfect for Thanksgiving leftovers
- Beef and mushroom: Rich, earthy winter comfort
- Seafood medley: Lobster, shrimp, and scallops for special occasions
Vegetable Variations:
- Harvest version: Sweet potatoes, butternut squash, kale
- Mediterranean twist: Artichokes, sun-dried tomatoes, olives
- Asian-inspired: Water chestnuts, snap peas, ginger
Dietary Adaptations
Gluten-Free Option: Substitute flour with 1:1 gluten-free baking blend Dairy-Free Version: Use coconut cream and dairy-free butter substitute Vegetarian Alternative: Replace chicken with extra-firm tofu or jackfruit
Make-Ahead, Freezing & Reheating Guide
Strategic Preparation Timeline
Up to 2 Days Ahead:
- Prepare crust dough, wrap tightly, refrigerate
- Cook filling completely, store separately
Freezing Instructions:
- Unbaked pies: Assemble completely, wrap in plastic then foil, freeze up to 3 months
- Baked pies: Cool completely, wrap thoroughly, freeze up to 2 months
Reheating for Best Results:
- From frozen (unbaked): Bake directly from freezer, add 15-20 minutes to cooking time
- From frozen (baked): Thaw overnight, reheat at 350°F for 25-30 minutes
Troubleshooting Common Issues
Soggy Crust Solutions
- Pre-bake bottom crust for 5 minutes before filling
- Cool filling before assembly to prevent steam
- Egg wash barrier on bottom crust prevents moisture penetration
Runny Filling Fixes
- Flour ratio: Increase to ½ cup for thicker consistency
- Cooking time: Simmer filling until it coats spoon before assembly
- Cornstarch slurry: Mix 2 tbsp cornstarch + 2 tbsp cold broth as emergency thickener
Bland Flavor Rescue
- Season in layers: Salt vegetables, season filling, season again before baking
- Acid balance: Few drops of lemon juice brighten heavy cream flavors
- Herb timing: Add hardy herbs early, delicate herbs at the end
Frequently Asked Questions
Q: Can I use rotisserie chicken for this recipe? A: Absolutely! Use 3-4 cups of shredded rotisserie chicken. Add it during the final 5 minutes of filling preparation to prevent overcooking.
Q: How do I prevent my pot pie from bubbling over? A: Place pie on a rimmed baking sheet to catch any overflow, and ensure your steam vents are adequate (at least 4-5 cuts in the top crust).
Q: What’s the best way to achieve a golden crust? A: Egg wash is crucial—beat 1 egg with 1 tablespoon of cream or milk. Apply evenly but avoid pooling around edges.
Q: Can I make individual pot pies instead? A: Yes! Use ramekins or muffin tins, reduce baking time to 20-25 minutes at 375°F, and adjust filling portions accordingly.
Your Pot Pie Journey Begins Now
This easy chicken pot pie recipe transforms a potentially complicated dish into an achievable masterpiece that will become your family’s most-requested comfort food. The combination of creamy chicken pot pie filling with perfectly flaky crust creates a harmony of textures and flavors that satisfies on every level.
Remember, cooking is about adaptation and personal preference. Use this guide as your foundation, then make it uniquely yours through the variations and techniques that speak to your taste. Whether you’re preparing this for a cozy family dinner or meal-prepping for busy weeks ahead, you now have every tool needed for pot pie perfection.
Nutritional Information (per serving): Approximately 485 calories, 28g fat, 35g carbohydrates, 25g protein
What’s your favorite pot pie variation? Share your creative adaptations and kitchen victories in the comments below—I love hearing how fellow home cooks make this recipe their own!
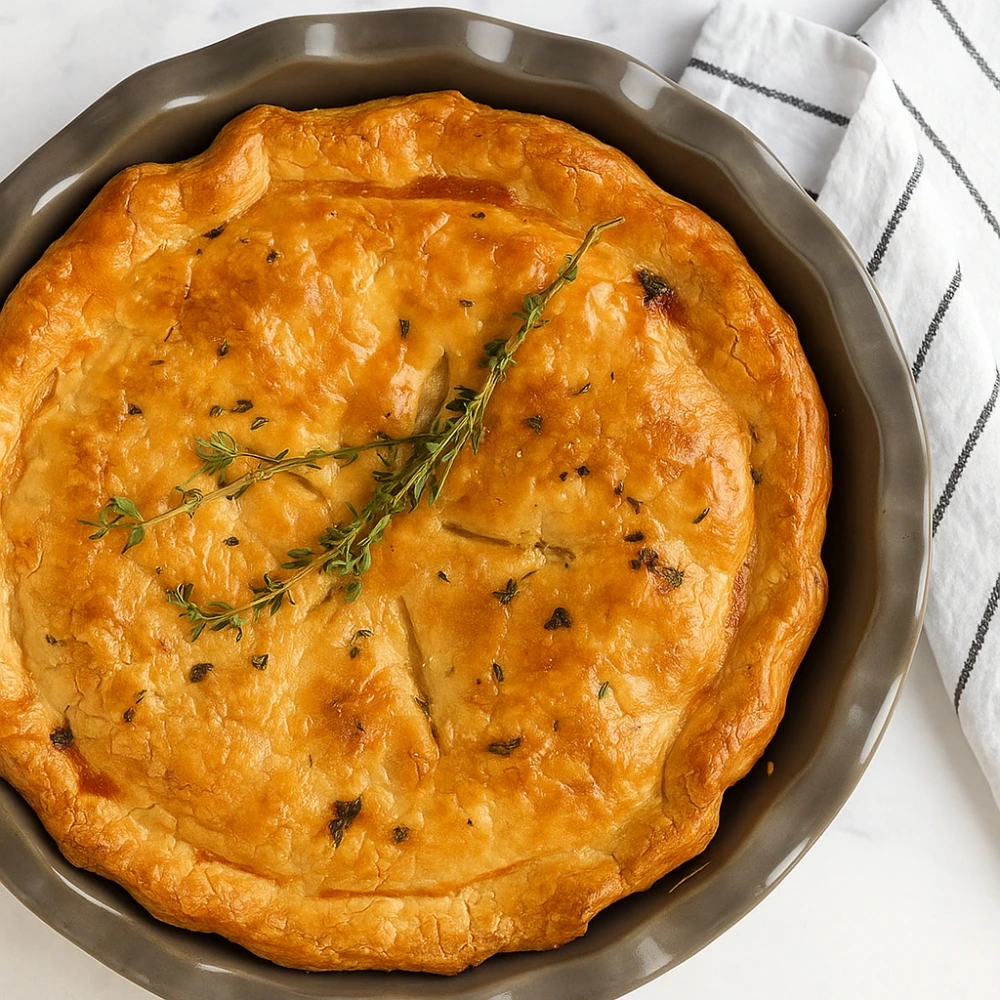
Chicken Pot Pie
Course: DinnerCuisine: AmericanServings
6
servingsPrep time
20
minutesCooking time
45
minutesCalories
520
kcalIngredients
Crust
2 pie crusts (store-bought or homemade), 9-inch (top & bottom)
Filling
3 cups (about 400 g) cooked chicken, diced or shredded
3 tbsp (42 g) unsalted butter
1 medium onion, finely diced (about 1 cup / 130 g)
2 ribs celery, diced (about 1 cup / 100 g)
2 medium carrots, diced (about 1 cup / 140 g)
2 cloves garlic, minced
1/3 cup (40 g) all-purpose flour
2 cups (480 ml) low-sodium chicken broth
3/4 cup (180 ml) milk or half-and-half
1 cup (140 g) frozen peas
1 tsp kosher salt (or to taste)
1/2 tsp black pepper
1/2 tsp dried thyme (or 1 tsp fresh, chopped)
1 tbsp fresh parsley, chopped (optional)
Egg Wash
1 egg beaten with 1 tsp water
Directions
- Preheat oven to 400°F (200°C). Place a rimmed baking sheet on the middle rack to preheat (catches drips and promotes crisp bottom crust).
- Make the filling base: In a large skillet or pot over medium heat, melt butter. Add onion, celery, and carrots; sauté until softened, 6–8 minutes. Stir in garlic for 30 seconds.
- Make the roux: Sprinkle flour over the vegetables; cook, stirring, 1–2 minutes until pasty and lightly blond.
- Add liquids: Slowly whisk in chicken broth, then milk/half-and-half. Simmer, stirring, until thick and silky, 3–5 minutes.
- Season & finish: Stir in chicken, peas, thyme, salt, pepper, and parsley. Taste and adjust seasoning. Take off heat and let cool 5–10 minutes (slightly cooler filling = crisper crust).
- Line the pie dish: Fit one crust into a 9-inch pie plate. Trim excess, leaving ~1/2 in (1 cm) overhang.
- Fill: Spoon the warm (not piping hot) filling into the crust; smooth the top.
- Top crust: Place second crust over filling. Trim, tuck, and crimp edges to seal. Cut 4–6 small slits on top for steam vents.
- Egg wash: Brush top with beaten egg. Optional: sprinkle a pinch of flaky salt.
- Bake: Set pie on the preheated baking sheet. Bake 35–45 minutes, until deep golden and the filling bubbles at the vents.
- Shield if needed: If edges brown too fast, cover rim with foil in the last 10–15 minutes.
- Rest: Cool at least 15 minutes before slicing so the filling sets. Serve warm.