The Best Fluffy Pancakes recipe you will fall in love with. Full of tips and tricks to help you make the best pancakes.
Dinner Rolls Recipe, Science, Troubleshooting & Beyond

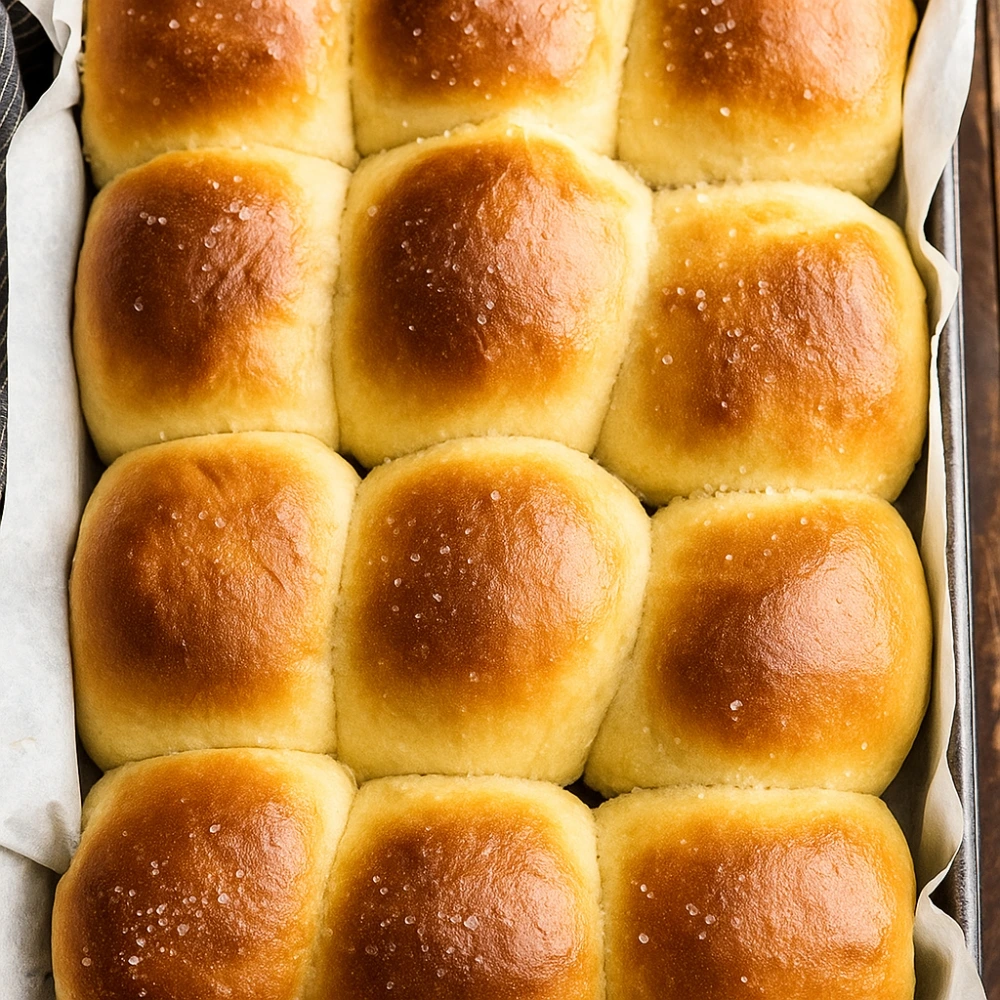
There’s something magical about pulling a tray of golden, pillowy dinner rolls from the oven—the soft, buttery aroma filling your kitchen, the satisfying give when you tear one open, and that cloud-like texture that makes every meal feel special. Yet, despite their simple ingredient list, dinner rolls can be surprisingly temperamental. Too dense, too dry, or stubbornly flat—we’ve all been there.
As a culinary professional who has spent years perfecting yeast breads and teaching home bakers the science behind exceptional baking, I’ve learned that the difference between mediocre and magnificent homemade dinner rolls isn’t luck—it’s understanding. This comprehensive guide will transform you from recipe-follower to confident baker, armed with the knowledge to troubleshoot any issue and customize rolls to your exact preferences.
Whether you’re preparing soft dinner rolls for Thanksgiving, seeking the perfect fluffy dinner rolls for Sunday supper, or simply want to master this essential baking skill, you’ll find everything you need right here.
Understanding Your Ingredients: The Science of Perfect Rolls
Before we dive into mixing bowls and kneading, let’s understand what each ingredient actually does. This knowledge is your secret weapon for troubleshooting and customization.
Flour: The Foundation
All-purpose flour (10-12% protein) creates tender, soft rolls perfect for most occasions. Bread flour (12-14% protein) develops more gluten, yielding chewier, more structured rolls with better rise—ideal if you prefer a heartier texture.
The Science: When flour meets liquid and agitation (kneading), two proteins—glutenin and gliadin—form gluten networks. These elastic strands trap carbon dioxide produced by yeast, creating that airy, risen structure we love.
Yeast: The Leavening Powerhouse
| Yeast Type | Activation Needed | Best For |
|---|---|---|
| Active Dry Yeast | Yes (bloom in warm liquid) | Traditional recipes, longer rise |
| Instant Yeast | No (mix directly with flour) | Quick recipes, faster rise |
| Fresh Yeast | Dissolve in liquid | Professional baking, short shelf life |
Pro Tip: Yeast thrives at 105-115°F. Too hot (above 120°F) kills it; too cold (below 95°F) slows fermentation dramatically.
Dairy: Richness and Tenderness
Whole milk creates the richest, most tender crumb thanks to fat content. Skim milk produces lighter rolls with less browning. Non-dairy alternatives (oat, soy) work well but may slightly alter flavor and texture.
The Science: Milk’s fat coats gluten strands, “shortening” them and creating a more tender bite. The lactose (milk sugar) also contributes to browning through Maillard reactions.
Sugar: More Than Sweetness
Sugar feeds yeast, accelerating fermentation. It also enhances browning and helps retain moisture, keeping your easy dinner rolls fresh longer. Use granulated sugar for neutral sweetness, or honey for subtle floral notes.
Butter: Flavor and Texture
Unsalted butter gives you control over salt levels and adds incomparable flavor. Oil creates softer rolls that stay fresh longer but lack butter’s richness.
The Science: Fat interferes with gluten development (in a good way), making rolls tender rather than tough. It also carries flavor compounds and contributes to the golden crust.
Salt: The Unsung Hero
Never skip salt—it controls yeast activity, strengthens gluten structure, and amplifies all other flavors. Use 1.5-2% of flour weight for optimal results.
The Perfect Dinner Rolls Recipe
Yield: 16 rolls | Prep Time: 20 minutes | Rise Time: 1.5-2 hours | Bake Time: 15-18 minutes
Ingredients
- 4 cups (480g) all-purpose flour, plus more for dusting
- 2¼ teaspoons (7g) instant yeast (or 1 packet active dry yeast)
- ¼ cup (50g) granulated sugar
- 1½ teaspoons (9g) salt
- 1 cup (240ml) whole milk, warmed to 105-115°F
- ¼ cup (60ml) water, warmed to 105-115°F
- 6 tablespoons (85g) unsalted butter, melted and slightly cooled
- 1 large egg, room temperature
- 2 tablespoons melted butter for brushing
Step-by-Step Instructions
Step 1: Activate and Combine
For Active Dry Yeast: Combine warm milk, water, and 1 teaspoon sugar in a bowl. Sprinkle yeast on top and let stand 5-10 minutes until foamy.
For Instant Yeast: Whisk yeast directly with flour in your mixing bowl.
Combine flour, yeast (if using instant), sugar, and salt in a stand mixer bowl with dough hook attached.
Why This Matters: Proper yeast activation ensures vigorous fermentation. The foamy layer confirms your yeast is alive and ready to work.
Step 2: Mix the Dough
Add warm milk mixture (or just warm milk/water if using instant yeast), melted butter, and egg to the flour mixture. Mix on low speed for 1 minute until combined, then increase to medium speed.
Common Mistake Alert: Don’t pour hot butter directly into yeast mixture—temperatures above 120°F will kill yeast. Let butter cool to lukewarm.
Step 3: Knead to Perfection
Knead on medium speed for 6-8 minutes, or by hand for 8-10 minutes. The dough should be smooth, elastic, and slightly tacky—not sticky or dry.
The Science Behind This Step: Kneading aligns gluten proteins into organized networks, creating elasticity that traps gas bubbles. Proper kneading is the difference between tough, dense rolls and soft, fluffy ones.
Touch Test: Press your finger gently into the dough. It should slowly spring back, leaving a slight indentation.
Step 4: First Rise (Bulk Fermentation)
Transfer dough to a lightly greased bowl, turning once to coat. Cover with plastic wrap or a damp towel. Let rise in a warm spot (75-80°F) for 60-90 minutes until doubled in size.
Pro Tip: Create a proofing box by turning your oven on for 1 minute, then turning it off. Place dough inside with the door slightly ajar.
Step 5: Shape with Precision
Punch down dough gently to release gas. Turn onto a lightly floured surface and divide into 16 equal pieces (about 60g each—use a kitchen scale for uniformity).
Shaping Technique:
- Cup your hand over one piece
- Apply gentle pressure while moving your hand in small circles
- The dough will tighten into a smooth ball
- Place seam-side down in a greased 9×13″ baking pan, spacing evenly
Why Uniform Size Matters: Equal portions ensure even baking—no burnt edges or doughy centers.
Step 6: Second Rise (Final Proof)
Cover shaped rolls loosely with plastic wrap. Let rise 30-45 minutes until puffy and nearly doubled. They should spring back slowly when gently pressed.
Temperature Check: Ideal proofing temperature is 75-80°F. Too warm (above 85°F) and rolls may over-proof and collapse; too cool and fermentation stalls.
Step 7: Bake to Golden Perfection
Preheat oven to 375°F (190°C). Brush rolls gently with melted butter (optional: sprinkle with flaky sea salt).
Bake 15-18 minutes until deep golden brown. Internal temperature should reach 190-200°F.
Getting That Golden Crust: Brush with butter before and immediately after baking. The post-bake butter adds shine and extra flavor.
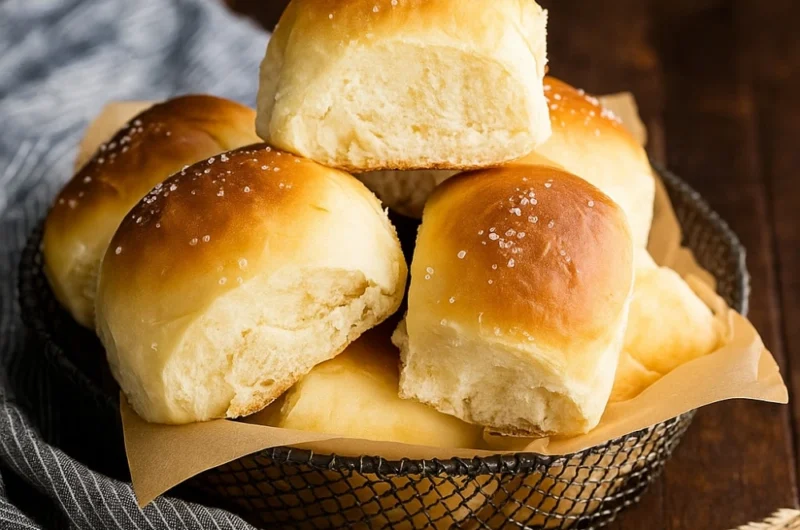
Step 8: Cool and Serve
Remove from oven and brush immediately with remaining melted butter. Let cool 5 minutes in the pan, then transfer to a wire rack.
Best served: Warm, torn (never cut!) to reveal that steamy, tender interior.
The Ultimate Troubleshooting Guide
Problem: Rolls Are Dense and Heavy
Causes & Solutions:
- Insufficient rising time → Ensure dough doubles in size during both rises
- Too much flour added → Measure by weight, not volume; dough should be slightly tacky
- Old or inactive yeast → Test yeast before using (should foam in warm water within 10 minutes)
- Inadequate kneading → Knead until dough passes the windowpane test (stretch a small piece thin enough to see light through)
- Oven temperature too low → Use an oven thermometer; low temps prevent proper oven spring
Problem: Rolls Didn’t Rise
Causes & Solutions:
- Dead yeast → Check expiration date; store yeast in the freezer for maximum freshness
- Liquid too hot or cold → Use a thermometer; ideal range is 105-115°F
- Too much salt added → Salt inhibits yeast; measure carefully and never let salt contact yeast directly
- Insufficient warmth during proofing → Find a draft-free spot; use proofing box technique
- Over-proofed dough → Dough that rises too long exhausts yeast food and collapses
Problem: Rolls Are Dry and Crumbly
Causes & Solutions:
- Too much flour → Spoon flour into measuring cups, level off; never pack or scoop directly
- Overbaking → Remove when just golden; they continue cooking from residual heat
- Insufficient fat → Don’t reduce butter; it’s essential for moisture
- Wrong flour type → Bread flour absorbs more liquid; add 2-3 tablespoons extra liquid if using
Problem: Rolls Are Tough and Chewy
Causes & Solutions:
- Over-kneading → More common with stand mixers; knead just until smooth and elastic
- Too much gluten development → Use all-purpose flour, not bread flour
- Not enough fat → Measure butter accurately; fat tenderizes
- Dough too cold → Bring ingredients to room temperature before mixing
Problem: Rolls Lack Flavor
Causes & Solutions:
- Insufficient salt → Don’t reduce salt below recipe amount
- Under-fermented → Longer, slower rises develop more complex flavors; try refrigerating overnight
- Low-quality butter → Use European-style butter for richer flavor
- Missing butter brushing → Brush before and after baking
Problem: Rolls Have Sour or Overly Yeasty Taste
Causes & Solutions:
- Over-proofed → Watch for doubling, not tripling; dough should spring back slowly when pressed
- Too much yeast → Follow recipe measurements exactly
- Fermentation too warm → Keep below 80°F; excessive heat accelerates fermentation unnaturally
Problem: Rolls Burnt Outside, Raw Inside
Causes & Solutions:
- Oven too hot → Verify with oven thermometer; reduce to 375°F
- Rolls too large → Divide into 16 pieces, not 12
- Pan too dark → Use light-colored metal pans; dark pans absorb more heat
- Rack position wrong → Bake in center of oven for even heat distribution
Problem: Dough Too Sticky or Too Stiff
Causes & Solutions:
- Too sticky: Add flour 1 tablespoon at a time during kneading; dough should be tacky, not sticky
- Too stiff: Add water 1 tablespoon at a time; proper dough should be soft and pliable
- Humidity factors: Flour absorbs moisture from air; adjust accordingly
Problem: Rolls Collapse After Baking
Causes & Solutions:
- Severe over-proofing → Watch carefully during final rise; bake when puffy, not tripled
- Oven opened too early → Don’t open oven door during first 12 minutes
- Under-baking → Structure needs full development; bake until deep golden
Problem: How to Get Golden-Brown Crust
Solutions:
- Brush with egg wash (1 egg + 1 tablespoon water) before baking
- Use whole milk, not skim (fat aids browning)
- Include sugar in recipe (essential for Maillard reactions)
- Bake at correct temperature (375°F)
- Brush with butter immediately after baking
Make-Ahead, Storage & Freezing Strategies
Make-Ahead Options
24 Hours Ahead:
- Prepare dough through first rise
- Punch down and refrigerate in greased, covered bowl
- Next day: Bring to room temperature (30-45 minutes), shape, proof, and bake
48-72 Hours Ahead (Cold Fermentation):
- Complete mixing and kneading
- Immediately refrigerate (skip first rise)
- When ready: Remove, let warm 30 minutes, shape, proof 45-60 minutes, bake
- Bonus: Extended fermentation develops superior flavor complexity
Shaped and Ready:
- Shape rolls and place in baking pan
- Cover tightly with plastic wrap
- Refrigerate up to 18 hours
- Remove 45-60 minutes before baking to proof
Freezing Instructions
Freezing Unbaked Dough:
- Shape rolls and place on parchment-lined baking sheet
- Freeze until solid (2-3 hours)
- Transfer to freezer bag
- Storage: Up to 3 months
- To Bake: Place frozen rolls in greased pan, cover, thaw and rise 3-5 hours, then bake
Freezing Baked Rolls:
- Cool completely
- Wrap tightly in aluminum foil, then place in freezer bag
- Storage: Up to 3 months
- To Reheat: Thaw at room temperature, wrap in foil, warm at 350°F for 10-12 minutes
Storage Best Practices
Room Temperature: Store in airtight container or sealed plastic bag for 2-3 days. Add a slice of bread to container to maintain moisture.
Refrigeration: Not recommended—refrigeration actually accelerates staling.
Reheating Methods
For Fresh Rolls: Wrap in foil, heat at 350°F for 5-7 minutes.
For Frozen Rolls: Thaw completely, then warm using fresh roll method.
Microwave Option: Place roll on damp paper towel, microwave 10-15 seconds (makes them soft but not crispy).
Delicious Variations & Customizations
Garlic Herb Butter Rolls
Add to melted butter for brushing: 3 minced garlic cloves, 2 tablespoons fresh parsley, 1 teaspoon dried Italian seasoning. Brush generously before and after baking.
Honey Whole Wheat Rolls
Replace half the all-purpose flour with whole wheat flour. Substitute honey for sugar. Add 2-3 tablespoons extra liquid (whole wheat absorbs more moisture).
Potato Dinner Rolls
Add ½ cup mashed potatoes (cooled) with wet ingredients. Reduce flour by ¼ cup. Result: Incredibly soft, long-lasting rolls.
Brioche-Style Rolls
Increase butter to ½ cup and add 1 additional egg. Reduce milk to ¾ cup. Creates rich, slightly sweet, tender rolls.
Sweet Cinnamon Rolls
After first rise, roll dough into rectangle, spread with butter, sprinkle with cinnamon-sugar, roll up, and slice. Proof and bake as directed.
Creative Shaping Techniques
Knots: Roll each piece into 8-inch rope, tie in knot, tuck ends under
Cloverleaf: Divide each piece into 3 small balls, place together in muffin tin
Crescent Rolls: Roll dough into 12-inch circle, cut into 12 wedges, roll from wide end to point
Pull-Apart: Arrange rolls touching each other in round cake pan for connected rolls
Essential Equipment for Dinner Roll Success
Must-Have Tools
Stand Mixer with Dough Hook ($200-400): Not essential but dramatically reduces effort and ensures consistent kneading.
Kitchen Scale ($15-30): Accuracy is crucial for consistent results. Measure flour by weight (grams) not volume (cups).
Instant-Read Thermometer ($15-35): Takes guesswork out of liquid temperature and doneness testing.
Large Mixing Bowl ($10-20): Glass or stainless steel for proofing dough.
Nice-to-Have Tools
Proofing Box ($50-150): Maintains ideal temperature and humidity, though DIY oven method works well.
Bench Scraper ($8-15): Makes portioning and handling dough easier.
Baking Stone ($30-60): Provides even bottom heat, though not necessary for pan rolls.
Comprehensive FAQ
How long do dinner rolls last? Properly stored in an airtight container at room temperature, dinner rolls stay fresh for 2-3 days. Freeze for longer storage up to 3 months.
Can I use bread flour instead of all-purpose? Yes, but rolls will be chewier. Add 2-3 tablespoons extra liquid as bread flour absorbs more moisture.
What is the ideal temperature for proofing dough? 75-80°F is optimal. Too warm (above 85°F) causes over-proofing; too cool (below 70°F) significantly slows yeast activity.
How do I know if my yeast is active? Sprinkle yeast over warm water with pinch of sugar. Within 5-10 minutes, mixture should foam and bubble. No foam = dead yeast.
What can I do if my dough isn’t rising? Move to warmer location, cover with warm damp towel, or use proofing box technique. If yeast is dead, you must start over.
Why are my rolls tough? Common causes: over-kneading, too much flour, insufficient fat, or dough too cold. See troubleshooting section for detailed solutions.
Can I bake dinner rolls in a loaf pan? Yes! Arrange 8-10 rolls in a greased loaf pan for pull-apart style. Baking time remains the same.
Should I use salted or unsalted butter? Always unsalted for baking—it gives you complete control over salt levels.
Can I make dinner rolls without a stand mixer? Absolutely! Mix in bowl with wooden spoon, then knead by hand on counter for 8-10 minutes.
What’s the best way to reheat dinner rolls? Wrap in aluminum foil and heat at 350°F for 5-7 minutes. This maintains moisture while warming through.
Can I use milk alternatives? Yes. Oat, soy, or almond milk work well. Choose unsweetened varieties for best control over sweetness.
Why didn’t my rolls brown? Possible causes: oven temperature too low, insufficient sugar in recipe, or using skim milk instead of whole milk.
How can I make rolls shinier? Brush with egg wash before baking (1 beaten egg + 1 tablespoon water) for glossy, bakery-style finish.
Can I add herbs or cheese to the dough? Yes! Add ½ cup shredded cheese or 2 tablespoons fresh herbs after kneading is complete. Fold in gently.
What causes a yeasty smell? Over-proofing or using too much yeast. Follow timing carefully and measure yeast precisely.
Is it better to shape rolls by weight or by eye? Always by weight for uniform size and even baking. Each roll should be approximately 60g.
Can I use this dough for hamburger buns? Yes! Divide into 8-10 larger portions, flatten slightly, and bake 18-20 minutes.
Why are my rolls flat? Under-proofing, weak yeast, or insufficient gluten development. Ensure proper rising time and thorough kneading.
Should rolls touch in the pan? For soft sides, arrange rolls touching. For crusty all around, space 2 inches apart.
Can I make gluten-free dinner rolls with this recipe? No, this recipe relies on gluten structure. Search for dedicated gluten-free roll recipes using xanthan gum or psyllium husk.
Your Path to Dinner Roll Mastery
You now possess the complete knowledge to bake exceptional dinner rolls every single time. You understand not just the “how” but the “why”—the science behind each ingredient, the technique behind each step, and the solutions to every potential problem.
Remember: Great baking is equal parts science and art. Your first batch might not be perfect, but armed with this guide’s troubleshooting wisdom, you’ll quickly develop the intuition that separates good bakers from great ones.
Ready to begin? Gather your ingredients, preheat that oven, and experience the incomparable satisfaction of serving warm, homemade rolls at your table. Your kitchen is about to smell absolutely incredible.
Share your results! Leave a comment below with your experience, variations, or questions. Tag your golden, fluffy creations on social media—we love seeing your success stories.
Want more baking mastery? Subscribe for in-depth guides on artisan breads, advanced techniques, and seasonal specialties delivered straight to your inbox.
Happy baking, and may your rolls always rise to perfection!
Dinner Rolls Recipe, Science, Troubleshooting & Beyond
Course: Breakfast, DessertsCuisine: AmericanServings
4
servingsPrep time
20
minutesCooking time
18
minutesCalories
160
kcalIngredients
1 cup (240 ml) warm milk, ~43°C
2¼ tsp (7 g) active dry yeast (or 2 tsp/6 g instant yeast)
¼ cup (50 g) granulated sugar
1 large egg (50 g, room temp)
¼ cup (57 g) unsalted butter, melted + more for brushing
1 tsp (6 g) fine salt
3½–4 cups (440–500 g) all-purpose flour
Directions
- Proof yeast (if using active dry): In a bowl, whisk warm milk and sugar; sprinkle yeast on top and let stand 5–10 minutes until foamy. (Skip proofing if using instant yeast—mix directly with flour.)
- Make dough: Whisk in egg, melted butter, and salt. Add 3½ cups (440 g) flour; mix until a shaggy dough forms, adding up to ½ cup more as needed.
- Knead: On a lightly floured surface (or mixer, medium-low), knead 8–10 minutes until smooth, elastic, and slightly tacky.
- First rise: Place in a greased bowl, cover, and let rise in a warm spot until doubled, ~60–75 minutes.
- Shape: Punch down, divide into 12 equal pieces (~70–80 g each). Shape each into a tight ball by tucking edges under.
- Second rise: Arrange in a greased 9×13-in (23×33 cm) pan, cover, and rise until puffy and touching, ~30–40 minutes.
- Bake: Preheat oven to 375°F (190°C). Bake 16–18 minutes until tops are golden and centers reach ~190°F (88°C).
- Finish: Brush hot rolls with melted butter and cool 10 minutes before serving.