The Best Fluffy Pancakes recipe you will fall in love with. Full of tips and tricks to help you make the best pancakes.
The Last Turkey Recipe You’ll Ever Need: Why Spatchcocking Beats Roasting Every Time
Let’s be honest: the traditional Thanksgiving turkey is a gamble. You’ve spent hours basting, rotating, and praying that your bird doesn’t emerge from the oven looking like a tanned leather handbag. Stop stress-roasting your bird for 5 hours. The “easy” method often leads to dry white meat and soggy skin. By flattening the bird (spatchcocking), we cut cooking time in half and guarantee juicy meat. Here is the data proving why.
After years of testing turkey recipes and analyzing cooking science, I’m convinced that the conventional roasting method sets you up for failure. The problem is simple: turkey breasts cook faster than dark meat. In a whole bird sitting upright, the breast is exposed to direct heat while the legs hide in the cavity’s shadow. The result? Overcooked, stringy breast meat by the time your thighs reach a safe temperature.
But there’s a better way—one that combines centuries-old butchery techniques with modern food science to deliver the juiciest, crispiest turkey you’ve ever tasted.
The Science Behind Spatchcocking: Why It Works
Spatchcocking (also called butterflying) involves removing the turkey’s backbone and flattening the bird so it cooks in a single, even plane. This simple technique solves the fundamental problem of turkey anatomy.
When you flatten a turkey, you accomplish three critical things:
Even heat distribution: All parts of the bird are equidistant from the heat source, meaning your breast and thighs finish cooking at the same time. No more sacrificing one cut for another.
Maximum surface area exposure: More skin touches the hot pan, creating that coveted golden-brown, crackling crust that makes people fight over corner pieces.
Improved airflow: Heat circulates around the entire bird instead of getting trapped in the cavity, dramatically reducing cooking time and producing more consistent results.
Let’s look at the numbers:
| Feature | Traditional Roast (The Old Way) | Our Spatchcock Method (The New Way) |
|---|---|---|
| Cook Time | 4-5 Hours | 80-90 Minutes |
| Skin Texture | Often Soft/Steamy | Glass-Shattering Crisp |
| Juiciness | High Risk of Dryness | Even Cooking / Juicy |
| Difficulty | Medium (Basting required) | Easy (No Basting) |
The data speaks for itself. Spatchcocking reduces cooking time by roughly 60%, which means less moisture loss and a more forgiving cooking window. You’ll spend less time hovering over your oven and more time enjoying your guests.
Why Dry Brining Is Better Than Wet Brining (No Mess!)
Before we even talk about cooking methods, we need to address seasoning. Forget the massive bucket of salted water taking up your entire refrigerator. Dry brining is the secret weapon of professional chefs, and it’s remarkably simple.
A dry brine is exactly what it sounds like: rubbing salt directly onto the turkey skin and letting it rest uncovered in your refrigerator for 24-48 hours. Here’s what happens during that time:
The salt draws moisture from the skin initially, then that salty liquid gets reabsorbed deep into the meat, seasoning it from within. Meanwhile, the exposed skin dries out in your refrigerator’s low-humidity environment, setting you up for maximum crispiness when it hits the oven.
The advantages over wet brining:
- No messy buckets or coolers needed
- Crispier skin (wet brining adds moisture to skin, making it harder to crisp)
- More concentrated turkey flavor (wet brining dilutes natural juices)
- Less refrigerator space required
- No risk of cross-contamination from sloshing brine
For a 12-14 pound turkey, use about 1 tablespoon of kosher salt per 4-5 pounds of bird. Pat the turkey completely dry with paper towels, then massage the salt into every surface, including under the skin where possible.
The Secret Ingredient: Baking Powder for Crispy Skin
Here’s where we separate amateur cooks from the professionals. We add 1 teaspoon of baking powder to our dry brine mixture. This changes the pH level of the skin, breaking down proteins to create the crispiest skin imaginable.
Baking powder is alkaline, which accelerates the Maillard reaction—the chemical process responsible for browning and developing complex flavors. It also helps break down the protein structure in the skin, allowing moisture to escape more readily during cooking. The result is skin that shatters like pork crackling rather than tearing like wet leather.
Your dry brine mixture for a 12-14 lb turkey:
- 3 tablespoons kosher salt
- 1 teaspoon baking powder
- 1 teaspoon black pepper
- 1 teaspoon garlic powder (optional)
Apply this mixture 24-48 hours before cooking and leave your turkey uncovered in the refrigerator. The longer it sits, the better your results.
How to Spatchcock a Turkey (Step-by-Step)
Don’t let the term intimidate you. Spatchcocking sounds fancy, but it’s actually easier than trussing a traditional turkey. You’ll need a pair of sharp kitchen shears or poultry shears.
The process:
- Remove the giblets and neck from the cavity, then pat the turkey completely dry inside and out.
- Place the turkey breast-side down on your cutting board. Locate the backbone running along the center of the back.
- Using your shears, cut along one side of the backbone from tail to neck. You’re cutting through ribs, so apply firm, steady pressure.
- Repeat on the other side of the backbone to remove it completely. Save it for making stock.
- Flip the turkey over and press down firmly on the breastbone with both hands until you hear a crack and the bird flattens. Your turkey should now lie relatively flat.
- Tuck the wing tips behind the breasts to prevent burning.
The entire process takes less than five minutes once you’ve done it once. If you’re nervous, search for “how to spatchcock a turkey video” for visual guidance—seeing it once makes it foolproof.
Exact Temperature Guide: Pull at 155°F, Not 165°F
This might be the most controversial advice in this post, but hear me out. The USDA recommends cooking turkey to 165°F for food safety, but that temperature accounts for zero carryover cooking.
Carryover cooking is the phenomenon where meat continues to rise in temperature after you remove it from the heat source due to residual thermal energy. For a large bird like a turkey, this can mean a 5-10 degree temperature increase during resting.
My recommendation: Pull your spatchcocked turkey when the thickest part of the breast reaches 155°F and the thighs reach 165°F. After a 20-minute rest, your breast will coast up to a safe 160-165°F while remaining incredibly juicy.
Insert your thermometer into the thickest part of the breast without hitting bone. For thighs, aim for the area between the leg and body.
The Complete Spatchcock Turkey Recipe
Ingredients:
- 1 whole turkey (12-14 lbs), spatchcocked
- 3 tablespoons kosher salt
- 1 teaspoon baking powder
- 1 teaspoon black pepper
- 2 tablespoons olive oil or melted butter
- Fresh herbs (thyme, rosemary, sage) – optional
Instructions:
- Dry brine your spatchcocked turkey 24-48 hours before cooking using the mixture above.
- Remove turkey from refrigerator 1 hour before cooking to bring to room temperature.
- Preheat oven to 450°F with a rack in the lower-middle position.
- Brush the turkey skin lightly with oil or butter. This helps with browning.
- Place turkey skin-side up on a large rimmed baking sheet or roasting pan.
- Roast for 80-90 minutes, rotating the pan halfway through for even cooking.
- Check temperature at 70 minutes. Remove when breast reaches 155°F and thighs reach 165°F.
- Rest for 20 minutes before carving. The temperature will continue to rise.
- Carve and serve immediately.
Why This Method Guarantees Success
Traditional turkey roasting is unnecessarily complicated. Between basting every 30 minutes, rotating pans, tenting with foil, and calculating cooking times based on stuffing, you’re setting yourself up for stress.
The spatchcock method eliminates variables. No basting means no opening the oven door and losing heat. No stuffing means predictable cooking times. No trussing means better heat circulation.
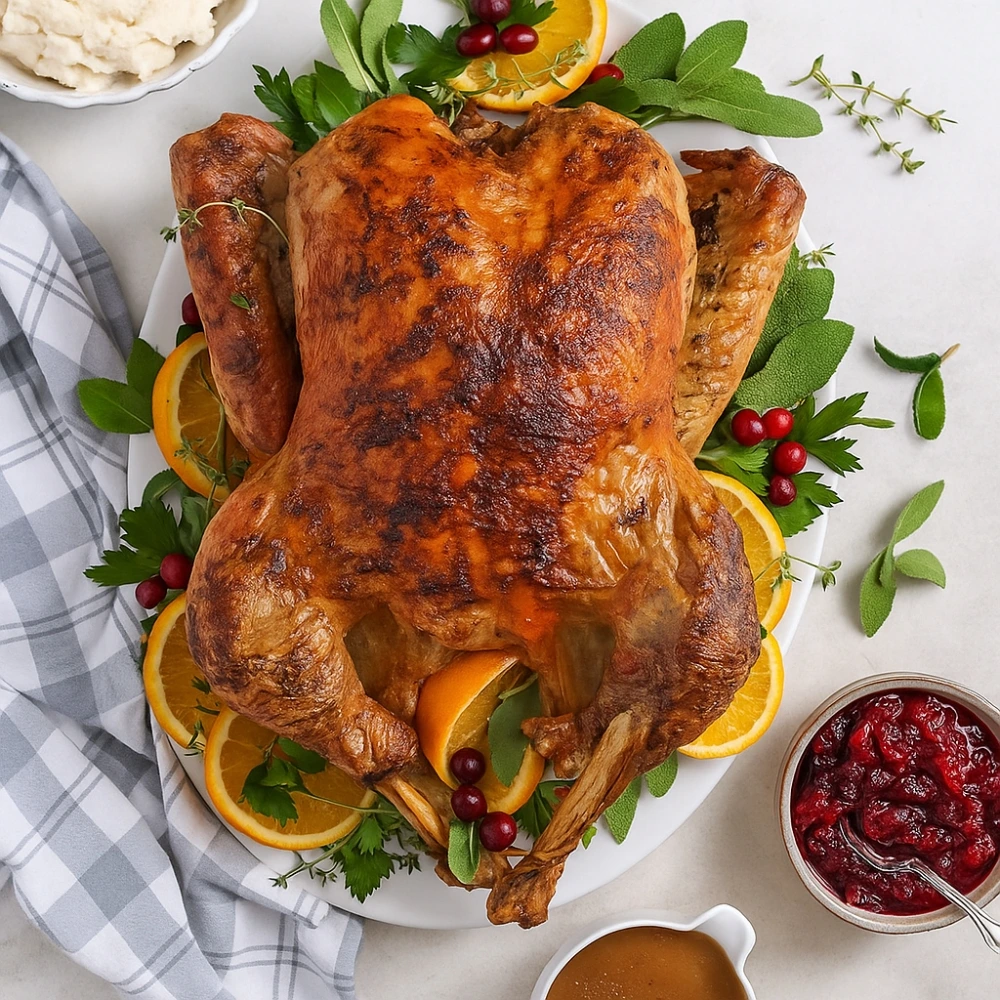
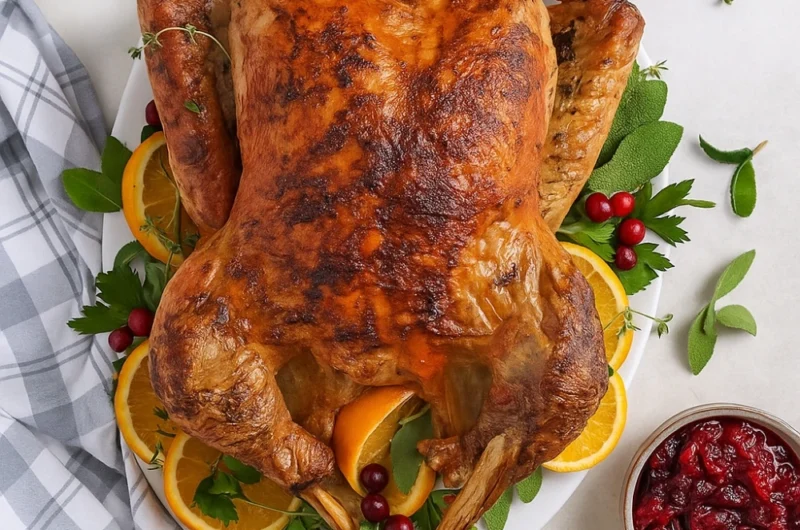
You’ll finish cooking in half the time with twice the confidence. Your turkey will emerge from the oven with mahogany skin, tender meat, and none of the anxiety that traditionally accompanies Thanksgiving dinner.
The bottom line: Stop following outdated recipes designed for a different era of cooking. Embrace the science, trust the process, and prepare for the best turkey of your life. Once you try spatchcocking, you’ll never go back to the old way.
Your guests won’t just be impressed—they’ll be asking for your recipe. And now you’ll have the data to back up why your method is simply better.
The Last Turkey Recipe You’ll Ever Need: Why Spatchcocking Beats Roasting Every Time
Course: BlogCuisine: AmericanServings
12
servingsPrep time
30
minutesCooking time
3
hours15
minutesCalories
480
kcalIngredients
1 whole turkey (12–14 lb / 5.5–6.5 kg), thawed if frozen
2 Tbsp kosher salt
1 tsp baking powder (optional, helps crisp the skin)
1 tsp freshly ground black pepper
6 Tbsp unsalted butter, melted (or ¼ cup olive oil)
1 large onion, quartered
2 carrots, chunked
2 celery stalks, chunked
1 head garlic, halved horizontally
1 lemon, halved
6–8 sprigs fresh herbs (thyme, rosemary, sage)
2 cups (480 ml) low-sodium chicken or turkey stock, divided
Directions
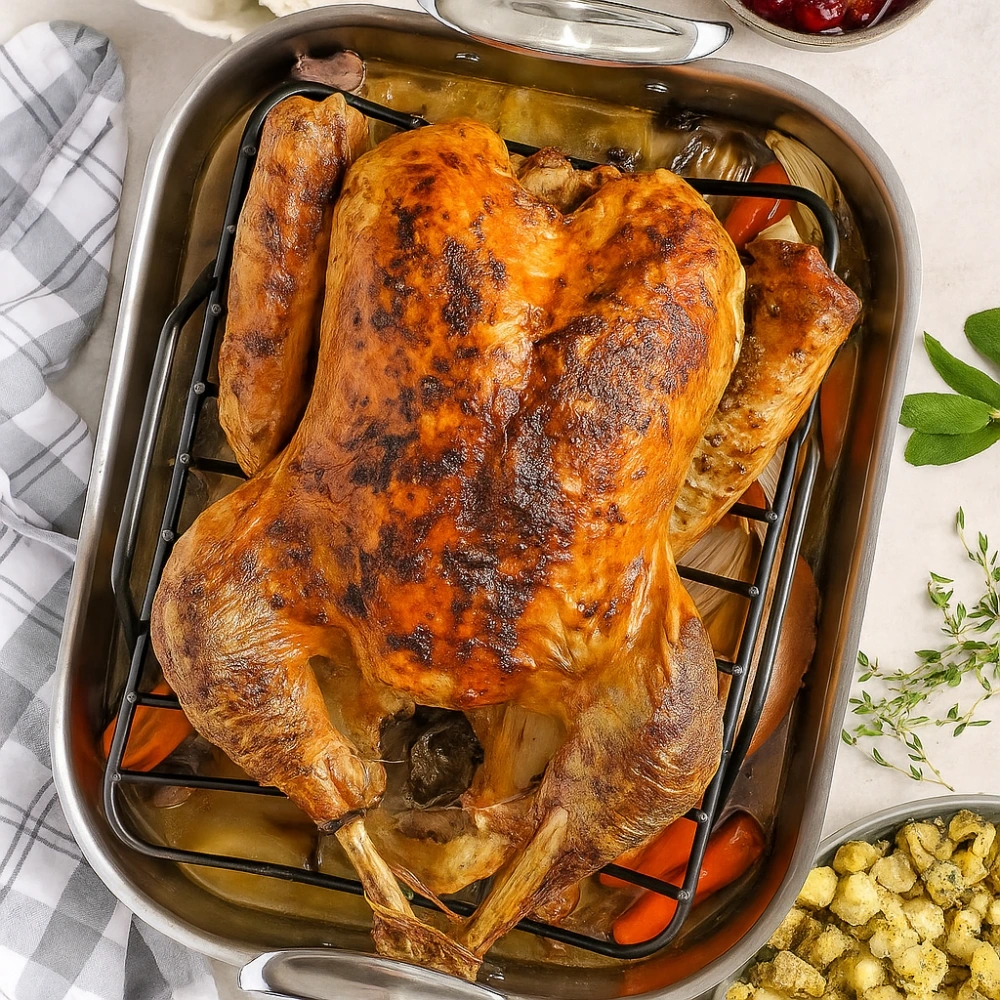
- Prep oven & pan: Preheat to 325°F (165°C). Set a rack in a large roasting pan. Scatter onion, carrots, celery, and garlic in the pan with 1 cup stock.
- Dry & season: Pat the turkey very dry (outside and cavity). Mix salt, baking powder (optional), and pepper. Rub all over the skin; place lemon halves and herb sprigs in the cavity.
- Tuck & tie: Tuck the wing tips behind the back. Tie legs loosely with kitchen twine. Brush the turkey generously with melted butter (or oil).
- Roast (first stage): Place turkey breast-side up on the rack. Roast for about 2 hours, rotating the pan once. If the pan looks dry, add ½ cup stock.
- Butter & shield: Brush with more butter. If skin is browning too fast, tent loosely with foil.
- Roast (to temp): Continue roasting 45–75 minutes more, until an instant-read thermometer in the thickest part of the thigh registers 165°F (74°C) and the breast reads 160°F (71°C) (it will rise slightly while resting).
- Rest: Transfer turkey to a board, tent with foil, and rest 30 minutes before carving.
- Optional gravy: Skim fat from pan drippings. Set pan over medium heat, add remaining stock to deglaze, simmer, and thicken to taste (slurry or reduction). Season and strain if desired.
- Carve & serve: Remove legs and thighs, then breasts; slice and serve with pan gravy.