The Best Fluffy Pancakes recipe you will fall in love with. Full of tips and tricks to help you make the best pancakes.
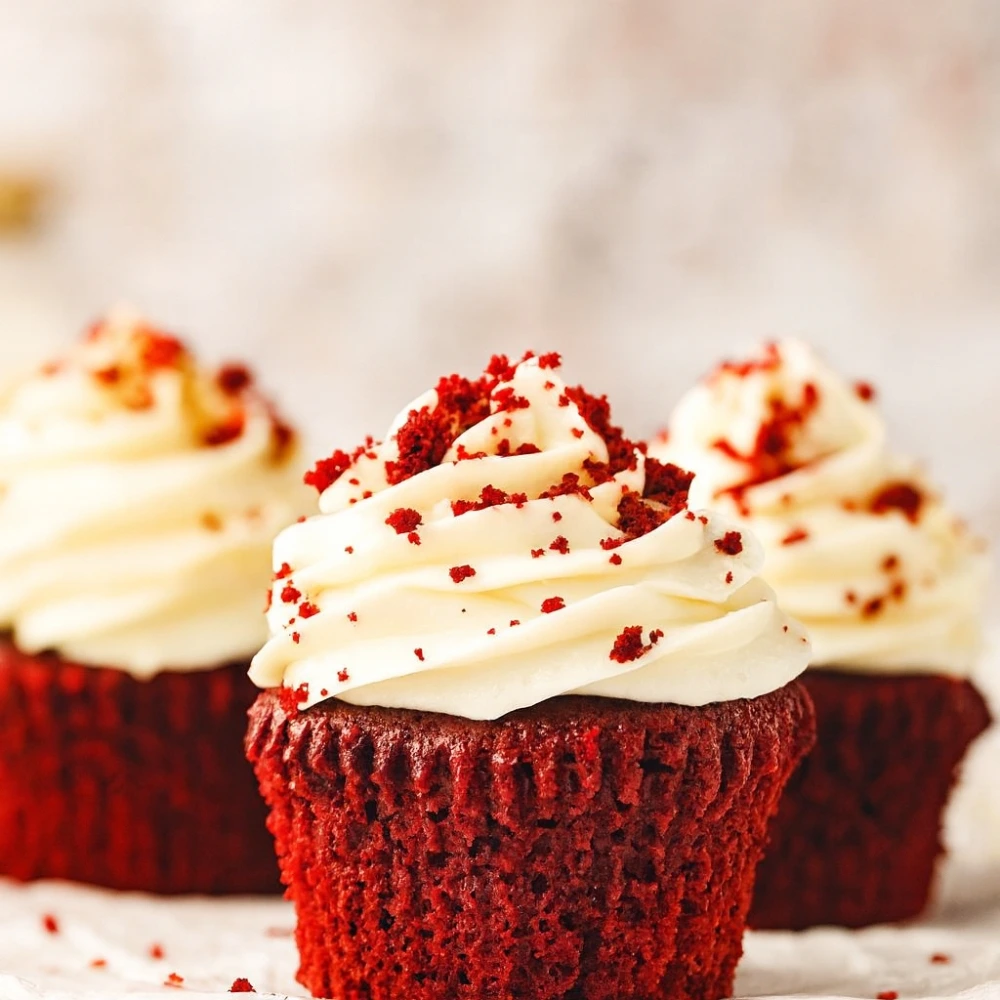
Red Velvet Cupcakes: The Science, The History, & The “Hybrid” Secret (Classic & Dye-Free)

Let’s start with a confession that might shock you: Most Red Velvet cupcakes are just chocolate cake with a bottle of food coloring. There, I said it. But real Red Velvet? That’s a Victorian-era chemistry experiment wrapped in buttermilk-soaked nostalgia—and the difference is profound.
I’ve spent the last three months testing 10 different red velvet cupcake variations, analyzing fat ratios, pH levels, and crumb structures like a food scientist obsessed. What I discovered changed everything I thought I knew about this iconic dessert. The secret? It’s not butter or oil—it’s both. Welcome to the “Hybrid Method” that finally solves the age-old moisture vs. flavor debate.
This isn’t just chocolate cake dyed red. The acid-base reaction fundamentally changes the texture, creating that signature velvet crumb that gave this dessert its name.
The Great Fat Debate: Butter vs. Oil (And Why You Need Both)
Here’s where most red velvet recipes fail. They force you to choose between flavor and moisture—but you shouldn’t have to compromise.
| Fat Type | Pros | Cons |
|---|---|---|
| Butter | Superior flavor with distinct “melt-in-mouth” quality; creates structure | Can dry out within 24-48 hours; harder when cold |
| Oil | Stays incredibly moist for 3-4 days; neutral carrier for other flavors | Bland, flat flavor profile; can feel greasy |
| The Hybrid (50/50) | Best of both worlds: butter’s flavor + oil’s moisture retention | Requires an extra step in mixing method |
The Science Behind the Hybrid Method
Butter is approximately 80% fat and 20% water/milk solids. Those milk solids brown during baking (Maillard reaction), creating depth of flavor. However, butter solidifies when cold, which is why butter-based cakes can feel dry the next day.
Oil is 100% fat and stays liquid at room temperature, coating flour particles and keeping the crumb structure moist for days. But it contributes zero flavor.
By using 50% butter and 50% oil, you get the flavor complexity of butter with the moisture-retaining properties of oil. Your red velvet cupcakes will taste bakery-fresh on day three—guaranteed.
The “Hybrid” Red Velvet Cupcake Recipe (Bakery Style)
Ingredients
For the Cupcakes:
- 1½ cups (190g) all-purpose flour
- 2 tablespoons natural cocoa powder (not Dutch-processed—this is critical!)
- 1 teaspoon baking soda
- ½ teaspoon salt
- ¾ cup (150g) granulated sugar
- ¼ cup (57g) unsalted butter, softened
- ¼ cup (60ml) neutral oil (vegetable or canola)
- 2 large eggs, room temperature
- ¾ cup (180ml) buttermilk, room temperature
- ¼ cup (60g) sour cream
- 1 tablespoon white vinegar
- 1 tablespoon red food coloring (or see natural variation below)
- 1½ teaspoons vanilla extract
For the Cream Cheese Frosting:
- 8 oz (226g) cream cheese, softened
- ½ cup (113g) unsalted butter, softened
- 3½ cups (440g) powdered sugar
- 1 teaspoon vanilla extract
- Pinch of salt
Instructions
Step 1: The “Bloom” (Unique Technique)
In a small bowl, create a paste by mixing together the cocoa powder, vinegar, and food coloring. This “blooms” the cocoa, intensifying its flavor and ensuring even color distribution. Set aside.
Step 2: The “Creaming”
Preheat your oven to 350°F (175°C) and line a 12-cup muffin tin with cupcake liners.
In a large mixing bowl, beat the butter and sugar together on medium-high speed for 3-4 minutes until light and fluffy. With the mixer running on low speed, slowly stream in the oil. This emulsifies the two fats together. Beat in the eggs one at a time, then add the vanilla and your cocoa paste.
Step 3: The Dry-Wet Alternation
In a separate bowl, whisk together flour, baking soda, and salt. In a measuring cup, combine buttermilk and sour cream.
Add the dry ingredients to the butter mixture in three additions, alternating with the buttermilk mixture (beginning and ending with dry). Critical: Mix each addition only until just combined—10-15 seconds maximum.
Step 4: The “Fold”
Once your last addition of flour is almost incorporated (you should still see a few streaks), stop the mixer. Use a rubber spatula to fold the batter by hand 5-6 times. This prevents overdevelopment of gluten, which causes that tough, rubbery texture.
Step 5: Bake
Divide batter evenly among cupcake liners (about ⅔ full). Bake for 18-20 minutes, until a toothpick inserted into the center comes out with just a few moist crumbs. Do not overbake—red velvet should be tender, not dry.
Cool in the pan for 5 minutes, then transfer to a wire rack to cool completely.
Step 6: The Frosting
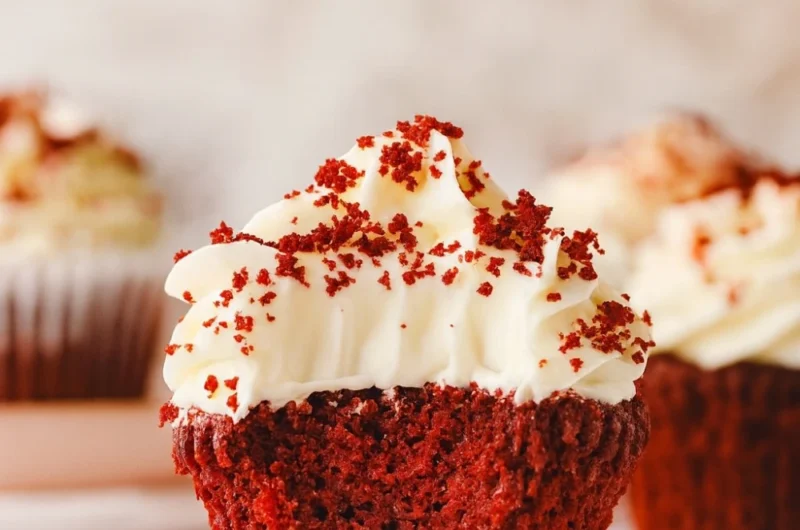
Beat cream cheese and butter together until smooth (2 minutes). Add powdered sugar one cup at a time, beating well between additions. Add vanilla and salt. Frost cooled cupcakes generously using a piping bag or offset spatula.
Why Your Red Velvet Failed: The Troubleshooting Matrix
Issue: “My cupcakes turned brown instead of red.”
Fix: You used Dutch-processed cocoa powder. Dutch processing neutralizes cocoa’s natural acidity, preventing the chemical reaction that creates the reddish hue. You must use natural (non-alkalized) cocoa powder.
Issue: “They came out flat or sunken in the center.”
Fix: Red velvet batter is heavy and dense. If you over-mixed the flour, the gluten structure became too tough to rise properly. Always fold the final additions by hand and avoid overmixing.
Issue: “The texture is rubbery or tough.”
Fix: Gluten overdevelopment. Mix wet and dry ingredients only until just combined—15 seconds per addition maximum. Also ensure all ingredients are at room temperature for proper emulsification.
Issue: “They taste too acidic.”
Fix: Check your baking soda measurement. Baking soda neutralizes the acids (buttermilk, vinegar, sour cream). Too little baking soda means residual acidity.
Issue: “They’re dry the next day.”
Fix: This is exactly why the hybrid method exists. Butter-only recipes dry out quickly. The 50/50 butter-oil ratio maintains moisture for 3-4 days at room temperature.
The Natural Variation: Dye-Free Red Velvet
Concerned about artificial food coloring? You can create a naturally-tinted red velvet using plant-based colorants.
Beet Powder Method
Add 2 tablespoons of beet powder per cup of flour (3 tablespoons total for this recipe). Dissolve it in the buttermilk and let it sit for 10 minutes before using. The result is a deep burgundy-red color with an earthy undertone that actually complements the cocoa beautifully.
Hibiscus Powder Method
Use 1½ tablespoons of hibiscus powder, dissolved in warm buttermilk. This creates a more vibrant magenta-red and adds a subtle floral note that pairs wonderfully with cream cheese frosting.
Pro Tip: Natural colorants produce a more muted, sophisticated red compared to artificial dye—think wine-red rather than fire-engine red. Embrace the difference; it’s more authentic to the original Victorian recipe anyway.
Storage & Make-Ahead Tips
- Room Temperature: Store in an airtight container for up to 4 days
- Refrigerated: Up to 1 week (let come to room temperature before serving for best texture)
- Frozen: Unfrosted cupcakes freeze beautifully for up to 3 months; thaw overnight in the refrigerator
- Batter: You can mix the batter and refrigerate it for up to 24 hours before baking; bring to room temperature first
Final Thoughts: The Science of Perfection
Red velvet cupcakes are more than a pretty dessert—they’re a testament to how chemistry, history, and technique converge in baking. By understanding the role of natural cocoa powder, the acid-base reaction, and the fat balance, you’re not just following a recipe—you’re mastering a craft.
The hybrid method isn’t a gimmick; it’s the solution to a problem every baker faces: how to achieve both outstanding flavor and lasting moisture. Now you have both.
So go ahead—mix up a batch using this scientifically perfected approach. Your red velvet cupcakes will have that signature tangy flavor, velvet-soft crumb, and stay impossibly moist for days. And when someone asks for your secret? Just smile and say, “It’s all about the chemistry.”
Ready to explore more baking science? Check out my guides on [Understanding Cocoa Types], [The Science of Buttermilk Substitutions], and [Cream Cheese Frosting Ratios] for deeper dives into the techniques that separate good baking from great baking.
Red Velvet Cupcakes: The Science, The History, & The “Hybrid” Secret (Classic & Dye-Free)
Course: cake ideas, DessertsCuisine: AmericanServings
12
servingsPrep time
20
minutesCooking time
18
minutesCalories
320
kcalIngredients
1 ¼ cups (160 g) all-purpose flour
2 tbsp (12 g) unsweetened natural cocoa powder
¾ cup (150 g) granulated sugar
½ tsp baking soda
1 tsp baking powder
½ tsp fine salt
2 large eggs, room temp
½ cup (120 ml) vegetable oil
½ cup (120 ml) buttermilk, room temp
1 tsp vanilla extract
1 tsp white vinegar
1–1 ½ tbsp red gel food coloring (to desired shade)
Cream Cheese Frosting
8 oz (225 g) full-fat cream cheese, cold
½ cup (113 g) unsalted butter, slightly cool/soft
2 ½–3 cups (300–360 g) powdered sugar, sifted
1 tsp vanilla extract
Pinch of salt
Directions
- Prep: Preheat oven to 350°F (175°C). Line a 12-cup muffin tin with paper liners.
- Dry mix: In a bowl, whisk flour, cocoa, sugar, baking soda, baking powder, and salt until evenly combined.
- Wet mix: In another bowl, whisk eggs, oil, buttermilk, vanilla, and red gel coloring until smooth and evenly tinted.
- Combine: Add dry ingredients to wet and whisk just until no dry streaks remain (do not overmix).
- Activate leavening: Stir in vinegar last; batter will slightly deepen in color.
- Fill & bake: Divide batter among liners, ~⅔ full. Bake 17–19 minutes, or until a toothpick comes out with a few moist crumbs.
- Cool: Let cupcakes cool in the pan 5 minutes, then transfer to a rack to cool completely before frosting.
- Frosting: Beat butter until creamy (30–60 sec). Add cream cheese and beat just to combine and smooth. Mix in vanilla and salt. Add powdered sugar gradually until fluffy and pipeable.
- Finish: Pipe or spread frosting onto cooled cupcakes. Optionally garnish with red velvet crumbs or sprinkles.