The Best Fluffy Pancakes recipe you will fall in love with. Full of tips and tricks to help you make the best pancakes.
Roast Beef Recipe (Science-Backed for Perfect Medium-Rare)
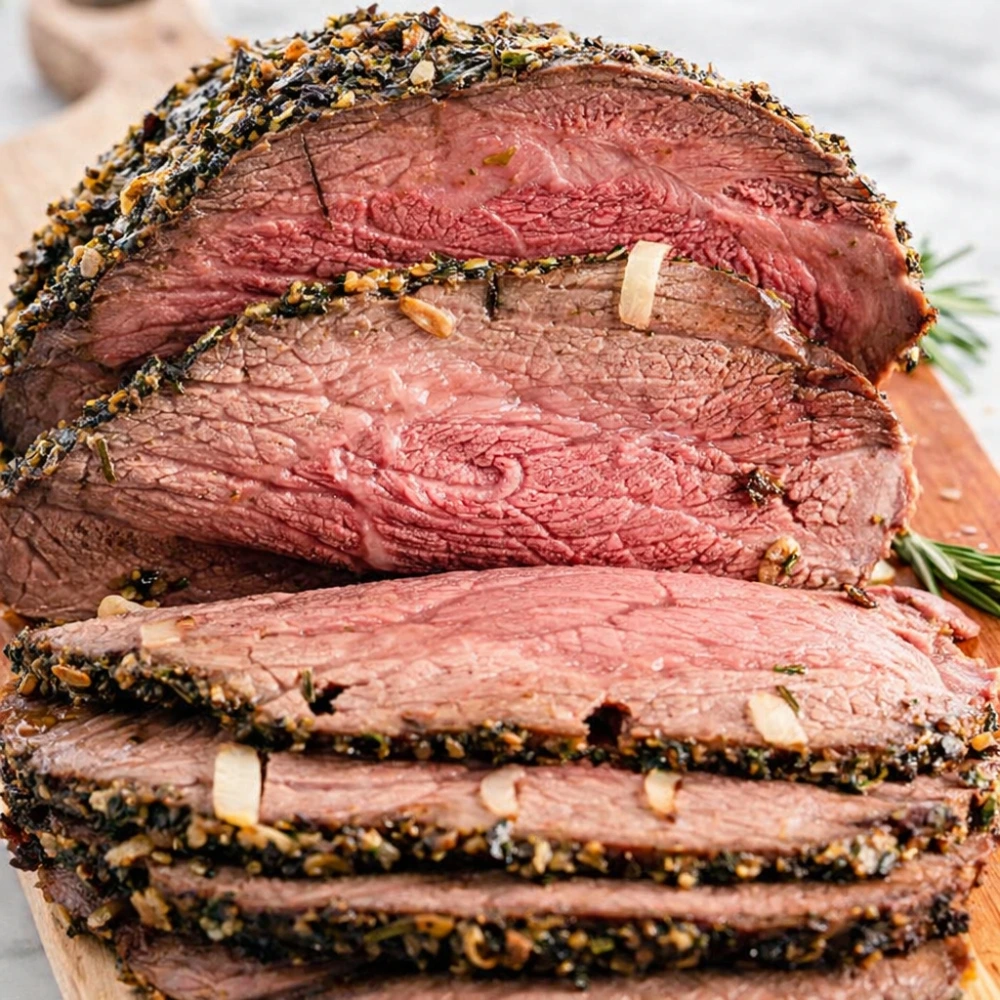
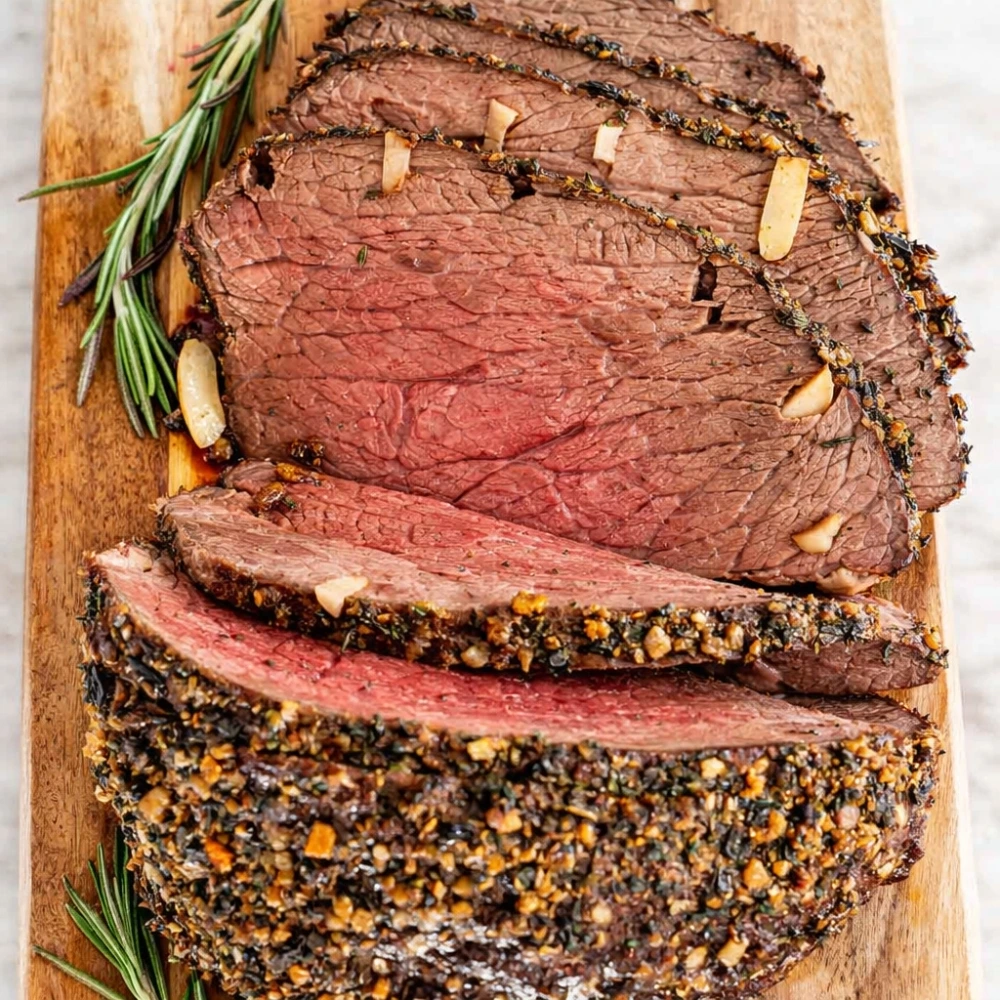
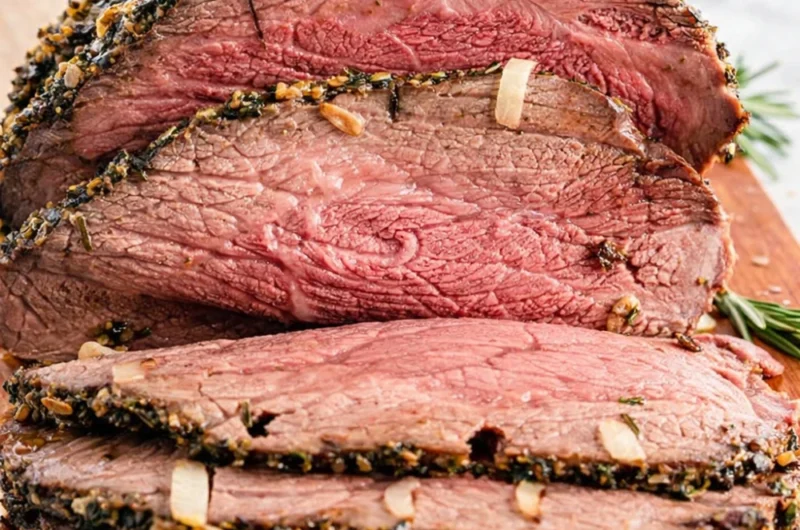
There’s something deeply satisfying about slicing into a perfectly cooked roast beef—that beautiful pink center, the caramelized crust, the tender texture that melts in your mouth. Yet most home cooks struggle with tough, overcooked, or unevenly prepared roasts. After years of experimenting and diving deep into food science, I’ve discovered the game-changing technique that professional chefs swear by: the reverse-sear method.
This isn’t your grandmother’s roast beef recipe. We’re combining centuries-old dry-brining wisdom with modern low-and-slow cooking techniques to create a tender roast beef that rivals any steakhouse. Whether you’re preparing Sunday dinner or planning an elegant holiday meal, this foolproof method delivers consistent, restaurant-quality results every single time.
Quick Facts: At-A-Glance Guide
| Element | Details |
|---|---|
| Best Cut | Top Round or Eye of Round |
| Target Internal Temp | 135°F (57°C) for Medium-Rare |
| Key Technique | Dry-brining for 12–24 hours |
| Total Time | 20 mins prep + 2 hours roasting |
| Resting Time | 15-20 minutes (critical!) |
Selecting the Right Cut: Why “Top Round” Wins
Not all beef cuts are created equal for roasting. While prime rib gets all the glory, top round roast is the unsung hero of tender roast beef—especially when you’re working with a budget.
Here’s why top round excels:
- Lean but flavorful: Unlike fatty cuts, top round benefits immensely from the reverse-sear method
- Even thickness: Ensures uniform cooking throughout
- Cost-effective: Typically 40-50% cheaper than ribeye roasts
- Versatile slicing: Perfect for thin-sliced sandwiches or thick medallions
Alternative Option: Eye of round also works beautifully with this technique, though it’s slightly leaner. For those seeking maximum tenderness, a sirloin tip roast offers more marbling while maintaining affordability.
Pro Tip: Look for roasts with minimal silverskin and even shape. Ask your butcher to tie the roast if it’s irregularly shaped—this ensures even cooking.
The Secret to the Crust: The Science of Dry Brining
Before we even think about heat, let’s talk about the most underutilized technique in home cooking: dry brining. This simple step transforms ordinary beef into extraordinary roast beef.
How Dry Brining Works
When you salt meat and let it rest:
- Osmosis begins: Salt draws moisture to the surface
- Salt dissolves: The moisture creates a concentrated brine
- Reverse osmosis: The brine is reabsorbed, carrying salt deep into muscle fibers
- Protein breakdown: Salt denatures proteins, creating a more tender texture
The Perfect Dry Brine Formula
- 3/4 teaspoon kosher salt per pound of beef
- Optional additions: Fresh cracked black pepper, garlic powder, or dried herbs
- Timing: Minimum 12 hours, optimal 24 hours
Method: Pat your beef roast completely dry with paper towels. Generously season all surfaces with kosher salt and your chosen spices. Place uncovered on a wire rack over a baking sheet in your refrigerator. The uncovered resting allows the surface to dry out, which is crucial for achieving that coveted crispy crust.
Step-by-Step: The Reverse Sear Method
The reverse sear method flips traditional roasting on its head. Instead of starting with high heat and finishing low, we do the opposite—and the results speak for themselves.
Phase 1: Low and Slow Roasting
Temperature: 250°F (121°C)
Instructions:
- Remove your dry-brined roast from the refrigerator 1 hour before cooking (allows for even cooking)
- Preheat your oven to 250°F
- Place roast on a wire rack set inside a rimmed baking sheet
- Insert a digital probe thermometer into the thickest part of the meat
- Roast until internal temperature reaches 125°F (52°C) for medium-rare
Estimated Time: Approximately 1.5 to 2 hours for a 3-pound roast
Why this works: Low-temperature cooking allows enzymes to tenderize the meat while minimizing moisture loss. The gentle heat ensures edge-to-edge consistency—no more gray, overcooked outer layers.
Phase 2: The Resting Period (Do Not Skip)
This is where carry-over cooking happens—a concept that separates amateur cooks from pros.
What you need to know:
- Meat temperature continues to rise 5-10°F after removal from heat
- Resting allows juices to redistribute throughout the roast
- Minimum resting time: 15 minutes, loosely tented with foil
Internal Temperature Guide: The Numbers That Matter
| Doneness Level | Pull Temperature | Final Rested Temperature |
|---|---|---|
| Rare | 120°F (49°C) | 125-130°F (52-54°C) |
| Medium-Rare | 125°F (52°C) | 130-135°F (54-57°C) |
| Medium | 135°F (57°C) | 140-145°F (60-63°C) |
Phase 3: The High-Heat Flash Sear
Now comes the dramatic finale—the sear that creates that irresistible crust.
Instructions:
- Heat a large cast-iron skillet over high heat until smoking (or preheat broiler)
- Add 2 tablespoons of high smoke-point oil (avocado or grapeseed)
- Sear the roast on all sides: 60-90 seconds per side
- The goal: Deep golden-brown crust without overcooking the interior
Alternative Method: If using a broiler, position rack 4-5 inches from heat source and broil 2-3 minutes per side.
Troubleshooting: Why Is My Roast Beef Tough?
Even experienced cooks encounter problems. Here are the most common issues and their solutions:
Problem: Dry, Tough Texture
Likely Causes:
- Overcooked (pulled at too high a temperature)
- Insufficient resting time
- Slicing with the grain instead of against it
Solution: Always use a reliable digital thermometer. Never trust cooking times alone—every oven and roast is different. When slicing, look for the direction of muscle fibers and cut perpendicular to them.
Problem: Lack of Crust Development
Likely Causes:
- Surface wasn’t dry enough before searing
- Insufficient dry-brining time
- Pan or oven wasn’t hot enough
Solution: Pat the roast completely dry before the final sear. Ensure your skillet is truly smoking hot before adding the meat.
Problem: Uneven Cooking
Likely Causes:
- Roast wasn’t at room temperature before cooking
- Irregular shape or thickness
- Oven hot spots
Solution: Always bring meat to room temperature for 60 minutes before roasting. Rotate the pan halfway through cooking. Consider having your butcher tie irregular roasts.
Essential Equipment: Tools for Success
Investing in the right tools makes perfect roast beef achievable every time:
- Digital Probe Thermometer: Non-negotiable. Look for models with remote monitoring capabilities (ThermoWorks ChefAlarm or ThermoPro TP20)
- Wire Cooling Rack: Allows air circulation for even cooking
- Cast-Iron Skillet: Retains heat beautifully for the perfect sear
- Sharp Carving Knife: Clean slices showcase your perfectly cooked beef
Serving Suggestions & Recipe Variations
Your perfectly cooked roast beef deserves equally thoughtful accompaniments:
Classic Pairings:
- Horseradish cream sauce (mix prepared horseradish with sour cream and chives)
- Au jus made from pan drippings
- Roasted root vegetables (carrots, parsnips, potatoes)
- Yorkshire pudding for traditional British elegance
Herb Variations: Before the low-temperature roasting phase, add:
- Rosemary and thyme for Mediterranean flair
- Coffee and cocoa rub for bold, complex flavors
- Montreal steak seasoning for peppery punch
The Science Behind Perfect Roast Beef
Understanding why this method works helps you adapt it to different situations.
Key Principles:
- Myoglobin denaturation: The protein responsible for meat color changes at different temperatures, which is why precise temperature control matters
- Collagen breakdown: While roasts don’t have as much collagen as tougher cuts, gentle heat still helps break down what’s present
- Moisture retention: Lower cooking temperatures result in less moisture evaporation—up to 20% more juice retention compared to high-heat methods
Final Thoughts: Your Roast Beef Journey
Mastering the perfect roast beef isn’t about following rigid rules—it’s about understanding the principles that create tender, flavorful meat. The reverse-sear method combined with proper dry-brining gives you a foolproof framework that works regardless of your experience level.
Remember these golden rules:
✓ Temperature, not time, determines doneness
✓ Patience pays off: Don’t rush the dry-brining or resting periods
✓ Sharp knife: Always slice against the grain for maximum tenderness
Now it’s time to fire up your oven and experience the difference that science-backed cooking techniques make. Your family and guests will wonder how you’ve suddenly become a culinary genius—but that’ll be your delicious secret.
What’s your biggest challenge when cooking roast beef? Share in the comments below, and let’s troubleshoot together!
Roast Beef Recipe (Science-Backed for Perfect Medium-Rare)
Course: Dinner, Recipe CollectionsCuisine: BritishServings
4
servingsPrep time
1
hour15
minutesCooking time
1
hour45
minutesCalories
350
kcalIngredients
1.3–1.6 kg (3–3.5 lb) beef roast (top sirloin/strip roast or ribeye roast)
2 tsp kosher salt
1 tsp freshly ground black pepper
3 cloves garlic, minced
1 tsp dried rosemary (or 1 Tbsp fresh, chopped)
1 tsp dried thyme (or 1 Tbsp fresh, chopped)
2 Tbsp olive oil
1 Tbsp Dijon mustard (optional)
1 large onion, thickly sliced (for rack; optional)
Directions
- Temper & prep (10 min): Remove roast from fridge 30–45 min before cooking. Pat dry. Heat oven to 230°C/450°F.
- Season: Mix salt, pepper, garlic, rosemary, thyme, olive oil, and (optional) Dijon into a paste. Rub all over roast.
- Set up: Place onion slices in a roasting pan as a bed (optional). Set roast fat-side up on a rack or on the onions.
- High-heat sear (15 min): Roast at 230°C/450°F for 15 minutes to form a crust.
- Roast to temp (50–65 min): Reduce oven to 160°C/325°F and continue roasting 50–60 minutes for medium-rare (internal 52–55°C / 125–130°F). For medium, go to 57–60°C / 135–140°F.
- Rest (15–20 min): Transfer to a board, tent loosely with foil, and rest 15–20 minutes (carryover will raise temp ~3–5°C / 5–10°F).
- Slice & serve: Slice against the grain into thin slices. Serve with pan juices.
- Notes:
- For a smaller roast, start checking temp earlier; for a larger one, add time.
- Use an instant-read thermometer for accuracy.
- OPTIONAL pan sauce: Deglaze pan with 120 ml (½ cup) beef stock + 60 ml (¼ cup) red wine; simmer to reduce, season, and whisk in 1 Tbsp butter (optional).