The Best Fluffy Pancakes recipe you will fall in love with. Full of tips and tricks to help you make the best pancakes.
Chocolate Crinkle Cookies: The Science of the Perfect Crackle (Fudgy & Fail-Proof)
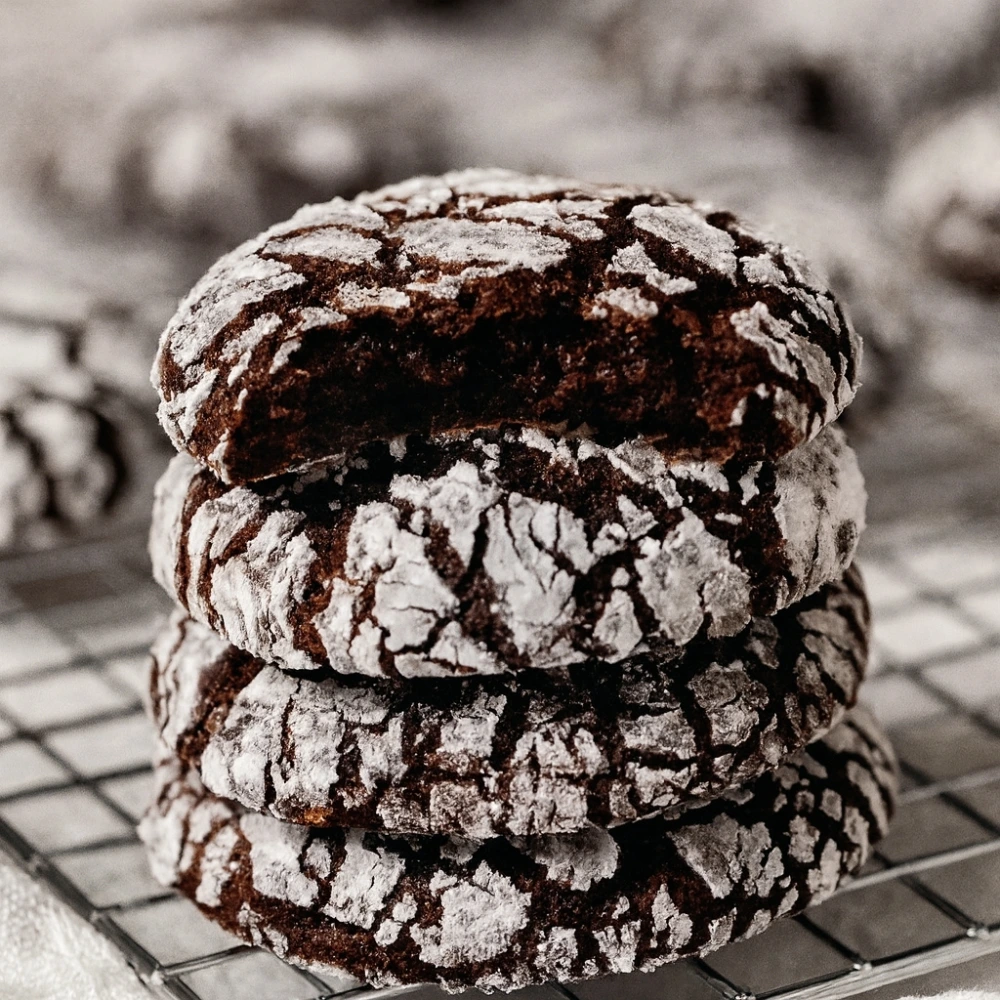
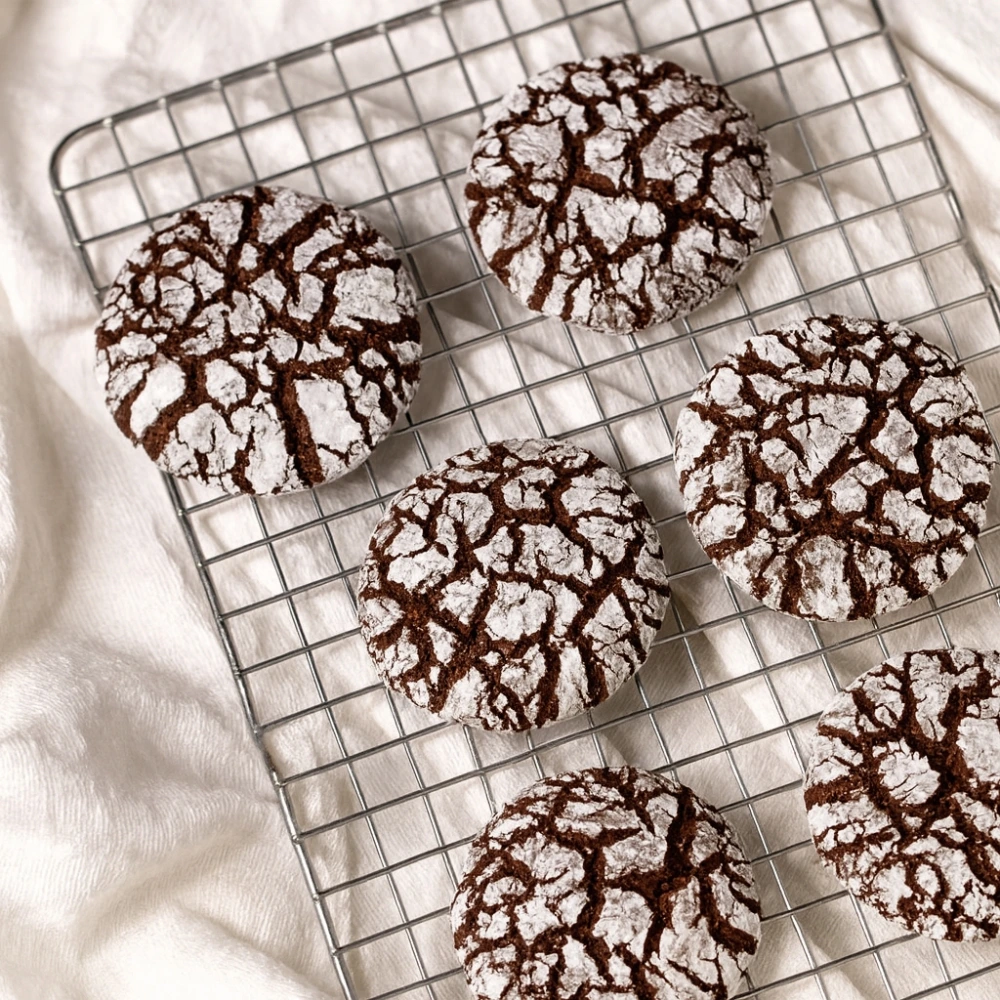
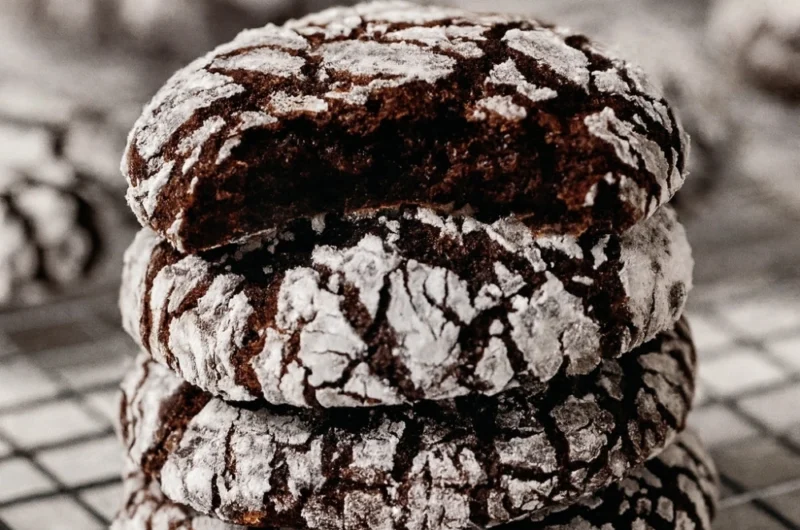
The secret to perfect chocolate crinkle cookies lies in the moisture balance. By using a combination of melted chocolate and Dutch-process cocoa powder, resting the dough for exactly 3 hours, and rolling the balls in granulated sugar before powdered sugar, you ensure a distinct crinkle pattern and a brownie-like fudgy center that stays soft for days.
Why Most Recipes Fail: The Competitor Killer Comparison
Before we get into the recipe, let’s talk about what sets this method apart. Most traditional chocolate crinkle cookie recipes rely on outdated techniques that produce inconsistent results. Here’s the truth:
Why This Method Works Better
| Feature | Standard Recipes (Most Blogs) | Our “Science-First” Method |
|---|---|---|
| Cocoa Type | Regular Cocoa | Dutch-Process (For deeper flavor/color) |
| Fat Source | Oil or Butter | Browned Butter (Nutty complexity) |
| The “Crinkle” | Powdered Sugar Only | Granulated + Powdered (Prevents absorption) |
| Texture | Cake-like | Fudgy / Truffle-like |
| Dough Rest | Optional or Overnight | Exactly 3 Hours (Optimal hydration) |
The key differences here aren’t just preference—they’re based on how ingredients interact at a molecular level. Let’s break down why each choice matters.
The Science Behind the Ingredients: Understanding the “Why”
Dutch-Process Cocoa: The Color and Texture Game-Changer
Not all cocoa powder is created equal. Dutch-process cocoa has been treated with an alkalizing agent that reduces its natural acidity from a pH of about 5.5 to a neutral 7. This isn’t just a flavor preference—it fundamentally changes how the cocoa interacts with your leavening agents.
When you use Dutch-process cocoa in chocolate crinkle cookies, the reduced acidity means your baking powder can work more efficiently, creating a specific type of rise that’s controlled and even. The result? A cookie that spreads just enough to crack but doesn’t flatten. Plus, the deeper, darker color creates that stunning visual contrast against the powdered sugar coating.
The Double-Sugar Technique: Engineering the Perfect Crinkle
Here’s where most recipes go wrong. If you roll your dough balls directly in powdered sugar, the moisture from the wet dough immediately starts dissolving that sugar. By the time the cookies hit the oven, much of that dramatic white coating has been absorbed, leaving you with lackluster cracks.
The solution: Rolling in granulated sugar first creates a moisture barrier. The granulated sugar doesn’t dissolve as quickly, so when you add the powdered sugar layer on top, it stays put. As the cookie bakes and expands, the powdered sugar coating cracks along predictable fault lines, creating those gorgeous fissures we’re after.
Browned Butter: The Complexity Factor
While many Christmas cookies rely on neutral oils or plain butter, browning your butter adds a layer of nutty complexity that elevates these from “good” to “extraordinary.” When butter is heated past its melting point, the milk solids undergo the Maillard reaction, creating hundreds of new flavor compounds. In chocolate crinkle cookies, this adds a subtle depth that complements the intense chocolate without overwhelming it.
The Recipe: Precision Meets Perfection
Ingredients (Makes 24 cookies)
Dry Ingredients:
- 180g (1 ½ cups) all-purpose flour
- 60g (¾ cup) Dutch-process cocoa powder
- 1 ½ teaspoons baking powder
- ¼ teaspoon salt
Wet Ingredients:
- 115g (½ cup) unsalted butter, browned and cooled
- 170g (6 oz) dark chocolate (60-70% cacao), melted
- 200g (1 cup) granulated sugar
- 100g (½ cup) light brown sugar
- 2 large eggs, room temperature
- 2 teaspoons vanilla extract
For Rolling:
- 100g (½ cup) granulated sugar
- 120g (1 cup) powdered sugar
Instructions
Step 1: Brown the Butter
Place butter in a light-colored saucepan over medium heat. Swirl occasionally as it melts, foams, and eventually develops brown specks at the bottom. Once it smells nutty and turns golden amber (about 5-7 minutes), immediately transfer to a heatproof bowl. Let cool for 15 minutes.
Step 2: Combine Wet Ingredients
In a large mixing bowl, whisk together the cooled browned butter, melted chocolate, granulated sugar, and brown sugar until smooth. Add eggs one at a time, whisking well after each addition. Stir in vanilla extract.
Step 3: Add Dry Ingredients
In a separate bowl, whisk together flour, Dutch-process cocoa powder, baking powder, and salt. Add dry ingredients to wet ingredients, folding gently with a spatula until just combined. The dough will be thick but slightly glossy.
Step 4: The Critical Rest
Cover the bowl tightly with plastic wrap and refrigerate for exactly 3 hours. Set a timer—this precision matters for achieving the right texture.
Step 5: Shape and Double-Coat
Preheat your oven to 350°F (175°C). Line two baking sheets with parchment paper.
Place granulated sugar in one bowl and powdered sugar in another. Scoop dough into 1.5-tablespoon portions (about 30g each). Roll each portion into a ball, then roll first in granulated sugar, coating completely. Next, roll generously in powdered sugar, ensuring a thick white coating.
Step 6: Bake
Place cookies 2 inches apart on prepared baking sheets (they will spread). Bake for 11-13 minutes. The cookies should look slightly underbaked in the center with dramatic cracks forming around the edges. They will continue to set as they cool.
Step 7: Cool and Serve
Let cookies cool on the baking sheet for 5 minutes before transferring to a wire rack. The centers will remain fudgy while the edges develop a slight crispness.
Troubleshooting FAQ: Solving Common Crinkle Cookie Problems
Why Did My Crinkle Cookies Go Flat?
The Problem: Flat cookies with minimal crackle usually stem from two issues: dough temperature or leavening failure.
The Solution: Ensure your dough is chilled to 40°F (4°C) before baking. Use a thermometer if necessary. Also, check your baking powder expiration date—leavening agents lose potency after 6 months of opening. If your baking powder is old, your cookies won’t have the lift needed to create those dramatic cracks.
Why Didn’t My Cookies Crackle?
The Problem: Smooth-topped cookies without the signature crinkle pattern.
The Solution: This typically happens when the oven temperature is too low. Verify your oven accuracy with an oven thermometer—many home ovens run 25°F cooler than the dial indicates. The rapid initial heat (at least 350°F) is what causes the exterior to set while the interior continues expanding, creating the cracks. Also, don’t skip the granulated sugar step—it’s essential for the crackle formation.
Can I Freeze the Dough?
Yes! Chocolate crinkle cookies freeze beautifully, which makes them perfect for holiday baking prep.
Freezing Instructions:
- After the 3-hour rest, portion and roll the dough balls in both sugars as directed
- Place coated dough balls on a parchment-lined baking sheet and freeze until solid (about 2 hours)
- Transfer frozen dough balls to a freezer-safe bag or container
- Freeze for up to 3 months
Baking from Frozen: Add 2-3 minutes to the baking time. No need to thaw—bake directly from frozen at 350°F.
How Long Do Crinkle Cookies Stay Fresh?
When stored in an airtight container at room temperature, these fudgy chocolate crinkle cookies stay soft and delicious for up to 5 days. The browned butter and proper moisture balance prevent them from drying out like cake-style versions.
Real Tester Feedback: What Bakers Are Saying
“I’ve tried Sally’s recipe and several others, but the double-sugar trick in this version makes the white coating pop so much more! The contrast is Instagram-worthy.” — Maria T., Home Baker
“Finally, a crinkle cookie that actually tastes like a brownie. The Dutch-process cocoa makes such a difference in depth of flavor.” — James K., Recipe Tester
“The 3-hour rest time seemed specific, but I trusted the science. Worth it! My cookies had the best texture I’ve ever achieved.” — Priya M., Food Blogger
Pro Tips for Next-Level Crinkle Cookies
Temperature Control is Everything: If your kitchen is warm (above 75°F), pop your rolled and coated dough balls back in the fridge for 10 minutes before baking. This extra insurance prevents spreading.
Measure by Weight: Notice how this recipe provides gram measurements? Precision matters in baking science. A cup of flour can vary by 30g depending on how it’s scooped, which significantly affects your cookie texture.
Don’t Overbake: These cookies should look slightly underdone when you remove them from the oven. The carryover heat will finish the baking process. If they look fully baked in the oven, they’ll be dry once cooled.
Experiment with Add-ins: Once you’ve mastered the base recipe, try folding in 100g of chopped dark chocolate or a teaspoon of espresso powder for extra depth.
The Bottom Line: Science Wins
The difference between mediocre chocolate crinkle cookies and showstopping ones comes down to understanding the chemistry. By choosing Dutch-process cocoa for its pH balance, creating a moisture barrier with the double-sugar technique, adding complexity with browned butter, and respecting the 3-hour hydration period, you’re not just following a recipe—you’re engineering the perfect cookie.
These snowflake cookies have earned their place as a Christmas cookies classic, but with this science-first approach, you can achieve bakery-quality results year-round. The fudgy, truffle-like center paired with that dramatic crackled exterior isn’t just beautiful—it’s the result of precise technique meeting quality ingredients.
Ready to become the crinkle cookie expert in your circle? Grab your Dutch-process cocoa and get baking. Your perfectly crackled, fudgy masterpieces are just 3 hours and 13 minutes away.
Chocolate Crinkle Cookies: The Science of the Perfect Crackle (Fudgy & Fail-Proof)
Course: cake ideas, DessertsCuisine: AmericanServings
24
servingsPrep time
15
minutesCooking time
10
minutesCalories
120
kcalIngredients
1 cup (200 g) granulated sugar
1/4 cup (60 ml) neutral oil (vegetable or canola)
2 large eggs, room temperature
1 tsp vanilla extract
1 cup (120 g) all-purpose flour
1/2 cup (50 g) unsweetened natural cocoa powder
1 tsp baking powder
1/4 tsp fine salt
Optional: 1 tsp instant espresso powder (boosts chocolate flavor)
For rolling: 3 Tbsp granulated sugar and 3/4 cup (90 g) confectioners’ sugar
Directions
- Mix wet: In a bowl, whisk granulated sugar and oil until sandy. Whisk in eggs one at a time, then vanilla, until glossy.
- Combine dry: In another bowl, whisk flour, cocoa, baking powder, salt (and espresso powder if using).
- Make dough: Fold dry into wet just until no dry streaks remain. Dough will be sticky.
- Chill: Cover and refrigerate 2 hours (or up to 24 hours) until firm enough to scoop.
- Prep to bake: Heat oven to 350°F / 175°C. Line 2 baking sheets with parchment. Place rolling sugars in two shallow bowls (one with granulated, one with confectioners’).
- Portion & coat: Scoop 1 Tbsp portions (about 20–22 g). Roll into balls, then roll first in granulated sugar (light coat) and then in confectioners’ sugar (generous coat).
- Bake: Arrange 2 inches apart. Bake 10–12 minutes until tops are deeply cracked and edges are set; centers should look slightly soft.
- Cool: Let rest on the sheet 3 minutes, then move to a rack to cool. Repeat with remaining dough, keeping dough chilled between batches.
- Store/Freeze: Store airtight 3–4 days. To freeze, freeze coated dough balls on a tray, then bag; bake from frozen adding ~1 minute.