The Best Fluffy Pancakes recipe you will fall in love with. Full of tips and tricks to help you make the best pancakes.
Creamy Black Eyed Peas Recipe (Stovetop & Instant Pot)
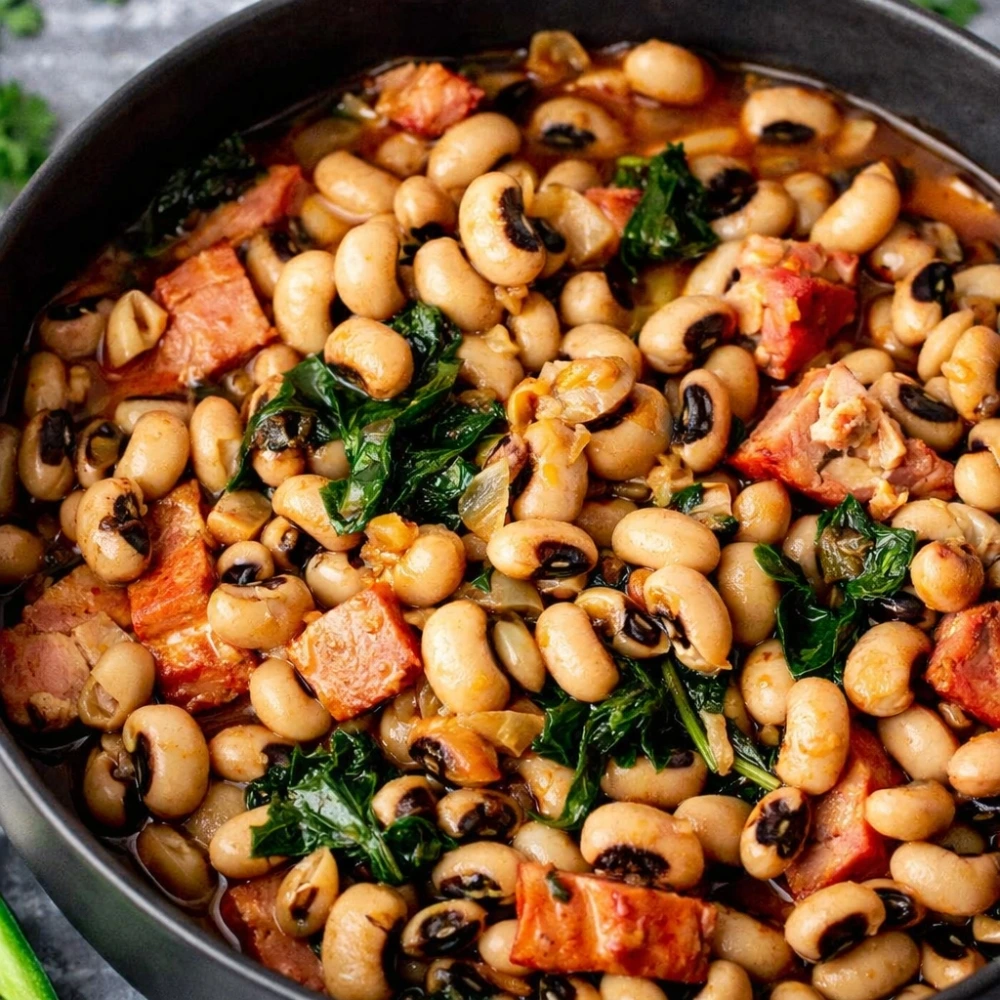
Every New Year’s Day, millions of families reach for black eyed peas—the legendary symbol of good luck and prosperity. But here’s the truth nobody talks about: most black eyed peas recipes result in bland, mushy beans swimming in watery broth.
After testing dozens of methods and consulting culinary science, I’ve cracked the code to achieving perfectly creamy black eyed peas with distinct texture—whether you’re cooking on the stovetop, in an Instant Pot, or using a slow cooker. This black eyed peas recipe delivers restaurant-quality results every single time.
What is the Secret to Creamy Black Eyed Peas?
The secret to creamy black eyed peas isn’t just the soaking—it’s the cooking liquid reduction. Unlike other beans, black eyed peas are thin-skinned. Using a broth rich in collagen (from smoked turkey or ham hocks) or simulating this with a “smashed bean” technique creates the signature velvet texture without mushiness. The starch released from partially mashed peas acts as a natural thickener, transforming watery liquid into luxurious, spoon-coating goodness.
Choose Your Cooking Method: The Complete Comparison
Not all cooking methods produce the same results. Here’s how each approach performs:
| Method | Prep Time | Texture Profile | Best For… |
|---|---|---|---|
| Traditional Stovetop | 1 hr 15 min | Creamy, soft, classic | The purist who wants control |
| Instant Pot (No Soak) | 40 min | Firm, distinct beans | Weeknight dinners in a rush |
| Slow Cooker | 6-8 hours | Ultra-tender, soup-like | “Set it and forget it” cooking |
My recommendation? Start with the stovetop method to master the fundamentals, then adapt to Instant Pot black eyed peas for busy weeknights.
The Ingredient Strategy: Building Layers of Flavor
The Holy Trinity Foundation
Southern cooking starts with the aromatic base of onion, celery, and bell pepper—collectively known as the “Holy Trinity.” This trio provides the savory backbone that transforms simple beans into soul food.
The Umami Factor: Choosing Your Smoke
This is where personal preference and dietary needs intersect:
Standard Options:
- Ham Hock: Traditional choice with intense smoky flavor and natural gelatin
- Bacon: Convenient and adds crispy texture when crumbled on top
Modern/Healthier Alternative:
- Smoked Turkey Wings: Less fat, more collagen, equally flavorful—my personal favorite for achieving that creamy consistency without excess grease
Vegan Options:
- Liquid Smoke + Smoked Paprika + Soy Sauce: This combination replicates the depth of smoked meat while keeping the dish plant-based (perfect for vegetarian black eyed peas)
Essential Ingredients Checklist
- 1 pound dried black eyed peas (no soak required!)
- 1 large onion, diced
- 2 celery stalks, chopped
- 1 green bell pepper, diced
- 4 cloves garlic, minced
- 1-2 smoked turkey wings or 1 ham hock
- 6 cups chicken or vegetable broth
- 2 bay leaves
- 1 tsp dried thyme
- 1 tsp smoked paprika
- 1/2 tsp cayenne pepper (adjust to taste)
- Salt and black pepper
- 2 tbsp olive oil or bacon fat
The Master Recipe: Stovetop Method
Step 1: The Sauté (Build the Base)
Heat olive oil in a large Dutch oven or heavy-bottomed pot over medium heat. Add the diced onion, celery, and bell pepper. Sauté for 5-7 minutes until vegetables soften and onions turn translucent. Add minced garlic and cook for another minute until fragrant—this releases the aromatic compounds that make your kitchen smell amazing.
Step 2: The Deglaze (Scraping the Brown Bits)
Pour in 1/2 cup of your broth and use a wooden spoon to scrape up all the fond—those caramelized brown bits stuck to the bottom of the pot. This step is crucial for flavor development and is often overlooked in simpler recipes. Those browned bits contain concentrated sugars and proteins that add exponential depth.
Step 3: The Simmer
Add the rinsed black eyed peas (no soaking needed!), remaining broth, smoked turkey wings or ham hock, bay leaves, thyme, and smoked paprika. Bring to a boil, then reduce heat to low. Cover and simmer for 45-60 minutes, stirring occasionally, until peas are tender but not falling apart.
Pro Tip: Resist adding salt until the final 10 minutes of cooking. Salt and acidic ingredients added too early prevent the bean skins from softening properly.
Step 4: The Thickening Hack (Game-Changer!)
This technique separates good black eyed peas from extraordinary ones:
- Remove 1/2 cup of cooked peas with a slotted spoon
- Mash them thoroughly with a fork in a small bowl
- Stir the mashed beans back into the pot
- Simmer for 5 more minutes
Why this works: The starch from the mashed beans creates a naturally creamy consistency without adding flour or cornstarch. The liquid transforms from thin and watery to thick and velvety.
Step 5: Final Seasoning
Remove the smoked turkey wings or ham hock. Shred the meat and return it to the pot (discard bones and skin). Taste and adjust seasoning with salt and black pepper. Remove bay leaves before serving.
Instant Pot Black Eyed Peas (Quick Version)
Time-Saver Alert: This method delivers no soak black eyed peas in under an hour.
- Use the “Sauté” function to cook your Holy Trinity vegetables (5 minutes)
- Add all remaining ingredients except salt
- Secure lid and set to High Pressure for 15 minutes
- Allow Natural Release for 10 minutes, then quick release remaining pressure
- Use the same mashing technique (Step 4 above) to thicken
- Season with salt to taste
The beans will be firmer and more distinct compared to stovetop—ideal if you prefer texture over ultra-creaminess.

Slow Cooker Method (Set-and-Forget)
- Add all ingredients to slow cooker (no sautéing required)
- Cook on LOW for 6-8 hours or HIGH for 4-5 hours
- Apply the mashing technique 30 minutes before serving
- Adjust seasoning
This method produces the most tender, soup-like consistency—perfect for serving over rice.
Common Black Eyed Pea Mistakes (Troubleshooting Guide)
Q: Do I really need to soak black eyed peas?
A: No! Unlike kidney beans, black eyed peas are small and thin-skinned. Soaking shortens cook time by approximately 15 minutes but isn’t required for safety or texture. The “no-soak” approach actually preserves more nutrients and produces beans with better structural integrity.
Q: Why are my beans still hard after cooking?
A: You likely added salt or acidic ingredients (tomatoes, vinegar, lemon juice) too early. Acid prevents the bean skins from softening properly. Always add these ingredients during the final 10-15 minutes of cooking.
Q: How do I prevent mushy black eyed peas?
A: Three critical factors:
- Don’t overcook (check at 45 minutes for stovetop)
- Maintain a gentle simmer, not a rolling boil
- Use the natural pressure release for Instant Pot (quick release causes beans to explode)
Q: Can I freeze cooked black eyed peas?
A: Absolutely! Cool completely, then store in airtight containers for up to 3 months. The texture holds up remarkably well. Thaw overnight in the refrigerator and reheat gently on the stovetop.
Serving Suggestions & Pairings
Black eyed peas shine as both a side dish and main course. Here are my favorite serving styles:
Classic Southern Plate:
- Serve alongside cornbread, collard greens, and fried chicken
- Top with diced raw onion and hot sauce
Modern Bowl:
- Spoon over fluffy white rice
- Add sliced avocado and fresh cilantro
- Drizzle with hot honey for sweet-savory contrast
New Year’s Good Luck Tradition:
- According to Southern folklore, eating black eyed peas on New Year’s Day brings prosperity—one pea for every day of good luck!
Storage & Meal Prep Tips
Refrigerator: Store in an airtight container for 4-5 days. The flavors actually improve on day two as the spices meld together.
Freezer: Portion into individual servings for quick weeknight meals. Label with date and cooking method.
Reheating: Add a splash of broth or water when reheating, as the beans absorb liquid over time. Warm gently over medium-low heat, stirring occasionally.
The Science Behind the Texture
Understanding why this recipe works helps you adapt it confidently:
Collagen Conversion: Smoked turkey wings and ham hocks contain connective tissue that breaks down into gelatin during slow cooking. This gelatin coats each bean, creating that silky mouthfeel.
Starch Gelatinization: The “smashed bean” technique releases amylose and amylopectin—starch molecules that thicken the cooking liquid naturally without additives.
Thin-Skin Advantage: Black eyed peas cook faster than other legumes because their skins are thinner, allowing liquid to penetrate quickly. This is why they don’t require soaking and why overcooking happens easily.
Final Thoughts: Your Path to Perfect Black Eyed Peas
Whether you’re honoring the New Year’s good luck tradition or simply craving soul-satisfying comfort food, this black eyed peas recipe delivers consistent, restaurant-quality results. The combination of proper technique (that mashing step!), quality ingredients (smoked turkey vs ham hock—either works!), and cooking method flexibility (stovetop, Instant Pot, or slow cooker) means you’ll never serve watery, flavorless beans again.
Start with the stovetop method to build your confidence, then experiment with the Instant Pot for busy weeknights. Master the “thickening hack” and you’ll have friends begging for your secret.
Ready to cook? Gather your ingredients, choose your method, and prepare to experience the creamiest, most flavorful black eyed peas you’ve ever made. Your taste buds—and your New Year’s luck—will thank you.

Creamy Black Eyed Peas Recipe (Stovetop & Instant Pot)
Course: DinnerCuisine: AmericanServings
6
servingsPrep time
15
minutesCooking time
1
hour15
minutesCalories
190
kcalIngredients
1 lb (450 g) dried black-eyed peas, picked over and rinsed (or 4 cans, drained/rinsed; reduce simmer time)
2 tbsp olive oil (or neutral oil)
1 medium onion, diced
1 rib celery, diced
1 green bell pepper, diced (optional)
3 cloves garlic, minced
1 tsp smoked paprika
1/2 tsp cayenne (optional, to taste)
1 tsp dried thyme (or 2 sprigs fresh)
2 bay leaves
6 cups (1.4 L) low-sodium vegetable broth (or chicken broth)
1 tsp kosher salt, plus more to taste
1/2 tsp black pepper
1–2 tbsp apple cider vinegar or lemon juice (finish)
Optional add-ins: 1 cup chopped tomatoes; 2 cups chopped greens (collards/kale) last 15 min; or 4–6 oz diced smoked turkey/ham for non-vegetarian version
Directions
- (Optional quick soak) Cover dried peas with plenty of water, bring to a boil for 2 minutes, turn off heat, cover, and rest 1 hour. Drain and rinse. (Skip if using canned.)
- Sauté aromatics. In a large pot, heat oil over medium. Cook onion, celery, and bell pepper 5–6 minutes until softened. Add garlic, smoked paprika, cayenne, thyme; cook 30–60 seconds until fragrant.
- Simmer. Add peas, bay leaves, and broth. Bring to a boil, then reduce to a gentle simmer. Partly cover and cook until peas are tender, about 55–70 minutes for dried (10–15 minutes for canned). Stir occasionally; add hot water if needed to keep peas just covered.
- Season & finish. Stir in salt and pepper (season to taste). If using greens, add for the last 10–15 minutes. Remove bay leaves. Off heat, stir in vinegar or lemon juice to brighten.
- Serve. Ladle over rice or with cornbread. Garnish with scallions or parsley. Adjust heat/acidity and salt before serving.