The Best Fluffy Pancakes recipe you will fall in love with. Full of tips and tricks to help you make the best pancakes.
Fried Chicken Sandwich Recipe (That’s Actually Easy)
We tested 7 brines and 4 dredging techniques to find the secret to perfectly crispy, juicy chicken every single time. This is the only guide you’ll ever need.
More Than Just a Sandwich, It’s a Project Worth Perfecting
Let’s be honest—the quest for the perfect fried chicken sandwich can feel like chasing a culinary unicorn. You’ve probably tried countless recipes, only to end up with soggy breading, dry chicken, or that dreaded combination of both. After months of testing in our kitchen, we’ve cracked the code on what makes a truly exceptional homemade fried chicken sandwich.
This recipe combines the science of a perfect brine with practical steps any home cook can master, resulting in a shatteringly crisp crust and incredibly juicy meat that rivals your favorite restaurant. In this post, we’ll not only give you the step-by-step recipe but also explain the ‘why’ behind each step – because understanding the technique is what transforms good cooks into great ones.
Why This Recipe Works: The 5 Pillars of Perfection
Our testing revealed five non-negotiable elements that separate mediocre chicken sandwiches from legendary ones:
1. The Buttermilk-Pickle Brine
The combination of acid from buttermilk and salt from pickle juice creates a two-pronged attack on tough chicken fibers. The acid breaks down proteins while the salt penetrates deep into the meat, seasoning and tenderizing from the inside out. This isn’t just flavoring – it’s food science at work.
2. The Double Dredge
A simple flour coating gives you basic coverage, but our dry-wet-dry technique creates exponentially more surface area. This means more nooks and crannies for an extra-craggy, ultra-crispy crust that stays crunchy even after assembly.
3. The Temperature Control
Maintaining 350°F oil temperature is absolutely critical. Too hot, and your breading burns before the chicken cooks through. Too cool, and you get greasy, soggy results. We’ll show you exactly how to maintain that sweet spot.
4. The Potato Bun
While brioche gets all the attention, potato buns are the unsung heroes of sandwich construction. Their subtle sweetness complements the savory chicken while providing superior structural integrity that won’t fall apart in your hands.
5. The Spicy Mayo
This isn’t just about heat – it’s about balance. The combination of fat, acid, and spice cuts through the richness of fried chicken while adding moisture and flavor complexity that elevates every bite.
Ingredient Deep Dive: Choosing Your Champions
The Chicken: Thighs vs. Breasts
Our recommendation: Boneless, skinless chicken thighs
While chicken breasts are leaner, thighs deliver superior flavor and moisture thanks to their higher fat content. They’re also more forgiving – slightly overcooking a thigh won’t turn it into cardboard like it will a breast. If you prefer white meat, we’ll show you how to adjust cooking times.
The Brine: Your Secret Weapon
- 2 cups buttermilk
- 1/2 cup pickle juice (dill pickle brine)
- 2 tablespoons hot sauce
- 1 tablespoon salt
- 1 teaspoon garlic powder
- 1 teaspoon onion powder
The Dredge: Maximum Crispiness Formula
- 2 cups all-purpose flour
- 1 tablespoon cornstarch (our secret ingredient for extra crispiness)
- 2 teaspoons paprika
- 1 teaspoon garlic powder
- 1 teaspoon onion powder
- 1 teaspoon cayenne pepper
- 1 teaspoon black pepper
- 1 teaspoon salt
The Bun: Foundation Matters
Potato buns are our top choice, but brioche works beautifully too. Avoid standard hamburger buns – they lack the structural integrity and flavor complexity needed for this application.
The Sauce & Toppings: The Finishing Touch
Spicy Mayo Recipe:
- 1/2 cup mayonnaise
- 2 tablespoons hot sauce
- 1 tablespoon honey
- 1 teaspoon lemon juice
- 1/2 teaspoon garlic powder
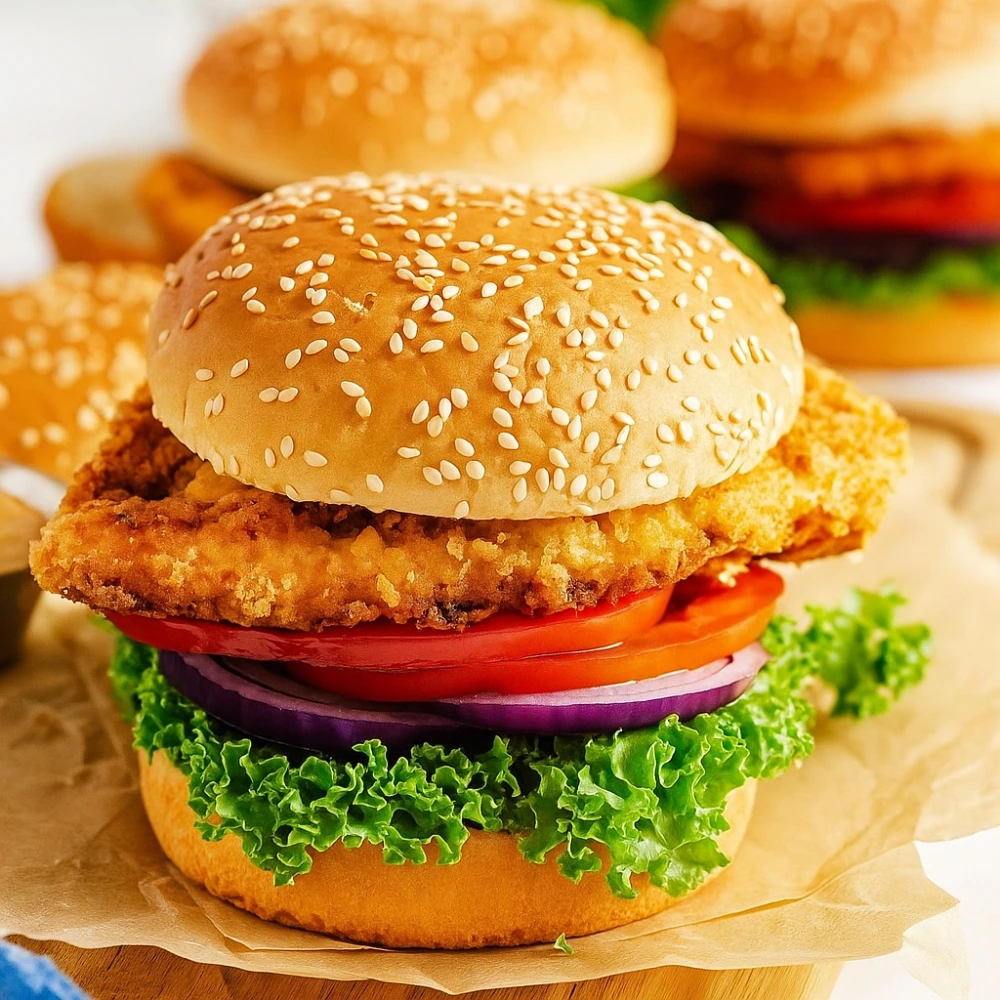
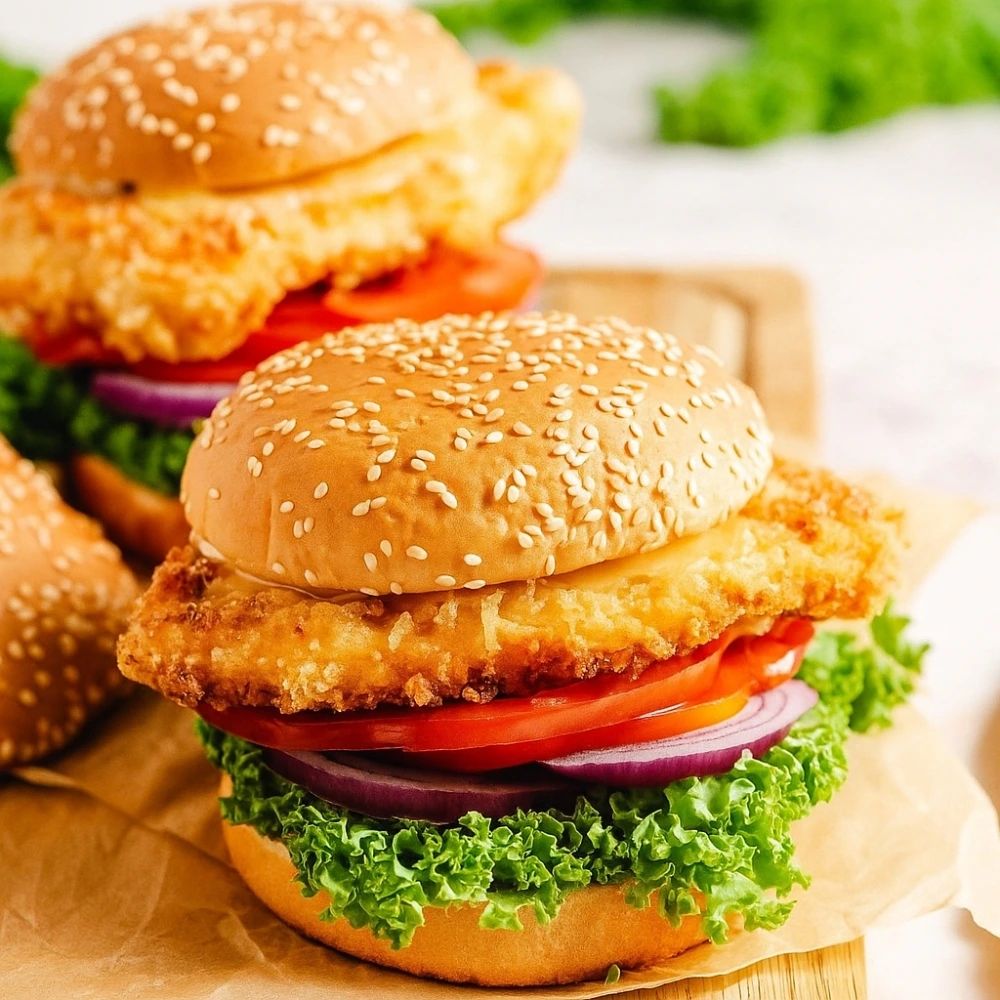
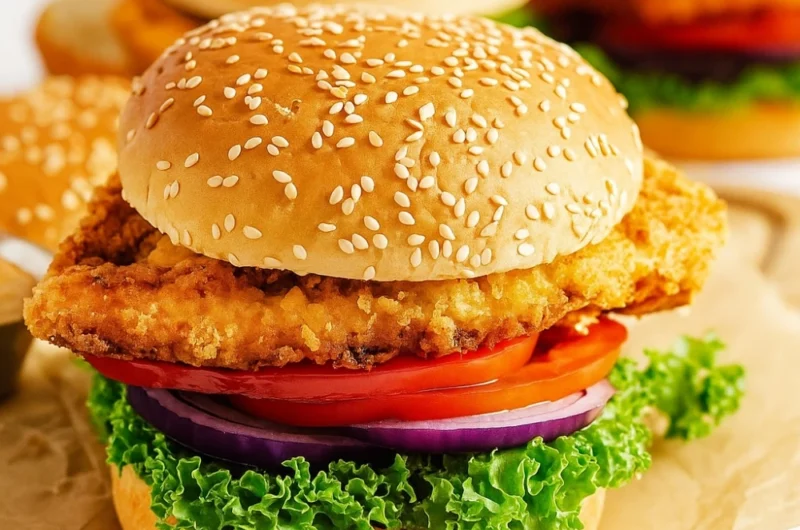
Essential toppings: Crisp lettuce, dill pickles, thinly sliced tomato (optional)
The Step-by-Step Recipe: From Raw Chicken to Sandwich Glory
Preparation (Active Time: 20 minutes, Brine Time: 2-24 hours)
Step 1: Prepare the Chicken Pound chicken thighs to an even 1/2-inch thickness between plastic wrap. This ensures even cooking and prevents thick spots from remaining raw while thin areas overcook.
Step 2: Make the Brine Whisk together buttermilk, pickle juice, hot sauce, salt, garlic powder, and onion powder in a large bowl. Submerge chicken completely and refrigerate for at least 2 hours, or up to 24 hours for maximum flavor.
Step 3: Set Up Your Dredging Station Create three stations:
- Station 1: Seasoned flour mixture
- Station 2: Reserved brine (1/2 cup)
- Station 3: Second bowl of seasoned flour
Step 4: The Triple Dredge Process Remove chicken from brine, letting excess drip off. Dredge in flour, then dip in reserved brine, then coat again in flour. The final coating should look shaggy and textured – this creates maximum surface area for crispiness.
Step 5: Rest the Coated Chicken Let dredged chicken rest on a wire rack for 15-20 minutes. This allows the coating to hydrate and adhere properly, preventing it from falling off during frying.
Cooking (Active Time: 15 minutes)
Step 6: Heat the Oil Heat 2-3 inches of neutral oil (vegetable or peanut) to 350°F in a heavy-bottomed pot. Use a thermometer – this isn’t negotiable for consistent results.
Step 7: Fry the Chicken Fry chicken pieces for 4-5 minutes per side, maintaining 350°F oil temperature. Don’t overcrowd the pan – work in batches if necessary.
Step 8: Drain and Rest Transfer fried chicken to a wire rack set over a baking sheet. Never use paper towels – they create steam that softens the crust.
Step 9: Assemble Your Masterpiece Toast bun halves until golden. Spread spicy mayo on both sides, add lettuce and pickles to bottom bun, place chicken on top, and crown with the top bun.
Pro-Tips from Our Test Kitchen
Keep Your Dredging Hand Clean: Use one hand for wet ingredients and one for dry. This prevents building up a glove of batter on your fingers.
The Secret to Not Making a Mess: Line your workspace with parchment paper and have a damp towel ready for quick cleanups.
Don’t Overcrowd the Pan: Frying too many pieces at once drops oil temperature and creates soggy results. Patience pays off.
How to Hold Chicken Warm: Keep finished pieces in a 200°F oven on a wire rack while you fry additional batches.
Variations: Make It Your Own
For a Nashville Hot Vibe
Mix 2 tablespoons hot oil with 1 tablespoon cayenne pepper, 1 teaspoon brown sugar, and 1/2 teaspoon smoked paprika. Brush over hot fried chicken for authentic Nashville heat.
For a Korean-Inspired Kick
Combine 3 tablespoons gochujang, 2 tablespoons honey, 1 tablespoon rice vinegar, and 1 teaspoon sesame oil. Toss fried chicken in this glaze for sweet-spicy perfection.
For the Health-Conscious: Air Fryer Method
Preheat air fryer to 380°F. Spray breaded chicken with oil and cook for 12-15 minutes, flipping halfway through. While not identical to traditional frying, this method delivers impressive results with significantly less oil.
Comprehensive FAQ Section
Can I use chicken breasts? Yes, but reduce cooking time to 3-4 minutes per side and use a meat thermometer to ensure internal temperature reaches 165°F.
Can I make this gluten-free? Absolutely. Substitute the all-purpose flour with a 1:1 gluten-free flour blend. The cornstarch already in our recipe helps maintain crispiness.
Why did my breading fall off? Common causes include: skipping the resting period, oil temperature too high, or not properly dredging in the wet-dry-wet sequence.
How do I store and reheat leftovers? Refrigerate for up to 3 days. Reheat in a 375°F oven for 8-10 minutes to restore crispiness. Avoid microwaving, which makes breading soggy.
What’s the best oil for frying? Neutral oils with high smoke points work best: vegetable, canola, or peanut oil. Avoid olive oil, which can impart unwanted flavors and has a lower smoke point.
This recipe represents months of testing and refinement to create the perfect balance of crispy exterior and juicy interior. The key is understanding that each step serves a specific purpose in building layers of flavor and texture. Master these techniques, and you’ll never need to search for another fried chicken sandwich recipe again.
Fried Chicken Sandwich Recipe (That’s Actually Easy)
Course: LunchCuisine: Americansandwiches
4
sandwichesPrep time
15
minutesCooking time
15
minutesCalories
650
kcalIngredients
4 boneless, skinless chicken thighs or breasts
1 cup buttermilk
1 cup all-purpose flour
1 tsp paprika
1/2 tsp garlic powder
1/2 tsp onion powder
Salt and pepper, to taste
Vegetable oil, for frying
4 sandwich buns
Pickles, lettuce, tomato, and your favorite sauce for serving
Directions
- Marinate: Place chicken in a bowl with buttermilk, salt, and pepper. Let sit for at least 15 minutes.
- Prepare coating: In a shallow dish, mix flour with paprika, garlic powder, onion powder, and a pinch of salt and pepper.
- Heat oil: In a deep skillet, heat about 1/2 inch of oil to 350°F (175°C).
- Dredge chicken: Remove chicken from buttermilk, letting excess drip off, then coat thoroughly in the flour mixture.
- Fry: Fry chicken for about 5–7 minutes per side until golden brown and internal temperature reaches 165°F (74°C).
- Assemble: Toast buns lightly. Place fried chicken on buns and top with pickles, lettuce, tomato, and your favorite sauce.
- Serve immediately while hot and crispy.