The Best Fluffy Pancakes recipe you will fall in love with. Full of tips and tricks to help you make the best pancakes.
Restaurant-Style Shrimp Fried Rice
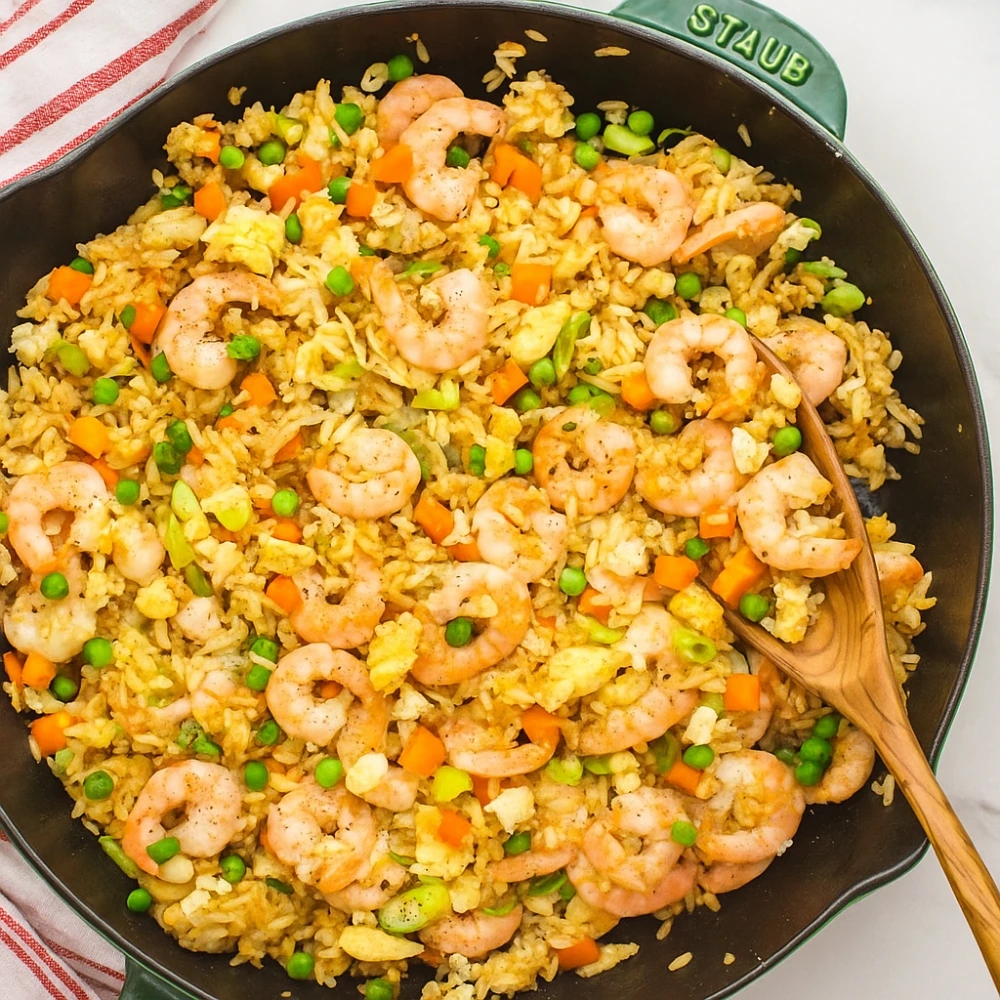
Tired of mushy, bland homemade fried rice that never quite matches your favorite takeout? You’re not alone. The secret to achieving that craveable restaurant-quality shrimp fried rice at home isn’t just about throwing rice and shrimp in a pan—it’s about mastering specific techniques that professional chefs use every single day. In this comprehensive guide, you’ll discover the exact methods, ingredients, and insider tips that transform ordinary ingredients into an extraordinary dish with perfectly separated grains, tender shrimp, and that elusive “wok hei” smokiness.
Key Takeaways
- Use day-old rice for the best texture and to prevent mushiness
- High heat is essential for achieving authentic restaurant flavor
- Proper shrimp preparation ensures tender, juicy results every time
- Cooking order matters: proteins first, then vegetables, then rice
- Quality ingredients like sesame oil and oyster sauce elevate the dish dramatically
Why This Recipe Works
Before we dive into the cooking process, let’s understand the science behind perfect shrimp fried rice. The key difference between restaurant-style fried rice and disappointing homemade versions comes down to three critical factors:
1. Rice Moisture Content: Fresh, just-cooked rice contains too much moisture. When stir-fried, it steams rather than fries, resulting in a mushy, clumpy texture. Day-old refrigerated rice has dried out slightly, allowing each grain to fry independently and develop that characteristic slightly crispy exterior.
2. Heat Management: Professional kitchens use commercial woks that reach temperatures far exceeding home stoves. This intense heat creates “wok hei”—that distinctive smoky, slightly charred flavor that defines authentic Asian stir-fry dishes. We’ll show you how to maximize heat on your home equipment.
3. Technique and Timing: The order in which ingredients hit the pan determines the final texture and flavor. Proteins need proper searing, vegetables require quick cooking to stay crisp, and rice needs space to fry properly without steaming.
Ingredients You’ll Need
For the Rice Base:
- 4 cups cooked jasmine rice (preferably day-old, refrigerated)
- 3 tablespoons neutral oil (vegetable or peanut), divided
- 1 tablespoon sesame oil
For the Protein:
- 1 pound large shrimp, peeled and deveined
- ½ teaspoon salt
- ¼ teaspoon white pepper
- 1 teaspoon cornstarch (optional, for velveting)
Aromatics & Vegetables:
- 3 cloves garlic, minced
- 1 tablespoon fresh ginger, minced
- 1 cup frozen peas and carrots (or fresh diced carrots and peas)
- 4 green onions, sliced (whites and greens separated)
Sauce Components:
- 3 large eggs, beaten
- 3 tablespoons soy sauce (or tamari for gluten-free)
- 1 tablespoon oyster sauce
- 1 teaspoon fish sauce (optional, for depth)
- ½ teaspoon sugar
Garnish:
- Extra green onions, sliced
- Sesame seeds (optional)
Equipment Needed
- Large wok or 14-inch skillet (carbon steel wok preferred)
- Metal spatula or wok turner
- Small bowls for prep (mise en place)
- Large plate or tray for cooked components
- High-output burner or maximum heat source
What Kind of Rice is Best for Fried Rice?
The best rice for fried rice is medium to long-grain white rice, with jasmine rice being the gold standard for restaurant-style shrimp fried rice. Here’s why:
| Rice Type | Best For | Prep Notes | Outcome |
|---|---|---|---|
| Jasmine | Traditional Chinese fried rice | Cook 1 day ahead, refrigerate uncovered | Slightly sticky yet separable, aromatic |
| Long-Grain White | All-purpose fried rice | Cook 1 day ahead, refrigerate | Very separable grains, neutral flavor |
| Basmati | Indian-style variations | Cook 1 day ahead, less moisture needed | Extremely fluffy, fragrant, very dry |
| Short-Grain | Not recommended | Too sticky | Clumps easily, mushy texture |
Pro Tip: If you don’t have day-old rice, spread freshly cooked rice on a baking sheet and refrigerate uncovered for 2-3 hours minimum. The cold air circulation will dry it out sufficiently.
Step-by-Step Cooking Instructions
Step 1: Prepare Your Shrimp
Fresh or frozen shrimp both work excellently for this easy shrimp fried rice recipe. If using frozen shrimp, thaw completely and pat very dry with paper towels—excess moisture is the enemy of good searing.
Optional Velveting Technique: For ultra-tender shrimp, toss them with ½ teaspoon salt, ¼ teaspoon white pepper, and 1 teaspoon cornstarch. Let sit for 10 minutes. This restaurant technique creates a protective coating that keeps shrimp juicy.
| Shrimp Type | Cleaning Method | Velveting? | Cook Time |
|---|---|---|---|
| Fresh, large | Peel, devein, rinse, pat dry | Recommended | 2-3 minutes |
| Frozen, pre-cleaned | Thaw, pat very dry | Optional | 2-3 minutes |
| Fresh, small | Peel, rinse, pat dry | Not necessary | 1-2 minutes |
Step 2: Set Up Your Mise en Place
This is crucial for homemade shrimp fried rice success. Once you start cooking, everything moves fast. Have all ingredients prepped and within arm’s reach:
- Break up cold rice with your hands, separating any clumps
- Beat eggs in a small bowl
- Combine soy sauce, oyster sauce, fish sauce, and sugar in another bowl
- Mince garlic and ginger
- Slice green onions, keeping whites and greens separate
- Measure out your oils
Critical Timing Note: From the moment you start cooking to plating takes only 10-12 minutes. There’s no time to chop vegetables mid-recipe.
Step 3: Cook the Eggs
Heat your wok or large skillet over high heat until a drop of water evaporates immediately upon contact. Add 1 tablespoon of neutral oil and swirl to coat.
Pour in beaten eggs and let them sit undisturbed for 10 seconds to set slightly. Using your spatula, quickly scramble into small, soft curds—about 30 seconds total. The eggs should be just barely set, slightly undercooked. Transfer to a plate immediately. They’ll finish cooking when added back later.
Why This Works: Cooking eggs separately prevents them from coating the rice and ensures distinct, fluffy egg pieces throughout your best shrimp fried rice.
Step 4: Sear the Shrimp
Return the wok to high heat and add 1 tablespoon of oil. When shimmering hot, add shrimp in a single layer—don’t overcrowd. Sear for 1-2 minutes on the first side without moving them. Flip and cook another 1 minute until just pink and cooked through.
Transfer shrimp to the plate with eggs. Don’t worry if they’re slightly underdone; they’ll finish cooking when tossed back in.
Common Mistake to Avoid: Overcooking shrimp makes them rubbery. Remember, shrimp cook incredibly fast—when they turn pink and opaque, they’re done.
Step 5: Build Your Flavor Base
Add the final tablespoon of oil to the wok. Toss in minced garlic, ginger, and the white parts of green onions. Stir-fry for 30 seconds until fragrant but not browned. Add frozen peas and carrots (or fresh vegetables) and stir-fry for 1-2 minutes until just tender.
This is where your restaurant-style shrimp fried rice begins developing its complex flavor profile. The aromatics infuse the oil, which will then coat every grain of rice.
Step 6: Fry the Rice
Add your day-old rice to the wok, breaking up any remaining clumps with your spatula. Here’s the critical technique: press the rice against the hot surface of the wok and let it sit for 20-30 seconds before stirring. This creates those delicious crispy bits.
Stir-fry vigorously for 3-4 minutes, using a folding and pressing motion. You want to expose different surfaces of the rice to the hot pan. The rice should start to look slightly toasted and smell nutty.
Step 7: Add the Sauce and Combine
Pour the sauce mixture over the rice and toss thoroughly to coat every grain. The sauce should sizzle immediately—if it doesn’t, your pan isn’t hot enough. Stir-fry for 2 minutes, ensuring even distribution and allowing some of the moisture to evaporate.
Drizzle sesame oil around the edges of the wok and toss again. That distinctive nutty aroma signals you’re almost there.
Step 8: Final Assembly
Return the scrambled eggs and cooked shrimp to the wok. Add the green parts of the sliced green onions. Toss everything together for 1-2 minutes until heated through. The shrimp should be perfectly cooked, the eggs distributed throughout, and the rice should have that coveted slightly crispy texture with separated grains.
Taste and adjust seasoning with additional soy sauce or a pinch of white pepper if needed.
How Do I Prevent Mushy Fried Rice?
Mushy fried rice is the most common complaint with homemade versions. Here are the guaranteed solutions:
- Always use cold, day-old rice – Fresh rice has too much moisture
- Break up rice clumps before cooking – This ensures even frying
- Use high heat throughout – Low heat steams the rice instead of frying it
- Don’t overcrowd the pan – If necessary, cook in two batches
- Minimize sauce – Too much liquid creates steaming, not frying
- Keep ingredients moving – Constant stirring prevents steaming pockets
Can I Use Fresh Shrimp Instead of Frozen?
Absolutely! Fresh shrimp often produces superior results for shrimp fried rice ingredients. Here’s what to know:
- Fresh shrimp tends to have better texture and flavor but must be used within 1-2 days of purchase
- Frozen shrimp is more convenient, often flash-frozen at peak freshness, and works perfectly when properly thawed and dried
- Either way: Pat shrimp completely dry before cooking—this is the single most important step for proper searing
What’s the Secret to “Wok Hei”?
“Wok hei” (breath of the wok) is that slightly smoky, charred flavor that defines authentic restaurant-style fried rice. While home stoves can’t match commercial wok burners, you can still achieve it:
- Use the highest heat your stove produces – Turn that burner to maximum
- Choose the right pan – Carbon steel woks conduct heat best; cast iron works too
- Work in batches if needed – Overcrowding drops temperature dramatically
- Let rice sit briefly – Those moments pressed against the hot wok create charring
- Outdoor wok burner – If you’re serious, portable outdoor wok burners reach the necessary temperatures
Common Pitfalls & Troubleshooting
My Fried Rice is Bland
Solutions:
- Don’t skip the oyster sauce—it adds crucial umami depth
- Add fish sauce for another layer of savory complexity
- Use more aromatics (garlic, ginger, green onions)
- Season at multiple stages, not just at the end
- Consider adding a dash of white pepper for authentic restaurant flavor
My Shrimp is Rubbery
Solutions:
- Cook shrimp separately at high heat for minimal time
- Don’t overcook—remove when just pink
- Try the velveting technique with cornstarch
- Use larger shrimp (they’re more forgiving than small ones)
Everything Sticks to My Pan
Solutions:
- Ensure your wok or pan is properly seasoned (if carbon steel)
- Use adequate oil—this isn’t a low-fat dish
- Make sure pan is screaming hot before adding ingredients
- Keep ingredients moving with constant stirring
Rice is Clumpy
Solutions:
- Refrigerate rice uncovered so excess moisture evaporates
- Break up all clumps with hands before cooking
- Don’t pack rice down—fluff it up
- Add rice to the hot pan gradually while stirring
Variations & Customization
Protein Variations
- Chicken Fried Rice: Substitute diced chicken breast or thighs
- Pork Fried Rice: Use char siu (Chinese BBQ pork) or diced pork loin
- Combination: Mix shrimp with chicken or pork for restaurant-style “house special”
- Vegetarian: Replace shrimp with crispy tofu or extra vegetables
Dietary Adjustments
- Gluten-Free Shrimp Fried Rice: Use tamari instead of soy sauce, coconut aminos instead of oyster sauce
- Low-Sodium: Use reduced-sodium soy sauce and omit fish sauce
- Keto/Low-Carb: Replace rice with cauliflower rice (use fresh, not frozen, and dry thoroughly)
- Shrimp Fried Rice Without Soy Sauce: Substitute coconut aminos or increase oyster sauce and salt
Flavor Profiles
- Thai-Style: Add Thai basil, lime juice, and red chili flakes
- Indonesian: Include sweet soy sauce (kecap manis) and sambal
- Kimchi Fried Rice: Add chopped kimchi and gochugaru
- Pineapple Fried Rice: Include diced pineapple and cashews
Serving Suggestions
Shrimp fried rice works beautifully as a complete meal, but pairs wonderfully with:
- Appetizers: Spring rolls, dumplings, or wonton soup
- Sides: Stir-fried bok choy, Chinese broccoli, or cucumber salad
- Proteins: Pair with additional dishes like kung pao chicken or beef and broccoli for a feast
- Sauce: Serve with extra soy sauce, chili oil, or sweet and sour sauce on the side
Presentation Tip: Serve in a shallow bowl or on a plate, garnished with extra sliced green onions and a sprinkle of sesame seeds. Add a wedge of lime for brightness.
Make-Ahead & Storage Tips
Make-Ahead Strategy
- Rice: Cook rice 1-2 days ahead and refrigerate uncovered
- Shrimp: Clean and prepare shrimp the night before; store covered in the refrigerator
- Mise en Place: Chop all vegetables and aromatics up to 4 hours ahead; store in airtight containers
Storage
- Refrigerator: Store leftover fried rice in airtight containers for up to 4 days
- Freezer: Freeze portions in freezer bags for up to 3 months
- Reheating: Best method is in a hot wok or skillet with a splash of oil to restore crispness. Microwave works but rice will be softer.
Shrimp Fried Rice Calories
A typical serving (approximately 1.5 cups) contains:
- Calories: 380-420
- Protein: 22-25g
- Fat: 12-15g
- Carbohydrates: 48-52g
Note: Nutritional values vary based on specific ingredients and portions used.
Frequently Asked Questions
Q: Can I make this with brown rice?
A: Yes, but brown rice requires adjustments. It takes longer to fry and needs more oil. The texture will be chewier and nuttier. Still use day-old refrigerated brown rice.
Q: What if I don’t have a wok?
A: A large 14-inch skillet works well. Cast iron retains heat excellently. Avoid non-stick pans—they can’t handle the high heat needed.
Q: Can I prep fried rice sauce ahead?
A: Absolutely. Mix all sauce components and store in the refrigerator for up to 1 week. This makes weeknight cooking even faster.
Q: Why does restaurant fried rice taste different?
A: Commercial wok burners produce 50,000-100,000 BTUs (yours is likely 7,000-12,000), creating that distinctive wok hei. They also use high amounts of oil and MSG. Our recipe maximizes flavor within home cooking constraints.
Your Path to Fried Rice Mastery
You now have everything you need to create restaurant-quality shrimp fried rice that rivals—or surpasses—your favorite takeout. The key isn’t magic; it’s technique, timing, and quality ingredients. Start with properly prepared day-old rice, master your high-heat cooking, and follow the precise ingredient order we’ve outlined.
Remember: your first attempt might not be perfect, but each time you make this dish, you’ll develop better wok control and intuitive timing. Before long, you’ll be adjusting heat, adding your own variations, and serving up plates that have your family asking, “Did you order takeout?”
Ready to transform your dinner routine? Gather your ingredients, fire up that wok, and experience the satisfaction of creating authentic, delicious shrimp fried rice in your own kitchen. Share your results with us in the comments below, and don’t forget to subscribe for more restaurant-quality recipes you can master at home
Restaurant-Style Shrimp Fried Rice
Course: DinnerCuisine: ChineseServings
4
servingsPrep time
10
minutesCooking time
12
minutesCalories
420
kcalIngredients
Cooked rice (day-old preferred): 4 cups, cold and fluffed
Large shrimp (peeled & deveined): 450 g (1 lb)
Eggs: 2, lightly beaten
Vegetable or peanut oil: 2 Tbsp (plus 1 tsp, divided)
Unsalted butter (optional for richness): 1 Tbsp
Aromatics: 3 cloves garlic (minced), 1 Tbsp fresh ginger (minced)
Vegetables: 1 cup frozen peas & carrots mix (thawed), 3–4 scallions (sliced, whites & greens separated)
Soy sauce: 2–2½ Tbsp (to taste)
Oyster sauce: 1 Tbsp
Sesame oil: 1 tsp
White pepper: ¼ tsp (or black pepper)
Salt: to taste
Optional: 1–2 tsp Shaoxing wine or dry sherry; chili flakes or sriracha for heat; lime wedges for serving
Directions
- Prep rice & shrimp: Pat shrimp dry and toss with a pinch of salt and white pepper. Break up any clumps in the cold rice with damp hands or a fork.
- Make sauce: In a small bowl, mix soy sauce, oyster sauce, and sesame oil (add Shaoxing wine if using). Set aside.
- Scramble eggs: Heat a large wok or skillet over medium-high. Add 1 tsp oil. Pour in beaten eggs, scramble just until set (30–45 sec). Slide eggs to a plate.
- Sear shrimp: Add 1 Tbsp oil to the hot pan. Sear shrimp 45–60 sec per side until just pink; remove to the egg plate.
- Aromatics: Add remaining 1 Tbsp oil and the butter (if using). Stir-fry garlic, ginger, and scallion whites 20–30 sec until fragrant.
- Rice: Add rice. Spread into an even layer; cook undisturbed 45–60 sec to lightly toast, then stir-fry 2–3 min, breaking up clumps.
- Veggies & sauce: Add peas and carrots; toss 30–60 sec. Pour in the sauce around the pan edges; stir-fry 1–2 min until rice is evenly coated and steaming.
- Finish: Return shrimp and eggs; add most scallion greens. Toss 30–60 sec. Adjust salt/soy and pepper to taste; add chili if you like heat.
- Serve: Plate immediately; garnish with remaining scallion greens and lime wedges.
- Notes & swaps:
- Use day-old jasmine rice for ideal texture. If using fresh rice, spread it on a tray to cool and dry 30–60 minutes.
- Gluten-free: choose GF soy/tamari and a GF oyster-style sauce.
- Add-ins: diced bell pepper, corn, or a splash of fish sauce for extra umami.