The Best Fluffy Pancakes recipe you will fall in love with. Full of tips and tricks to help you make the best pancakes.
The Only Cake Pop Recipe You’ll Ever Need: A Step-by-Step Guide for Perfect Results
If you’ve ever watched your beautifully crafted cake pops crack down the middle or slide right off their sticks, you’re not alone. These adorable treats have a reputation for being finicky, but here’s the truth: cake pops aren’t difficult—they just require understanding the science behind the process. Today, I’m sharing everything I’ve learned from making thousands of cake pops, including the temperature tricks and ratios that separate perfect pops from Pinterest fails.
Ingredients & Tools Explained: The Science Behind Success
The Best Cake to Use (and Why Box Mix is Your Friend Here)
Contrary to what you might think, homemade cake isn’t always better for cake pops. Box mix creates the ideal texture because it’s formulated with stabilizers and oils that hold together better when crumbled. Oil-based cakes (like most box mixes) create a sturdier foundation than delicate butter cakes, which can become too crumbly or greasy.
Pro tip: If you prefer homemade, choose recipes with oil rather than butter as the fat source.
Frosting as a Binder: How Much is Too Much?
Think of frosting as the glue that holds your cake pop together—not the star flavor. The perfect cake-to-frosting ratio is crucial: too little and your pops will crumble, too much and they’ll be dense and fall off the stick.
| Frosting Amount | Result | Fix |
|---|---|---|
| Too Little | Crumbly, won’t hold shape | Add 1 tablespoon at a time |
| Perfect Amount | Holds together when squeezed, not sticky | You’re golden! |
| Too Much | Heavy, dense, slides off stick | Add more cake crumbs |
The mixture should feel like Play-Doh—moldable but not wet.
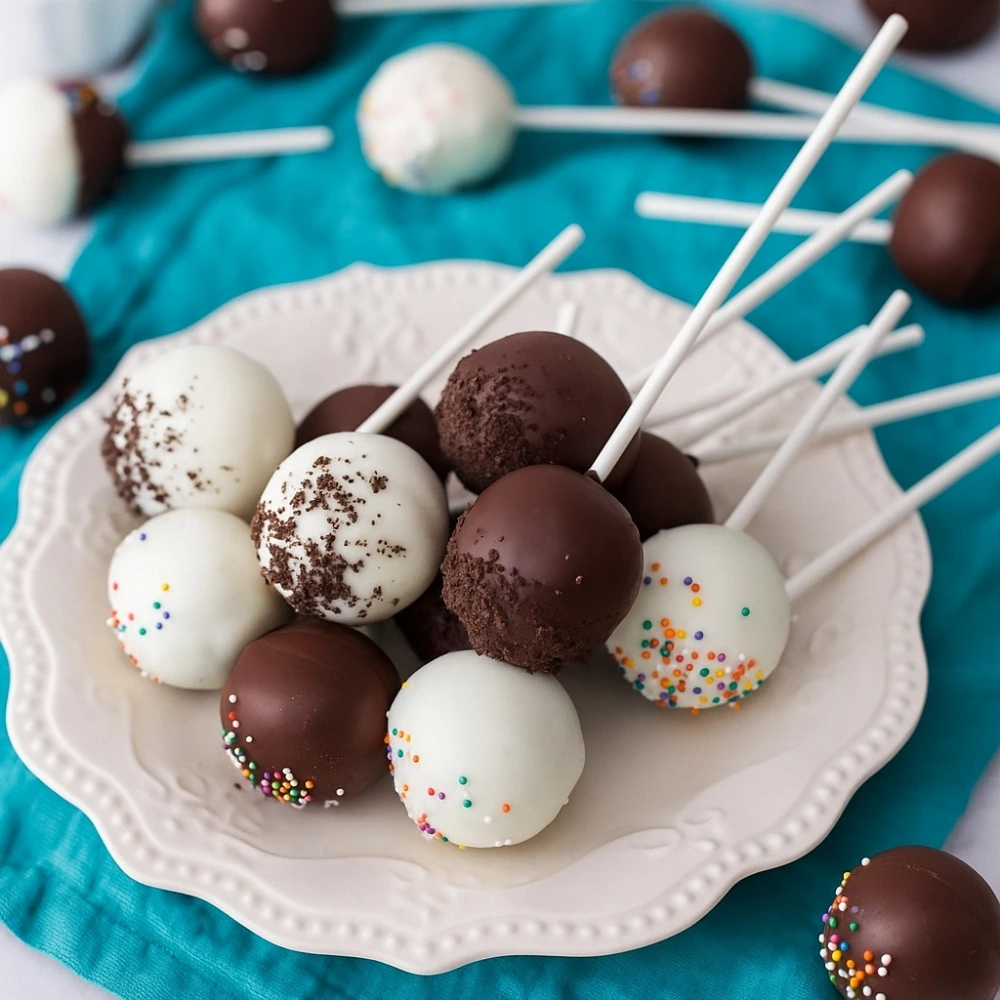
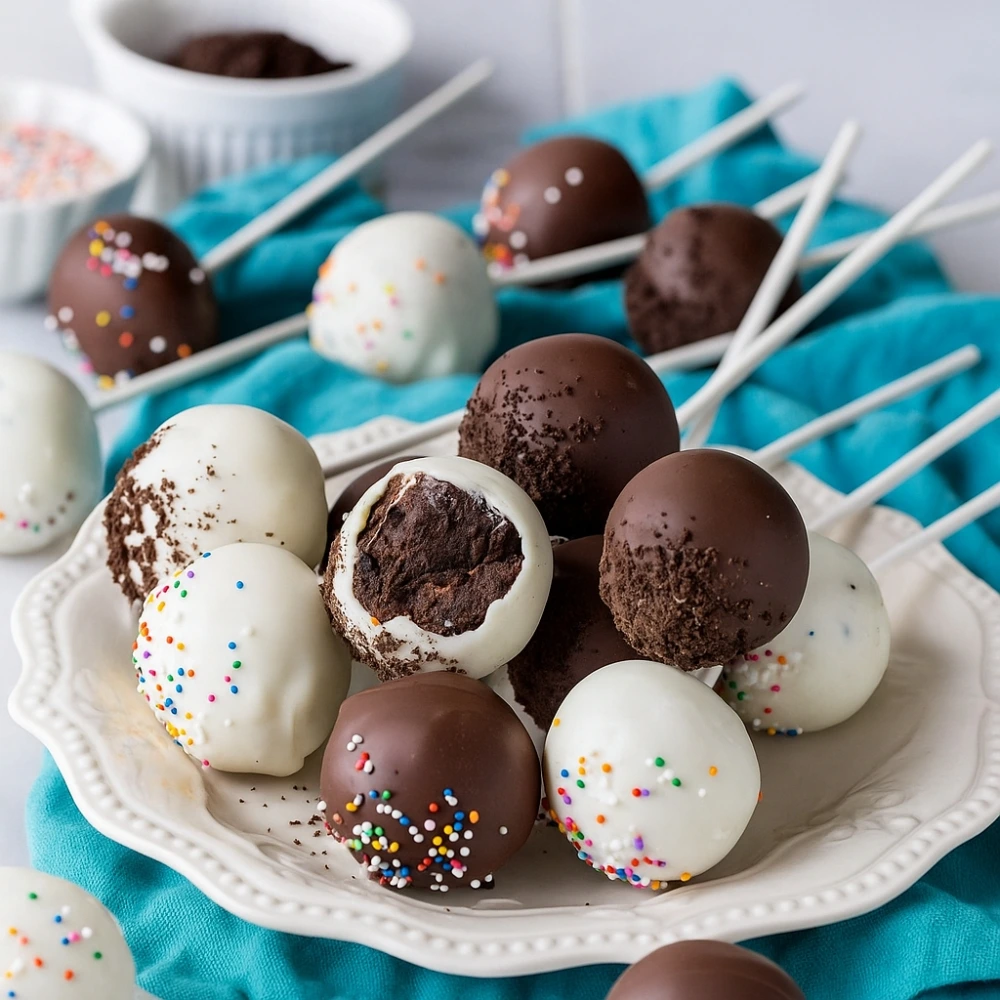
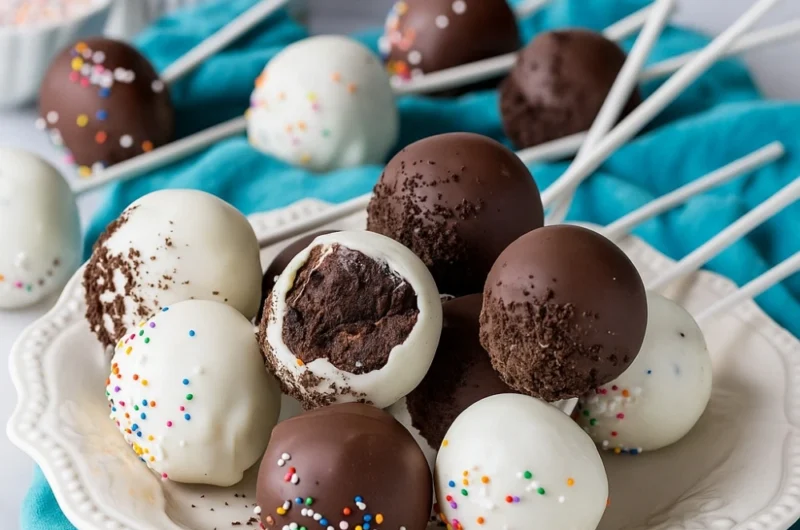
Candy Melts vs. Chocolate: The Great Debate
For beginners, candy melts are your best friend. They’re formulated to set at room temperature with a nice snap, and they don’t require tempering like real chocolate. However, if you prefer chocolate’s taste:
Good: Candy melts (easiest)
Better: High-quality chocolate chips + 1 tsp coconut oil
Best: Paramount crystals + chocolate for professional results
The Ultimate Step-by-Step Guide
Step 1: Baking the Cake
Bake your cake according to package directions. Critical point: Let it cool completely—warm cake creates steam that makes your mixture too wet.
Step 2: Crumbing the Cake
Break the cake into chunks, then pulse in a food processor until you achieve fine, uniform crumbs. No chunks should be larger than a pea.
Step 3: Mixing the “Dough”
Start with half the frosting and gradually add more. The mixture is ready when you can squeeze a handful and it holds together without cracking.
Step 4: Rolling the Balls
Use a small cookie scoop for uniform size (about 1.5 inches). Roll between your palms with light pressure—overworking makes them dense.
Step 5: The First Chill (Critical!)
Chill shaped balls for at least 2 hours. This firms them up so they won’t fall apart during dipping.
Step 6: Dipping the Stick & Attaching
Dip each stick about 1/2 inch into the melted coating, then insert into the cake ball. This creates an anchor that prevents sliding.
Step 7: The Second Chill (The Secret to Success!)
Chill again for 15 minutes. This step prevents cracking—it ensures the cake pop and coating are similar temperatures during the final dip.
Step 8: Melting the Coating
Microwave method: 30-second intervals, stirring between each
Double-boiler method: Gentle heat, constant stirring
The coating should flow like thick cream. If too thick, add 1 teaspoon of coconut oil.
Step 9: The Perfect Dip
Hold the stick and dip straight down into the coating. Tap gently on the side of the bowl to remove excess—don’t shake vigorously or the pop may fall off.
Step 10: Drying & Decorating
Insert into styrofoam block or cake pop stand. Add decorations while coating is still wet.
The Cake Pop Troubleshooting FAQ
Why are my cake pops cracking?
Problem: Cracks appear during or after dipping
Cause: Temperature shock—your cake balls are too cold and the coating is too hot
Solution: Let chilled cake pops sit at room temperature for 5 minutes before dipping, and ensure coating isn’t too hot
Why are my cake pops falling off the stick?
Problem: Cake pops slide down or fall off completely
Cause: Too much frosting making them heavy, or skipping the stick-dipping step
Solution: Use less frosting in your mixture and always dip the stick in coating before inserting
Why is my chocolate coating so thick?
Problem: Coating doesn’t flow smoothly
Cause: Chocolate has seized or is too cool
Solution: Add 1 teaspoon coconut oil or paramount crystals and stir gently
Why are my cake pops oily?
Problem: Oil seeping through the coating
Cause: Too much frosting or using butter-based cake
Solution: Add more cake crumbs to absorb excess moisture
How do I fix lumpy coating?
Problem: Bumpy, uneven surface
Cause: Coating was too thick or cake pop was too cold
Solution: Warm coating slightly and ensure cake pops aren’t straight from the freezer
Storage & Make-Ahead Guide
Room Temperature Storage
Store finished cake pops in an airtight container for up to 3 days. Place parchment between layers to prevent sticking.
Refrigerator Storage
Cake pops keep in the fridge for up to 1 week. Bring to room temperature before serving for best texture.
Freezer Storage
Freeze cake balls (before dipping) for up to 3 months. Thaw in the refrigerator overnight before dipping in the coating.
Make-Ahead Timeline
- 3 days ahead: Make and shape cake balls, freeze
- 1 day ahead: Dip in coating, store covered
- Day of: Add final decorations if needed
Pro Tips for Cake Pop Success
Temperature is everything. The difference between cake pop success and failure often comes down to temperature control at each stage.
- Use a thermometer: Coating should be 90-95°F for dipping
- Work in small batches: Coating thickens as it cools
- Practice the dip: Smooth, confident motions prevent air bubbles
- Invest in quality sticks: Cheap sticks can break under the weight
Troubleshooting Quick Reference
| Problem | Quick Fix |
|---|---|
| Cracking | Adjust temperatures |
| Falling off | Less frosting, dip stick first |
| Thick coating | Add coconut oil |
| Uneven surface | Tap gently, don’t shake |
Variations to Try Next
Once you’ve mastered the basic technique, the flavor possibilities are endless:
- Oreo Cake Pops: Replace vanilla cake with chocolate and mix in crushed Oreos
- Red Velvet Cake Pops: Use red velvet cake mix with cream cheese frosting
- Funfetti Birthday Cake Pops: Add extra sprinkles to both the mixture and coating
Final Thoughts
Cake pops might seem intimidating, but they’re simply a matter of understanding ratios, temperatures, and timing. With this guide, you now have the knowledge to troubleshoot any issue and create bakery-quality cake pops at home. Remember: practice makes perfect, and even “failed” cake pops usually taste amazing!
The key to cake pop mastery isn’t perfection on the first try—it’s understanding why each step matters. Armed with this knowledge, you’re ready to create stunning cake pops that not only look professional but taste incredible too.
The Only Cake Pop Recipe You’ll Ever Need: A Step-by-Step Guide for Perfect Results
Course: DessertCuisine: AmericanCake Pop
24
Cake PopPrep time
20
minutesCooking time
25
minutesCalories
150
kcalIngredients
1 box of cake mix (plus ingredients listed on box)
1 cup frosting (store-bought or homemade)
2 cups chocolate or candy melts
Sprinkles (optional)
Cake pop sticks
Directions
- Bake the cake according to package instructions and let it cool completely.
- Crumble the cooled cake into fine crumbs in a large bowl.
- Mix in frosting gradually until the mixture holds together when pressed.
- Roll into small balls (about 1 inch) and place them on a baking sheet lined with parchment paper.
- Chill the balls in the refrigerator for at least 30 minutes.
- Melt chocolate or candy melts according to package directions.
- Dip the tip of each cake pop stick into melted chocolate, then insert halfway into each cake ball.
- Dip each cake pop fully into the melted chocolate, gently tapping off excess.
- Decorate with sprinkles if desired.
- Let cake pops set upright in a styrofoam block or cake pop stand until chocolate hardens.