The Best Fluffy Pancakes recipe you will fall in love with. Full of tips and tricks to help you make the best pancakes.
Guide to Thanksgiving Stuffing: Ratios, Science, & The “Soggy-Proof” Method
The Golden Ratio for Perfect Stuffing
Bread: 1 pound (Dried, not just stale)
Liquid: 2.5 cups (Stock + Egg binder)
Fat: 1/2 cup (Butter or Sausage fat)
Temp: 350°F (175°C) for 45 mins
Key Insight: Drying bread in the oven works better than air-drying to prevent mushiness.
If you’ve ever wondered how to make stuffing that’s crispy on top, tender in the middle, and never soggy, you’re in the right place. The best Thanksgiving stuffing isn’t about following your great-aunt’s vague “add enough stock until it looks right” advice—it’s about understanding the science behind what makes this holiday staple truly exceptional.
Let’s be honest: most stuffing recipes fail because they treat bread preparation as an afterthought. The difference between restaurant-quality dressing and a mushy disappointment comes down to moisture control, fat distribution, and proper binding. This guide will walk you through the exact ratios, techniques, and troubleshooting strategies that professional chefs use to create stuffing worth fighting over at the dinner table.
Why “Stale” Bread is a Myth (And Why You Must “Dry” It)
Here’s where most home cooks go wrong: they think leaving bread on the counter overnight creates the ideal stuffing base. It doesn’t. What you’re actually experiencing is retrogradation—a process where starch molecules crystallize and the bread becomes firm. But firmness isn’t the goal; dryness is.
When bread dries in the oven, you’re actively removing moisture through evaporation. This creates a porous structure that can absorb liquid evenly without turning to mush. Stale bread still contains significant moisture content trapped inside, which means when you add your stock mixture, you’re essentially waterlogging already-hydrated bread cells.
The correct method: Cut your bread into 3/4-inch cubes and spread them on baking sheets. Bake at 250°F for 45-60 minutes, stirring every 15 minutes, until the cubes are completely dry and lightly golden. They should feel light and crispy, not just firm. This single step is the difference between stuffing that holds its structure and stuffing that collapses into porridge.
Choosing Your Bread: The Comparison You Need
Not all bread performs equally in stuffing. The absorbency, structural integrity, and flavor contribution vary dramatically. Here’s your decision-making framework:
| Bread Type | Absorbency | Flavor Profile | Best For… |
|---|---|---|---|
| Sourdough | High | Tangy, Complex | Sausage Stuffing |
| White Sandwich | Medium | Neutral, Classic | Traditional/Kids |
| Cornbread | Low | Sweet, Crumbly | Southern Style |
| Baguette | High | Crusty, Chewy | Mushroom/Herb |
Pro tip: The best bread for stuffing is white sandwich bread dried in the oven, not left out on the counter. Its neutral flavor profile allows your seasonings to shine, while its medium absorbency creates the perfect texture balance.
For those exploring alternatives, gluten-free bread options have improved dramatically. Look for brands with xanthan gum or psyllium husk, which provide structural integrity similar to gluten. Canyon Bakehouse and Schar both perform well in blind taste tests, though you’ll need to reduce your liquid by about 1/4 cup to account for their denser structure.
The Science of the Liquid Ratio
Here’s your non-negotiable rule: Use 2.5 to 3 cups of liquid for every 1 pound of dry bread for a moist but structure-rich texture. But not all at once.
Your liquid mixture should consist of:
- 2 cups chicken or vegetable stock (warm, not cold)
- 2 large eggs (for binding and richness)
- 1/2 cup melted butter or reserved fat
The eggs are critical here—they create a custard-like binding effect that holds the bread together without making it gummy. Many traditional recipes skip the eggs entirely, which is why their stuffing falls apart when served.
Temperature matters: Cold liquid causes the butter to solidify on contact, creating uneven pockets of fat. Warm stock (around 120°F) ensures even distribution and begins the absorption process immediately.
The Aromatic Foundation: Where Flavor Actually Happens
Before you even think about combining bread and liquid, you need to build your flavor base. This is where amateur recipes say “sauté onions and celery” and leave you hanging.
The detailed method:
- Sweat your vegetables slowly: Heat 1/2 cup butter or fat in a large skillet over medium-low heat. Add 2 cups diced onion and 1.5 cups diced celery. Cook for 12-15 minutes, stirring occasionally, until completely softened and translucent but not browned. This concentrates their natural sweetness.
- Activate your herbs: Add herbs to the butter while sautéing to activate the oil-soluble flavors. Fresh thyme, sage, and parsley release different compounds when cooked in fat versus added raw. Use 2 tablespoons fresh thyme, 1 tablespoon fresh sage, and 1/2 cup fresh parsley.
- Toast your aromatics: In the last 2 minutes, add 4 minced garlic cloves. This removes the harsh bite while preserving the aromatic complexity.
Assembly: The Step-by-Step Process
- Combine dry ingredients: In your largest mixing bowl, combine 1 pound dried bread cubes with your cooled sautéed vegetable mixture. Toss thoroughly to distribute the aromatics evenly.
- Create your liquid mixture: Whisk together warm stock, eggs, and any additional melted butter. Season aggressively—the bread will absorb and mellow the salt.
- Gradual hydration: Add liquid in three stages, tossing gently between additions. You want every piece moistened but still able to hold its shape when squeezed.
- The texture test: Grab a handful and squeeze. It should clump together but not drip liquid. If it crumbles apart, add more stock by the tablespoon.
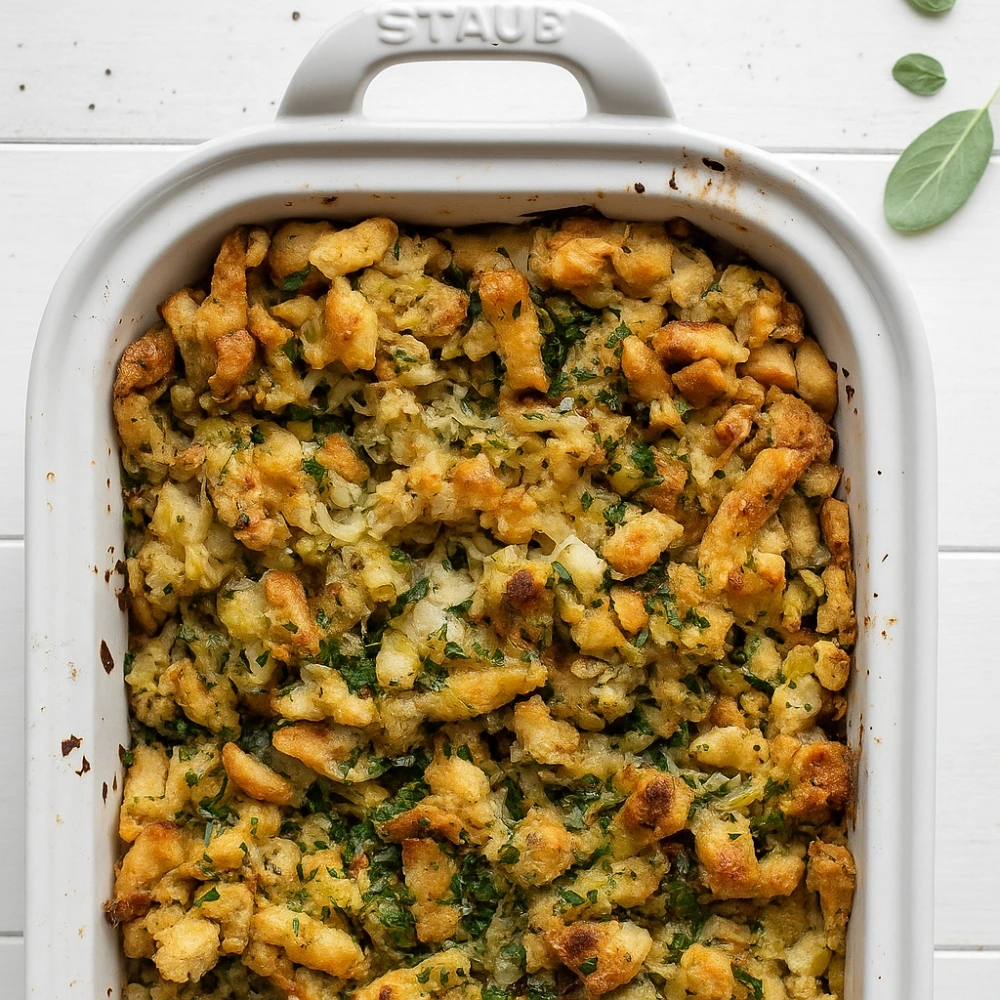
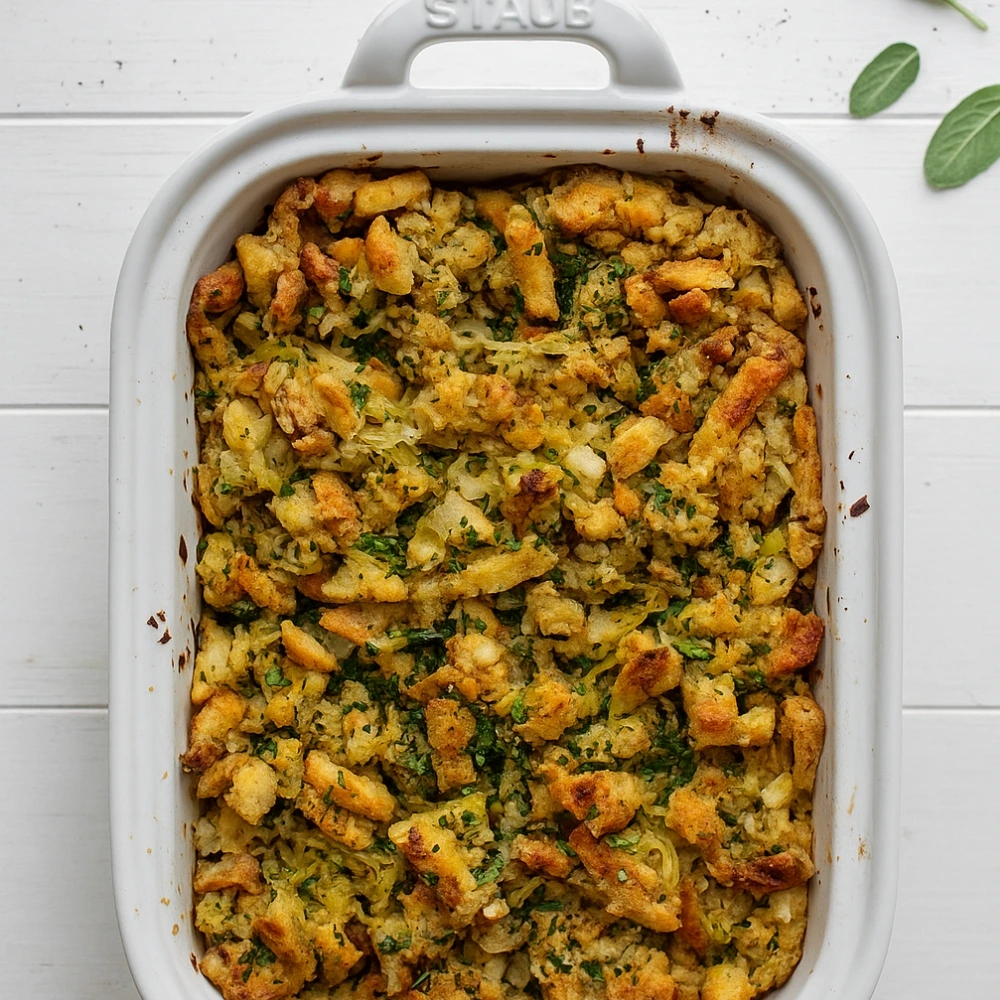
- Pan preparation: Butter a 9×13-inch baking dish generously. Transfer stuffing and spread evenly, but don’t compress it. You want air pockets for crispy bits.
- The two-stage bake: Cover with foil and bake at 350°F for 30 minutes. Remove foil and continue baking for 15-20 minutes until the top is deeply golden and crispy.
Critical note: You should cook stuffing outside the turkey to ensure it reaches 165°F without overcooking the bird. Inside the cavity, stuffing acts as insulation, requiring the turkey to overcook before the center of the stuffing is safe to eat.
Variations: Sausage, Oyster, or Vegetarian?
The beauty of mastering the base technique is that variations become simple substitutions:
Sausage Stuffing: Brown 1 pound Italian sausage (removed from casings) first. Use the rendered fat as part of your butter measurement. The fat carries flavor compounds that complement sage beautifully. Use sourdough bread to stand up to the richness.
Oyster Stuffing: A Mid-Atlantic tradition that sounds intimidating but follows the same principles. Drain 1 pint of oysters, reserving the liquor. Chop oysters roughly and fold them in during the final toss. Use the oyster liquor as part of your stock measurement. White sandwich bread is ideal here.
Vegetarian/Vegan: Replace butter with olive oil (use a robust, fruity variety). Substitute vegetable stock and use flax eggs (1 tablespoon ground flaxseed + 3 tablespoons water per egg, let sit 5 minutes). Add 1 cup toasted walnuts or pecans for richness and textural contrast.
Troubleshooting: How to Fix Common Stuffing Disasters
How to Fix Soggy Stuffing
If your stuffing comes out mushy, you’ve over-hydrated. Don’t panic. Spread it on a baking sheet in a thin layer and return it to a 375°F oven, stirring every 5 minutes. The increased surface area allows moisture to evaporate quickly. In 15-20 minutes, you’ll have crispy, dried-out stuffing that you can return to the serving dish.
How to Fix Dry Stuffing
Dry stuffing is actually easier to rescue. Drizzle 1/4 cup warm stock over the surface, cover tightly with foil, and return to a 350°F oven for 10 minutes. The steam will rehydrate the bread without making it soggy.
Lack of Flavor
If your stuffing tastes bland, you under-seasoned. Stuffing needs more salt than you think—the bread is a massive flavor absorber. Fix it by melting 2 tablespoons butter with 1 teaspoon salt and drizzling it over the finished dish. The fat carries the salt into the bread quickly.
Make-Ahead Strategy: The 3-Day Prep Schedule
Professional caterers don’t make stuffing the morning of Thanksgiving. Here’s their timeline:
Three days before: Cube and dry your bread. Store in an airtight container at room temperature.
Two days before: Sauté your vegetables and aromatics. Cool completely and refrigerate in a sealed container.
One day before: Assemble the stuffing completely but don’t bake. Cover tightly and refrigerate. Add 10-15 minutes to your baking time since it’s starting cold.
Thanksgiving morning: Bring to room temperature for 30 minutes, then bake as directed.
This approach actually improves flavor—the aromatics have time to permeate the bread, creating deeper, more complex taste.
The Bottom Line: Precision Beats Tradition
Great stuffing isn’t about grandma’s secret recipe or mystical cooking intuition. It’s about understanding that bread needs to be dry (not stale), liquid ratios matter, fat carries flavor, and proper technique creates texture.
Master these fundamentals, and you’ll create stuffing that becomes the conversation piece of your Thanksgiving table. The crispy top, the tender interior, the perfect balance of savory aromatics—it’s all achievable when you approach this classic dish with the respect it deserves.
Now you have the knowledge. The rest is just execution.
Ready to explore more Thanksgiving techniques? Check out our complete guide to turkey brining science and our comparison of potato varieties for the perfect mash.

Guide to Thanksgiving Stuffing: Ratios, Science, & The “Soggy-Proof” Method
Course: DinnerCuisine: AmericanServings
8–10
servingsPrep time
20
minutesCooking time
45
minutesCalories
250
kcalIngredients
1 lb (450 g) day-old French or country bread, cut into ¾-inch cubes (about 10–12 cups)
6 Tbsp unsalted butter, plus more for greasing
1 large onion, finely chopped
3 ribs celery, finely chopped
2 garlic cloves, minced
1½ tsp kosher salt (plus more to taste)
½ tsp black pepper
2 tsp poultry seasoning or 1½ tsp dried sage + ½ tsp dried thyme
2 Tbsp fresh parsley, chopped (optional but great)
2 large eggs, lightly beaten
2–2½ cups low-sodium chicken or vegetable broth (add as needed to moisten)
Optional mix-ins: ½ cup dried cranberries, ½ cup chopped toasted pecans, ½ lb (225 g) sausage (browned and drained)
Directions
- Dry the bread: Preheat oven to 300°F (150°C). Spread bread cubes on 2 sheets and bake 12–15 minutes until dry but not browned. Cool. (Skip if using very dry day-old bread.)
- Sauté aromatics: Increase oven to 350°F (175°C). In a large skillet, melt butter over medium heat. Cook onion and celery with a pinch of salt until soft, 8–10 minutes. Stir in garlic, poultry seasoning (or sage/thyme), pepper; cook 1 minute. Remove from heat.
- Combine: In a large bowl, toss dried bread with the warm vegetable mixture and parsley. Add optional mix-ins if using.
- Moisten: Whisk eggs with 2 cups broth. Pour over bread and toss until evenly moistened; add more broth as needed—the cubes should be hydrated but not soggy. Taste and adjust salt.
- Bake: Grease a 9×13-inch (23×33 cm) baking dish. Pack stuffing in, cover with foil, and bake 30 minutes. Uncover and bake 10–15 minutes more until the top is golden and crisp and the center is hot.
- Serve: Rest 5 minutes; fluff with a fork and serve.