The Best Fluffy Pancakes recipe you will fall in love with. Full of tips and tricks to help you make the best pancakes.
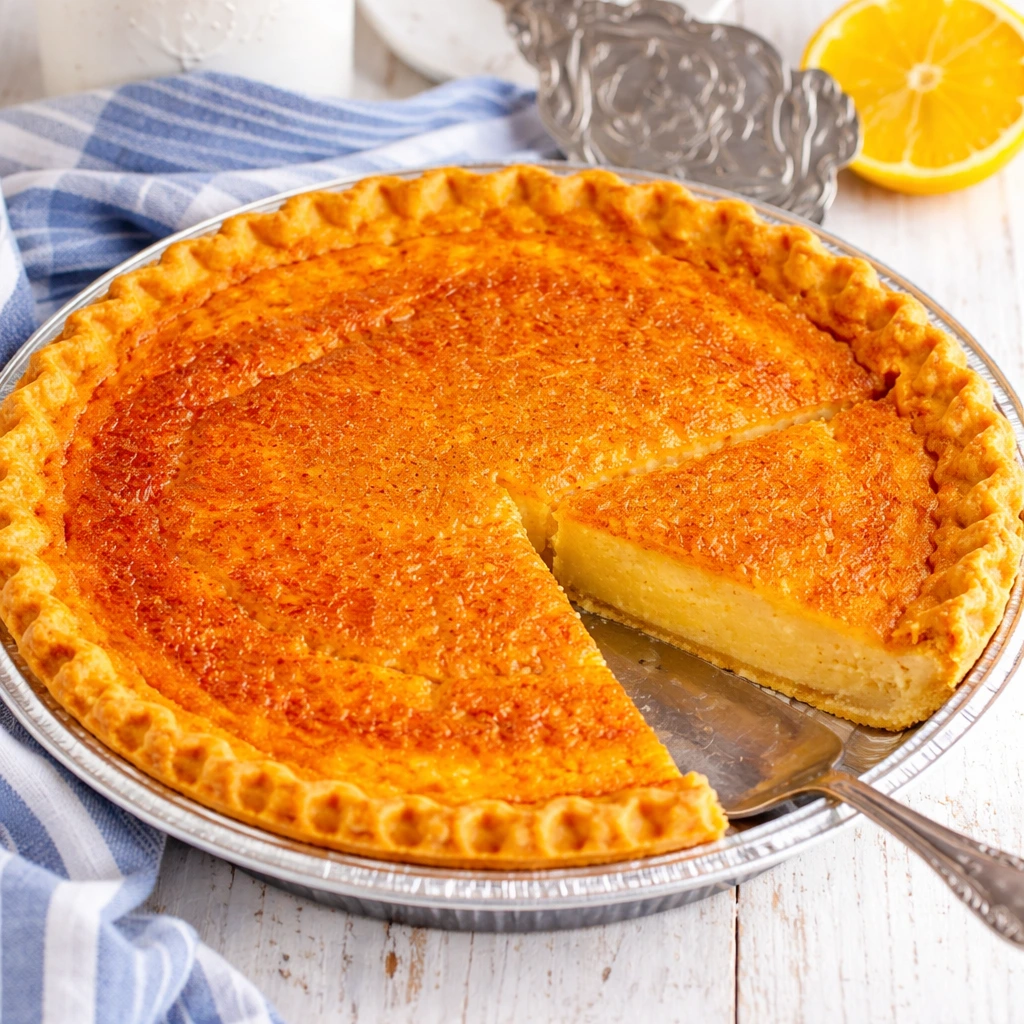
Old Fashioned Buttermilk Pie (The Only Recipe You Need)

A classic Southern Buttermilk Pie is a custard-based dessert known for its tangy, sweet flavor and creamy texture. Unlike Chess Pie (which uses cornmeal), Buttermilk Pie relies on a blend of eggs, sugar, butter, and buttermilk for a smooth finish. Prep time: 10 mins. Bake time: 50 mins.
Buttermilk Pie vs Chess Pie: What’s the Difference?
Many people confuse these two Southern classics, but they’re quite distinct. Here’s a clear comparison:
| Feature | Buttermilk Pie | Chess Pie | Custard Pie |
|---|---|---|---|
| Key Ingredient | Buttermilk (acidic dairy) | Cornmeal + vinegar | Regular milk/cream |
| Texture | Creamy, smooth, custard-like | Slightly grainy, denser | Silky, jelly-like |
| Flavor Profile | Tangy with balanced sweetness | Very sweet, less tang | Mild, sweet, vanilla-forward |
| Origin | Southern US, 1800s | England/Southern US | European |
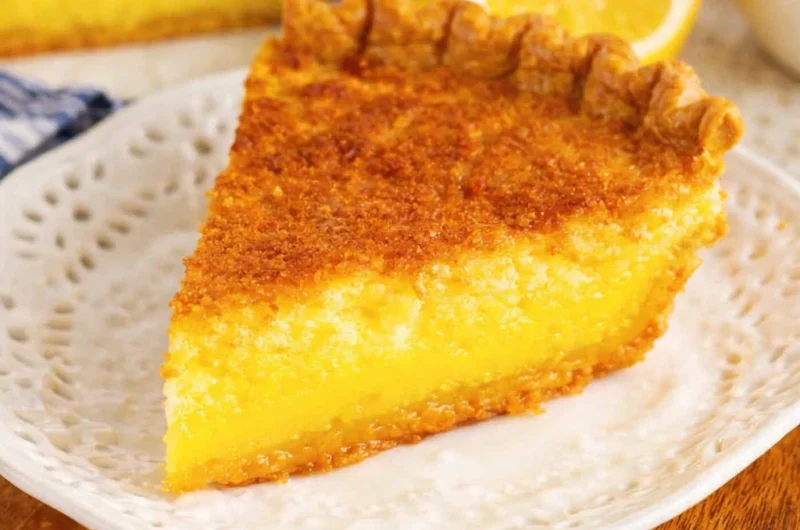
| Appearance | Golden, slight shine | Crackled top layer | Pale, smooth surface |
The Sensory Profile: What to Expect
- Tangy: 3/5 – Bright buttermilk acidity cuts sweetness
- Sweet: 5/5 – Rich sugar content balanced by tang
- Creamy: 5/5 – Smooth, custard-like mouthfeel
- Buttery: 4/5 – Rich, satisfying finish
- Texture: Velvety with slight firmness when set
The Foolproof Buttermilk Pie Recipe
Ingredients You’ll Need:
- 1 unbaked 9-inch pie crust (homemade or store-bought)
- 1½ cups granulated sugar
- 3 tablespoons all-purpose flour
- 3 large eggs (room temperature)
- ½ cup unsalted butter, melted and slightly cooled
- 1 cup buttermilk (room temperature)
- 1 tablespoon fresh lemon juice
- 1 teaspoon vanilla extract
- Pinch of salt
Step-by-Step Instructions (With the Logic Behind Each Step)
Step 1: The Foundation – Prepare Your Oven & Crust
The Action: Preheat your oven to 350°F (175°C). Place your unbaked pie crust in a 9-inch pie pan and crimp the edges.
The Logic: Starting with a consistent oven temperature ensures even baking. A properly crimped edge prevents shrinkage and creates that classic pie appearance.
Step 2: The Dry Mix – Preventing Lumps
The Action: In a large bowl, whisk together the sugar, flour, and salt until completely combined.
The Logic: Pre-mixing flour with sugar prevents clumping when wet ingredients are added. The sugar granules separate flour particles, ensuring a smooth filling without lumps. This is critical for achieving that creamy texture.
Step 3: The Emulsion – Why Room Temperature Matters
The Action: In a separate bowl, lightly beat the room-temperature eggs. Add the melted (but not hot) butter, room-temperature buttermilk, lemon juice, and vanilla. Mix gently until just combined—do not overbeat.
The Logic: Room temperature ingredients emulsify smoothly, creating a stable mixture. Cold eggs won’t incorporate properly with warm butter, leading to separation. Overbeating introduces air bubbles that cause layering as the pie bakes. Gentle mixing is your secret weapon here.
Pro Tip: If you forgot to bring your eggs and buttermilk to room temperature, place eggs in warm (not hot) water for 5 minutes, and microwave buttermilk for 10-15 seconds.
Step 4: The Combination
The Action: Pour the wet ingredients into the dry mixture. Stir gently with a whisk or wooden spoon until just combined and smooth. Some small lumps are okay—they’ll dissolve during baking.
The Logic: Adding wet to dry (rather than vice versa) gives you better control over consistency and prevents overmixing.
Step 5: The Bake – Mastering the Jiggle Test
The Action: Pour the filling into your prepared crust. Bake for 45-55 minutes. The pie is done when the edges are set and golden, but the center still has a slight jiggle (about 2-3 inches in diameter).
The Logic: Custard pies continue cooking from residual heat after removal from the oven. If you wait until the center is completely set in the oven, you’ll end up with an overcooked, cracked pie. The “jiggle test” is your best indicator—think of it like Jello that hasn’t fully set. If it waves gently when you shake the pan, it’s perfect.
Step 6: The Cool Down
The Action: Remove from oven and cool on a wire rack for at least 2 hours. Refrigerate for 3-4 hours before serving for best texture.
The Logic: The custard needs time to fully set as it cools. Cutting too early results in a runny filling. Patience pays off with clean, beautiful slices.
Troubleshooting: Common Buttermilk Pie Problems Solved
Q: Why is my buttermilk pie runny?
A: The most common culprits are underbaking or using cold ingredients. Make sure your pie reaches the proper internal temperature (around 170°F at the edges). Additionally, cold eggs and buttermilk won’t emulsify correctly, leading to a loose filling that never fully sets. Always bring ingredients to room temperature and use the jiggle test rather than relying solely on time.
Q: Why did my pie separate into layers?
A: This happens when too much air is incorporated during mixing. Overbeating the eggs creates bubbles that rise during baking, causing the filling to separate. Mix gently and just until combined. Also, ensure your oven temperature is accurate—baking too hot can cause rapid bubbling and separation.
Q: Can you freeze buttermilk pie?
A: Yes! Buttermilk pie freezes beautifully for up to 2 months. See the detailed instructions below.
Q: Why did my pie crack on top?
A: Overbaking is usually the cause. Remove the pie when there’s still a slight jiggle in the center. The residual heat will finish the cooking without causing cracks.
Q: How long does buttermilk pie last?
A: Store covered in the refrigerator for up to 4 days. The texture is best within the first 2-3 days.
How to Freeze and Reheat Buttermilk Pie
One of the best things about this old fashioned Southern buttermilk pie is how well it freezes, making it perfect for make-ahead entertaining or preserving leftovers.
Freezing Instructions:
- Cool Completely: Let the pie cool to room temperature, then refrigerate for at least 4 hours until fully chilled.
- Wrap Properly: Wrap the entire pie (in its pan) tightly with plastic wrap, ensuring no air pockets. Follow with a layer of aluminum foil.
- Label & Freeze: Write the date on the foil and freeze for up to 2 months.
- Individual Slices: For single servings, cut the pie and wrap each slice individually in plastic wrap, then place in a freezer bag.
Thawing & Reheating:
- Slow Thaw: Transfer the wrapped pie to the refrigerator 24 hours before serving. This gradual thawing prevents condensation and texture changes.
- Room Temperature: Let sit at room temperature for 30 minutes before serving for the best flavor.
- Optional Warmth: If you prefer it slightly warm, heat individual slices in a 300°F oven for 10-12 minutes.
Delicious Variations to Try
Once you’ve mastered the classic recipe, these variations add exciting twists while maintaining that signature creamy custard texture:
Lemon Buttermilk Pie
Add 1 tablespoon of lemon zest and increase lemon juice to 2 tablespoons for a brighter, more citrus-forward version. The extra acidity enhances the tang beautifully.
Gluten-Free Buttermilk Pie
Swap the all-purpose flour for a 1:1 gluten-free baking blend. Use a gluten-free pie crust, and the rest of the recipe remains exactly the same. The texture is virtually identical.
Chocolate Buttermilk Pie
Add ¼ cup of cocoa powder to the dry ingredients and reduce flour to 2 tablespoons. You’ll get a rich, chocolatey custard with that characteristic buttermilk tang.
Coconut Buttermilk Pie
Stir in ¾ cup of sweetened shredded coconut to the filling before baking. The coconut adds texture and a tropical note that complements the tang perfectly.
Serving Suggestions
This buttermilk pie shines with simple accompaniments:
- Fresh Berries: Strawberries, blueberries, or blackberries add freshness and color
- Whipped Cream: A dollop of lightly sweetened whipped cream balances the tang
- Vanilla Ice Cream: The cold creaminess contrasts beautifully with the pie’s texture
- Mint Garnish: A fresh mint leaf adds visual appeal and a hint of brightness
Final Thoughts: Your Foolproof Path to Pie Perfection
Creating the perfect buttermilk pie recipe isn’t about luck—it’s about understanding the science and following proven techniques. By bringing ingredients to room temperature, mixing gently, and trusting the jiggle test, you’re guaranteed a creamy, tangy, absolutely delicious pie every time.
This Depression-era dessert has endured for good reason: it’s simple, affordable, and absolutely delicious. Whether you’re baking for a holiday gathering, a Sunday dinner, or just because you’re craving something sweet with a Southern soul, this recipe won’t let you down.
Now that you understand the difference between buttermilk pie vs chess pie, know how to prevent a runny filling, and can confidently freeze leftovers, you have everything you need to make this recipe your own. Happy baking!
Old Fashioned Buttermilk Pie (The Only Recipe You Need)
Course: cake ideas, DessertsCuisine: AmericanServings
4
servingsPrep time
15
minutesCooking time
50
minutesCalories
355
kcalIngredients
1 unbaked 9-inch (23 cm) pie crust (homemade or store-bought)
1 cup granulated sugar (200 g)
2 tbsp all-purpose flour (16 g)
1/4 tsp fine salt (1 g)
1/2 cup unsalted butter, melted and cooled (113 g)
3 large eggs (about 150 g without shells)
1 cup buttermilk, well shaken (240 ml)
2 tsp pure vanilla extract (10 ml)
1 tbsp fresh lemon juice (15 ml)
1 tsp lemon zest (optional)
1/4 tsp ground nutmeg (optional, for topping)
Directions
- Prep. Heat oven to 350°F (175°C). Place a rack in the lower-middle position. Set the pie crust into a 9-inch (23 cm) pie plate and crimp edges.
- Dry mix. In a medium bowl, whisk together sugar, flour, and salt until lump-free.
- Add butter & eggs. Whisk in the cooled melted butter. Add eggs one at a time, whisking just to combine after each.
- Finish custard. Whisk in buttermilk, vanilla, lemon juice, and zest until smooth. (Optional: strain the custard for an ultra-silky texture.)
- Fill. Pour the custard into the pie shell. Lightly dust the top with nutmeg if using.
- Bake. Bake 45–55 minutes until the edges are set and the center has a slight jiggle (an instant-read thermometer reads ~175–180°F / 79–82°C in the center). If the crust browns too quickly, tent the edges with foil.
- Cool. Let cool on a rack until room temperature, at least 2 hours; the custard will finish setting as it cools.
- Serve. Slice and serve plain or with lightly sweetened whipped cream. Refrigerate leftovers up to 3 days.