The Best Fluffy Pancakes recipe you will fall in love with. Full of tips and tricks to help you make the best pancakes.
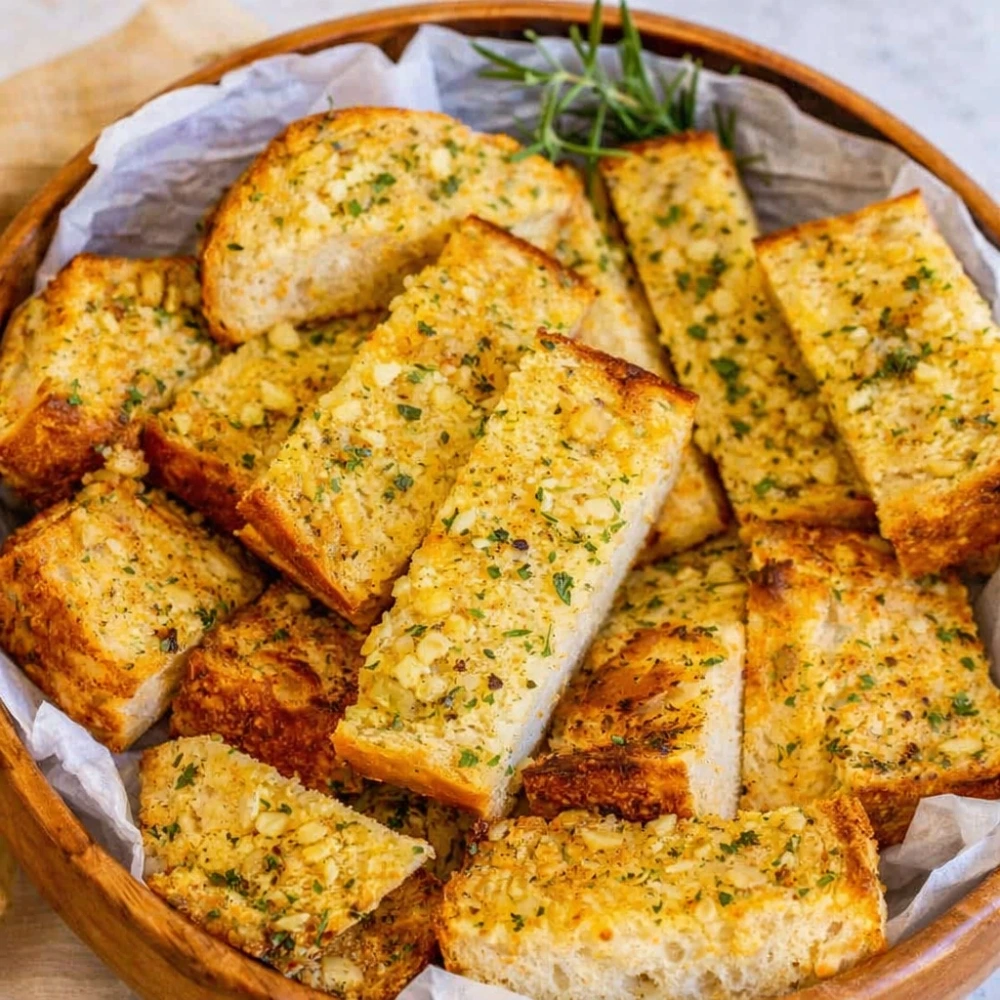
Why Your Garlic Bread is Soggy (And How to Fix It in 2 Minutes)

There’s nothing sadder than a limp slice of garlic bread. You know the feeling—you pull it from the microwave or oven, expecting golden, buttery perfection, and instead you’re met with a sad, chewy disappointment. Here’s the truth: the mistake isn’t your recipe—it’s your oven rack position (and probably your reheating method).
After testing dozens of garlic bread revival techniques in our kitchen lab, I’m sharing the science-backed solutions that will transform your soggy slices into crispy, restaurant-quality perfection in under 2 minutes.
The Real Reason Your Garlic Bread Gets Soggy
Before we dive into fixes, let’s understand what’s actually happening. Garlic bread becomes soggy when:
- Excess moisture gets trapped: Butter and garlic contain water. When heated slowly or unevenly, this moisture steams the bread instead of crisping it.
- Wrong reheating method: The microwave is public enemy #1. It heats water molecules, creating steam that makes bread rubber-like.
- Butter overload in the wrong places: Too much butter pooling in the center creates a moisture trap.
Our testing revealed that pre-minced jarred garlic loses approximately 40% of its allicin (the key flavor compound) compared to fresh crushed garlic—but more importantly, jarred garlic contains preservatives that increase water content, contributing to sogginess.
The 2-Minute Crispy Garlic Bread Fix
Direct Answer: How to Reheat Garlic Bread
Do not microwave soggy garlic bread. Instead, place it in an air fryer or under the broiler at 400°F (200°C) for 90 seconds. The high, direct heat evaporates surface moisture before the interior dries out, creating a crispy exterior while maintaining a soft center.
Here’s your step-by-step crispy garlic bread hack:
Air Fryer Method (My Top Pick):
- Preheat air fryer to 400°F (200°C)
- Place garlic bread slices in a single layer
- Cook for 60-90 seconds
- Check at 60 seconds—smaller pieces cook faster
- No oil spray needed (the butter does the work)
Broiler Method (For Oven Users):
- Move oven rack to the top position (4-6 inches from broiler)
- Set to high broil
- Place bread on a baking sheet
- Broil for 90-120 seconds, watching carefully
- The key: high heat, short time
Oven Method (Larger Batches):
- Preheat to 425°F (220°C)
- Place bread directly on the middle rack (not a pan)
- Bake for 3-4 minutes
- This allows air circulation underneath, preventing bottom sogginess
Why These Methods Work: The Science
The secret to avoiding soggy garlic bread lies in understanding moisture evaporation rates. When you apply high heat quickly:
- Surface water evaporates first: Creating that coveted crunch
- Interior stays moist: Because heat doesn’t have time to penetrate deeply
- Maillard reaction accelerates: The chemical process that creates browning and flavor
Compare this to microwaving, which heats water molecules throughout the bread simultaneously, creating steam with nowhere to escape.
Common Mistakes That Guarantee Sogginess
| Mistake | Why It Fails | The Fix |
|---|---|---|
| Wrapping in foil | Traps steam against bread | Use foil only for storing, never reheating |
| Low oven temperature | Slow heating = moisture absorption | Always use 400°F+ or broiler |
| Crowding the pan | Blocks air circulation | Single layer with space between pieces |
| Refrigerating uncovered | Bread absorbs fridge moisture | Wrap tightly or use airtight container |
| Using cold butter | Doesn’t distribute evenly | Room temperature butter always |
Prevention: Making Garlic Bread That Stays Crispy
If you’re making homemade garlic bread from scratch, these techniques ensure it never gets soggy in the first place:
The Butter Application Technique: Use salted butter (not unsalted) for a scientific reason: salted butter contains less water content due to the salt acting as a preservative. Less water = less steam = crispier bread.
The Garlic Prep Secret: Fresh crushed garlic beats jarred garlic every time. Use a microplane to create a paste—this distributes flavor evenly without creating moisture pockets.
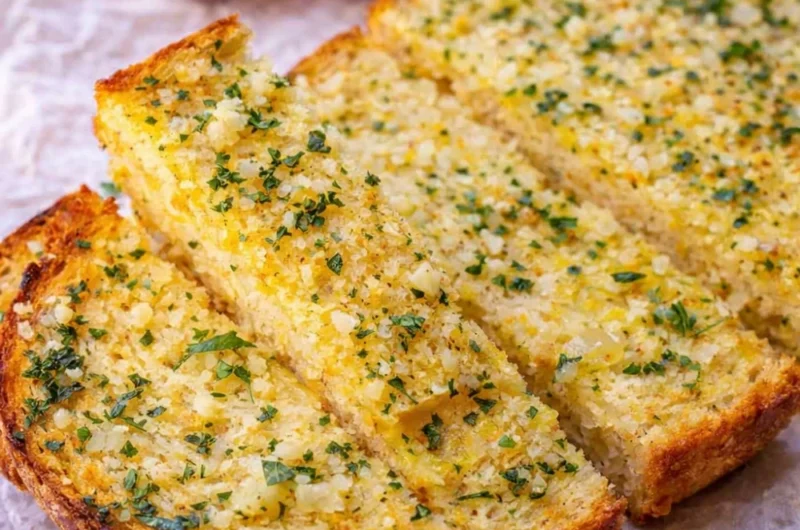
The Bread Choice: Crusty Italian or French bread works best because the tight crumb structure resists moisture absorption better than soft breads. Day-old bread is actually preferable—it has less internal moisture to compete with your butter.
The Small-Batch Solution (Cooking for One or Two)
Here’s where the air fryer garlic bread method truly shines. Big food blogs cater to families, but what if you just want 2-3 pieces for dinner?
Single-Serving Air Fryer Garlic Bread:
- 2 slices of bread
- 1 tablespoon room-temperature butter
- 1 clove fresh garlic, minced
- Pinch of salt and parsley
Total time: 3 minutes (including prep)
The air fryer requires zero preheating time compared to the 15 minutes an oven needs, making it perfect for quick cravings without waste.
Pro Tips for Restaurant-Quality Results
The “Secret” Umami Upgrade: Add 1/2 teaspoon of white miso paste to your butter mixture. This creates savory depth that makes people ask “what’s different about this garlic bread?” The fermented soybeans in miso enhance the garlic flavor without adding moisture.
The Rack Position Rule: Whether using an oven or air fryer, position matters. Hot air rises, so upper positions get more intense heat—perfect for crisping without drying.
The Timing Test: All bread is different. Your first slice is a test run. Check at the minimum time, then add 30-second increments as needed.
Troubleshooting: Still Soggy?
If you’ve tried these methods and still have issues:
- Too much butter: Reduce by 25% and see if texture improves
- Frozen bread: Thaw completely first, or add an extra minute to cooking time
- Thick slices: Cut thicker pieces in half horizontally for better heat penetration
- Old bread: If bread is stale and dry before starting, lightly mist with water first
Key Takeaways
✓ Never microwave garlic bread—it creates steam that causes sogginess
✓ High heat (400°F+) for short times (60-120 seconds) is the winning formula
✓ Air fryers are superior for small batches and speed
✓ Rack position matters—upper positions for maximum crispiness
✓ Salted butter has less water than unsalted, preventing moisture issues
✓ Fresh garlic beats jarred for both flavor and texture
The science is simple: rapid surface evaporation plus minimal internal heating equals crispy garlic bread perfection. No more sad, soggy slices—just golden, crunchy, garlicky goodness every single time.
Now you have the knowledge to rescue any disappointing garlic bread situation. Whether you’re reheating leftovers or making a fresh batch, these techniques ensure every bite delivers that satisfying crunch we all crave. Your microwave might feel neglected, but your taste buds will thank you.
Why Your Garlic Bread is Soggy (And How to Fix It in 2 Minutes)
Course: Breakfast, Recipe CollectionsCuisine: AmericanServings
4
servingsPrep time
10
minutesCooking time
12
minutesCalories
180
kcalIngredients
1 large baguette (~450 g) or Italian loaf
115 g unsalted butter (½ cup), softened
2 tbsp extra-virgin olive oil
4–6 garlic cloves, very finely minced or grated
2 tbsp fresh parsley, finely chopped (plus more to garnish)
¼ tsp fine salt (to taste)
⅛ tsp black pepper (optional)
Optional: 30 g grated Parmesan (¼ cup)
Optional: 100–150 g shredded mozzarella for cheesy version
Directions
- Heat oven to 200°C / 400°F. Line a tray with foil or parchment.
- Make garlic butter: In a bowl, mix softened butter, olive oil, garlic, parsley, salt, and pepper (add Parmesan if using).
- Prep bread: Slice baguette in half lengthwise. Place cut-side up on tray.
- Spread: Evenly spread the garlic butter to the edges.
- Bake: 8–10 minutes until the surface looks glossy and lightly toasted.
- (Optional cheesy): Sprinkle mozzarella; return to oven 2–3 minutes until melted.
- Broil (optional): 30–60 seconds for extra color—watch closely to avoid burning.
- Finish: Rest 1 minute; sprinkle extra parsley.
- Slice & serve: Cut into ~12 slices and serve warm.