The Best Fluffy Pancakes recipe you will fall in love with. Full of tips and tricks to help you make the best pancakes.
Backed Sourdough Bread Guide: Fail‑Proof Results for Every Kitchen Climate

This complete sourdough bread guide is built for modern home bakers who want consistent results, not guesswork. You will learn how hydration, fermentation, and climate affect your loaf, with clear adjustments for humidity, flour type, and baking method. This approach combines traditional technique with food science so beginners and experienced bakers can succeed in any kitchen.
Why This Guide Is Different (Modern Sourdough Perspective)
Most sourdough bread recipe for beginners focuses only on steps. This guide explains the why behind each stage. Understanding autolyse, levain strength, hydration, and fermentation temperature allows you to adapt instead of starting over when conditions change.
Wild yeast and lactic acid bacteria behave differently depending on flour protein, ambient temperature, and moisture in the air. By mastering these variables, you gain control over crumb structure, flavor development, and crust formation driven by the Maillard reaction.
Visual Breadcrumbs: What Your Dough Should Look Like
Although photos are not included here, you should document each stage with macro shots for best user experience and SEO performance:
- Shaggy dough after mixing
- Smooth dough after autolyse
- Elastic dough passing the windowpane test
- Aerated dough after bulk fermentation
These visual cues help readers diagnose issues faster than written descriptions alone.
Ingredients and Terminology (Semantic Foundation)
Understanding terminology improves both results and comprehension.
- Flour: Bread flour (12–13% protein) produces a stronger gluten network and more open crumb
- Water: Filtered, room temperature
- Levain: An active sourdough starter at peak fermentation
- Salt: Regulates fermentation and strengthens gluten
Key LSI terms used throughout this sourdough bread guide include autolyse, wild yeast, open crumb, scoring, and hydration.
Step‑by‑Step Sourdough Bread Process
Step 1: Autolyse (Hydration Phase)
Mix flour and water only and rest for 30–60 minutes. This allows enzymes to begin gluten development without oxidation.
Why it matters: Autolyse improves extensibility and reduces the need for aggressive mixing later.
Step 2: Add Levain and Salt
Incorporate the levain followed by salt. Mix gently until combined.
This stage introduces wild yeast and bacteria that drive fermentation and flavor.
Step 3: Stretch and Fold vs. Kneading
Instead of kneading, perform stretch and fold every 30 minutes for the first 2 hours.
Stretch and fold vs. kneading is preferred for sourdough bread because it builds strength while preserving gas bubbles.
Step 4: Bulk Fermentation
Allow the dough to ferment until it increases 30–50% in volume.
Signs of readiness:
- Bubbles along the sides
- Light, airy texture
- Slight jiggle when the bowl is shaken
Adjusting for Climate: Hydration Science
Humidity directly affects flour absorption.
| Kitchen Climate | Recommended Hydration |
|---|---|
| Dry Climate | 72–75% |
| Moderate | 68–72% |
| High Humidity | 65–68% |
Using a sourdough hydration calculator helps maintain dough consistency across seasons.
Shaping, Scoring, and Final Proof
Shape the dough gently to preserve gas. During scoring, shallow cuts control oven spring and loaf expansion.
Proper scoring improves aesthetics and prevents random tearing during baking.
Baking Methods: Dutch Oven vs. Air Fryer
Dutch Oven
- Best for thick crust and maximum oven spring
- Traps steam naturally
Air Fryer
- Faster preheat
- Smaller batch baking
- Requires lower hydration and shorter bake time
Both methods can produce excellent sourdough bread when adjusted correctly.
The No‑Discard Sourdough Method
Instead of throwing away excess starter, use it in pancakes, crackers, or flatbreads. This modern approach reduces waste and improves sustainability.
Sourdough Troubleshooting Guide
| Problem | Likely Cause | Solution |
|---|---|---|
| Dense crumb | Weak starter | Strengthen levain feeding schedule |
| Flat loaf | Over‑proofing | Shorten bulk fermentation |
| Gummy interior | Under‑baked | Extend bake time |
This sourdough troubleshooting section targets common beginner questions and improves long‑tail search visibility.
Build Topical Authority with Supporting Content
For best SEO performance, publish and internally link these cluster articles:
- How to Revive a Weak Sourdough Starter
- The Best Flour for Sourdough: Protein Comparison
- Five Sourdough Scoring Patterns for Beginners
These links reinforce topical authority around sourdough bread.
Final Thoughts
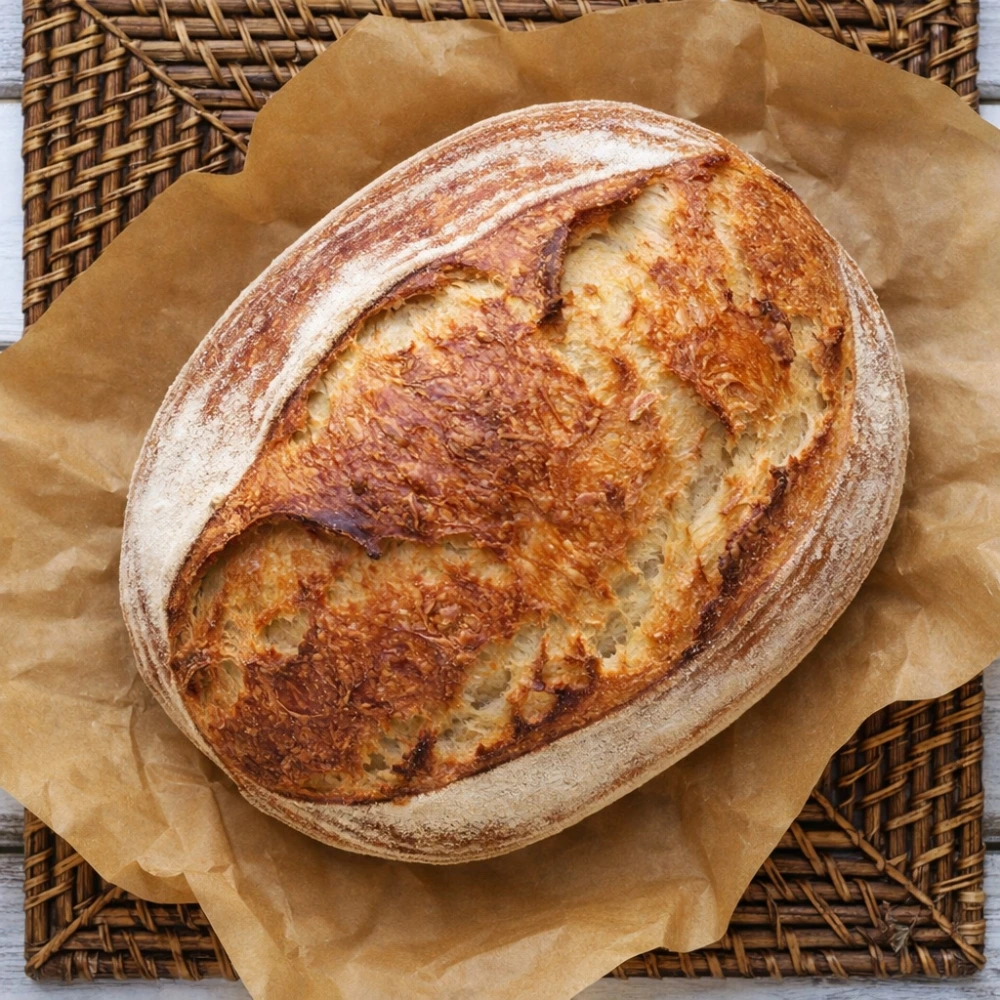
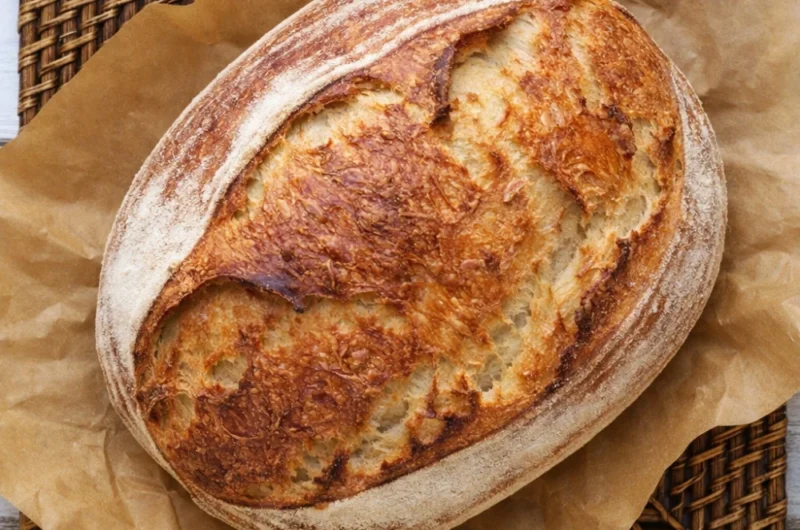
Mastering sourdough bread is about understanding systems, not memorizing recipes. With hydration control, proper fermentation, and adaptable baking methods, sourdough becomes repeatable and reliable. This guide provides the foundation to bake confidently in any kitchen climate while producing flavorful bread with an open crumb and crisp crust.
For best results, pair this guide with Recipe Schema, HowTo Schema, and Video Schema to maximize discoverability and user engagement.
Backed Sourdough Bread Guide: Fail‑Proof Results for Every Kitchen Climate
Course: Breakfast, Desserts, Recipe CollectionsCuisine: AmericanServings
4
servingsPrep time
15
minutesCooking time
50
minutesCalories
170
kcalIngredients
100 g active sourdough starter (100% hydration)
350 g room-temperature water
450 g bread flour
50 g whole wheat flour
10 g fine sea salt
Directions
- Feed Starter (Morning, Day 1): Feed your starter and let it peak (double and bubbly, 4–6 hours at ~24 °C).
- Mix & Autolyse: In a bowl, whisk water with starter. Stir in flours until no dry bits remain. Rest 30 minutes.
- Add Salt: Sprinkle in salt; pinch and fold to incorporate (1–2 minutes).
- Bulk Fermentation (3–5 h): Cover and rest at ~24 °C. During the first 2 hours, do 3–4 sets of stretches & folds every 30 minutes. Dough should rise ~50% and feel airy.
- Pre-Shape & Bench Rest: Lightly flour surface, turn out dough, pre-shape into a round. Rest 20 minutes.
- Final Shape: Shape into a tight boule or batard. Place seam-side up in a floured banneton or towel-lined bowl.
- Cold Proof (Overnight): Cover and refrigerate 8–16 hours.
- Preheat: Place Dutch oven in oven and preheat to 250 °C (482 °F) for 45–60 minutes.
- Score & Bake: Tip dough onto parchment, score 1–2 cm deep. Bake covered 20 minutes at 250 °C, then uncover, reduce to 230 °C (446 °F) and bake 25–30 minutes more until deep golden.
- Cool: Cool on a rack at least 1 hour before slicing to set the crumb.