The Best Fluffy Pancakes recipe you will fall in love with. Full of tips and tricks to help you make the best pancakes.
Homemade Yogurt: A Science-Backed Complete Guide

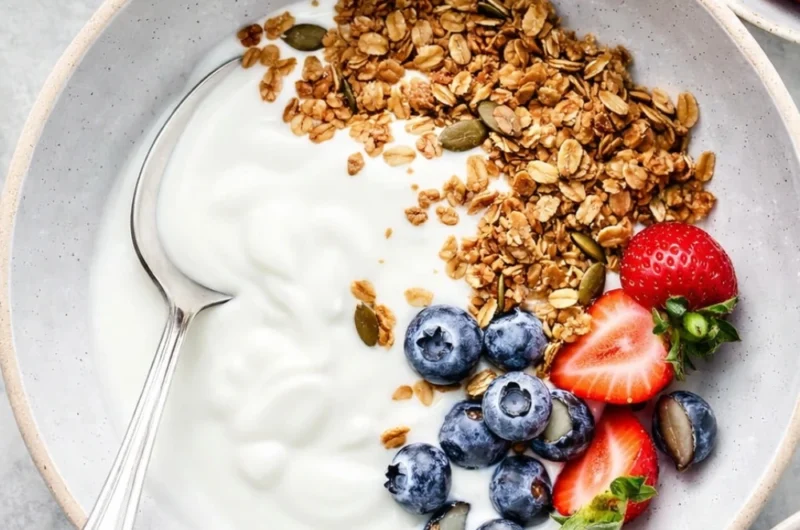
Learning how to make homemade yogurt is not just about following steps; it is about understanding the science that turns milk into a thick, probiotic-rich food. Homemade yogurt relies on controlled heat, precise temperatures, and beneficial bacteria to transform milk sugars into lactic acid. When done correctly, this process creates yogurt that is creamier, more affordable, and nutritionally superior to many store-bought options.
This guide goes beyond basic instructions. It explains why each step matters, provides a yogurt temperature chart, compares incubation methods, and includes a troubleshooting matrix for common problems like runny or grainy yogurt. By the end, you will know exactly how to make homemade yogurt with confidence, even without special equipment.
The Scientific Why Behind Yogurt Making
The foundation of great yogurt is protein structure. Heating milk to 180°F denatures whey proteins, allowing them to bond with casein during fermentation. This creates a thicker, more stable yogurt.
Cooling the milk to the correct range is equally important. Yogurt starter cultures, such as Lactobacillus bulgaricus and Streptococcus thermophilus, thrive between 110°F and 115°F. Any hotter and the bacteria die; any cooler and fermentation slows dramatically.
Milk Type and Thickness Comparison
| Milk Type | Fat Content | Expected Thickness |
|---|---|---|
| Whole Milk | High | Very thick and creamy |
| 2% Milk | Medium | Moderately thick |
| Skim Milk | Low | Thin, requires straining |
| A2 Milk | Medium | Smooth but slightly thinner |
Understanding these variables helps you control the final texture when making homemade yogurt.
Step-by-Step: How to Make Homemade Yogurt
Step 1: Scalding the Milk
Heat the milk slowly to 180°F using a heavy-bottomed pot. Hold it at this temperature for 10 minutes while stirring occasionally.
Tip: Maintaining this temperature improves thickness and prevents troubleshooting runny yogurt later.
Step 2: The Ice Bath Cooling Method
Cool the milk quickly to 110°F–115°F by placing the pot in an ice bath.
Why this matters: Slow cooling can lead to grainy texture due to uneven protein structure.
Step 3: Inoculation with Starter Cultures
Whisk in the yogurt starter (2 tablespoons per quart of milk). Ensure the starter contains live active cultures.
Best yogurt starter cultures include plain Greek yogurt, heirloom starters, or previous homemade batches.
Step 4: Incubation Methods
Choose one of the following incubation options:
- Oven Method: Turn the oven light on and maintain warmth for 8–12 hours
- Instant Pot Yogurt Setting: Provides consistent incubation temperature
- Dehydrator: Set to 110°F for stable results
This stage determines tanginess and probiotic strength.

Yogurt Temperature Chart
| Stage | Temperature |
|---|---|
| Scalding | 180°F |
| Cooling | 110°F–115°F |
| Incubation | 105°F–115°F |
This yogurt temperature chart is essential for repeatable success.
Troubleshooting Matrix (Problem-Solving Hub)
| Problem | Likely Cause | The Fix |
|---|---|---|
| Runny Yogurt | Milk not heated long enough | Heat to 180°F for 10 minutes |
| Grainy Texture | Milk cooled too slowly | Use an ice bath |
| Too Sour | Incubated too long | Reduce incubation to 7 hours |
| No Set | Weak starter cultures | Use fresher starter |
This section addresses the most common searches related to troubleshooting runny yogurt and texture issues.
Homemade Yogurt Cost vs. Store-Bought
Making yogurt at home can reduce costs by 50–70%. One gallon of milk typically yields the equivalent of four large tubs of yogurt at a fraction of the price, with no additives or thickeners.
Beyond savings, homemade yogurt allows full control over ingredients, fermentation time, and flavor.
Frequently Asked Questions
Why is my homemade yogurt grainy?
Grainy yogurt is usually caused by slow cooling or overheating during incubation.
How to make yogurt without a thermometer?
Use the finger test: milk should feel warm but not hot enough to burn after cooling.
Instant Pot vs. Sous Vide yogurt: which is better?
Instant Pot is easier; sous vide offers precision but requires more setup.
Final Thoughts
Understanding how to make homemade yogurt transforms a simple recipe into a repeatable system. By combining temperature control, quality starter cultures, and proper incubation, you can produce thick, flavorful yogurt every time. This method builds not just a recipe, but a foundational skill for healthier, more cost-effective eating.
For next steps, explore guides on straining yogurt into Greek yogurt or flavoring yogurt naturally with fruit and honey.
Homemade Yogurt: A Science-Backed Complete Guide
Course: Breakfast, Recipe CollectionsCuisine: AmericanServings
4
servingsPrep time
00
minutesCooking time
20
minutesCalories
150
kcalIngredients
4 cups (1 liter) whole or 2% milk
2 tablespoons plain yogurt with live active cultures (starter)
(Optional) 2–3 tablespoons milk powder for thicker yogurt
Directions
- Heat the milk: In a saucepan over medium heat, warm milk to 82–85°C (180–185°F), stirring to prevent scorching (~PT15M).
- Cool: Remove from heat and cool to 43–46°C (110–115°F). Speed it up by placing the pot in a cool water bath, stirring (~PT20–30M).
- Prepare starter: In a small bowl, whisk the starter yogurt until smooth. Stir in 1/2 cup warm milk to temper.
- Combine: Whisk the tempered starter back into the pot until evenly mixed. If using milk powder, whisk it in now.
- Incubate: Transfer to a clean jar, cover, and keep at 43–46°C (110–115°F) for 8 hours (up to 12 for tangier yogurt). Use an oven with light on, yogurt maker, insulated cooler, or warm spot.
- Check & chill: When set (it should jiggle as one mass), refrigerate at least 4 hours to firm up.
- Optional strain: For Greek-style yogurt, strain through a lined sieve in the fridge 2–4 hours.
- Store: Keeps 7–10 days refrigerated. Reserve 2 Tbsp as starter for your next batch.