The Best Fluffy Pancakes recipe you will fall in love with. Full of tips and tricks to help you make the best pancakes.
ThGuide to Mac and Cheese: Classic Recipes, Irresistible Variations & Expert Tips

There’s something magical about a perfectly crafted mac and cheese recipe. Whether you’re craving nostalgic comfort food or planning to impress dinner guests, mastering this beloved dish unlocks endless culinary possibilities. After years of testing recipes and refining techniques, I’m sharing the ultimate resource that covers everything from the classic baked mac and cheese to innovative variations that’ll transform your cooking repertoire.
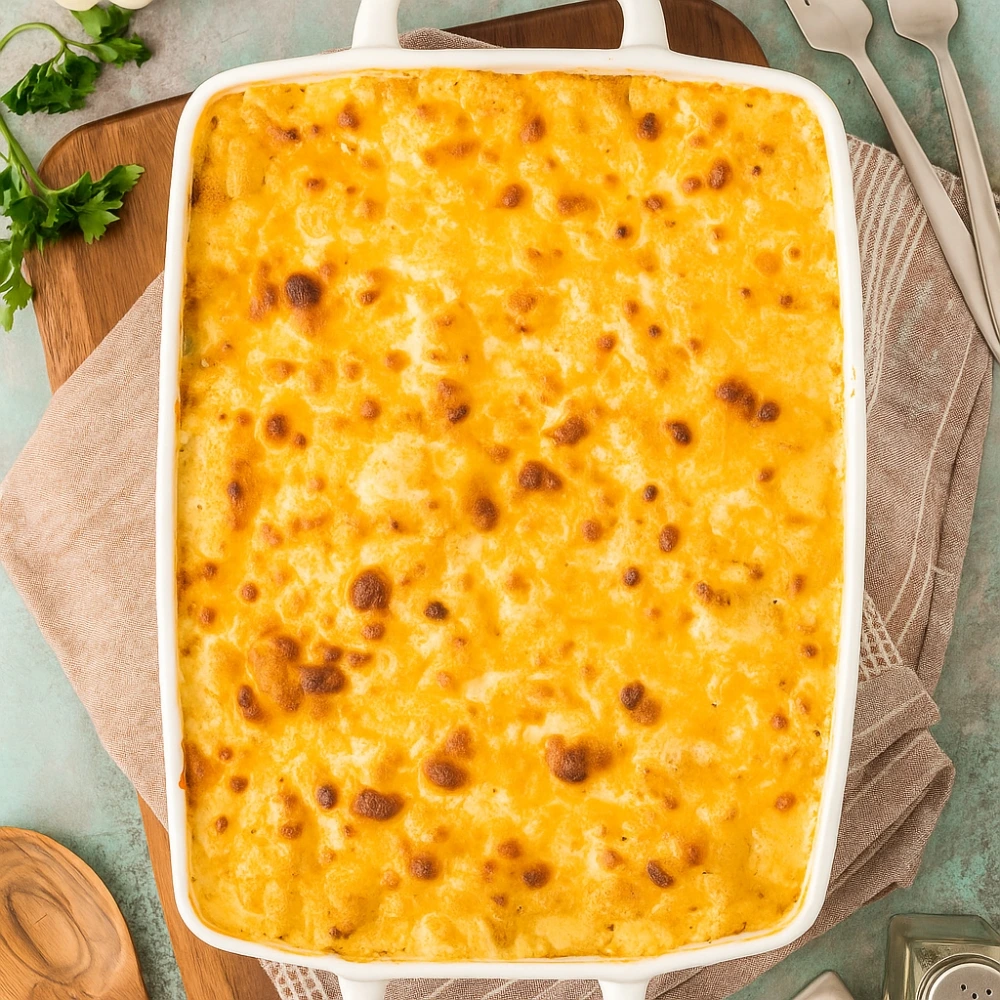
The “Golden Ratio” Classic Baked Mac and Cheese Recipe
What Makes This the Creamiest Mac and Cheese?
The secret to the creamiest, cheesiest baked mac and cheese that never dries out lies in three critical elements: the perfect roux-to-liquid ratio, strategic cheese selection, and proper baking technique. Unlike recipes that leave you with grainy, separated, or dried-out results, this method creates a velvety sauce that stays luxuriously creamy from oven to table.
Ingredients (Serves 8-10)
For the Pasta:
- 1 pound elbow macaroni (or cavatappi for extra sauce-holding power)
- 1 tablespoon salt for pasta water
For the Cheese Sauce:
- 4 tablespoons unsalted butter
- 1/4 cup all-purpose flour
- 3 cups whole milk (warmed)
- 1 cup heavy cream
- 2 cups sharp cheddar cheese, freshly shredded
- 1 cup Gruyère cheese, freshly shredded
- 1 cup fontina cheese, freshly shredded
- 1 teaspoon Dijon mustard
- 1/2 teaspoon garlic powder
- 1/4 teaspoon cayenne pepper
- Salt and black pepper to taste
For the Topping:
- 1 cup panko breadcrumbs
- 2 tablespoons melted butter
- 1/2 cup Parmesan cheese, grated
- 1 teaspoon smoked paprika
Step-by-Step Instructions
Step 1: Prepare Your Ingredients
Preheat your oven to 350°F (175°C). Butter a 9×13-inch baking dish generously. Shred all cheeses fresh—pre-shredded varieties contain anti-caking agents that prevent smooth melting and create that disappointing grainy texture.
Step 2: Cook the Pasta
Boil pasta in heavily salted water until just under al dente (about 2 minutes less than package directions). The pasta will continue cooking in the oven, so undercooking at this stage prevents mushy results. Drain and set aside without rinsing.
Step 3: Create the Roux
In a large heavy-bottomed pot over medium heat, melt butter completely. Add flour and whisk continuously for 2-3 minutes until the mixture turns light golden and develops a nutty aroma. This crucial step removes the raw flour taste and creates the foundation for your creamy mac and cheese sauce.
Step 4: Build the Cheese Sauce
Gradually add warmed milk and cream while whisking constantly to prevent lumps from forming. Continue whisking until the sauce thickens enough to coat the back of a spoon, approximately 5-7 minutes. The sauce should have a consistency similar to thick cream. Remove from heat before adding cheese.
Step 5: Add the Cheese
Add mustard, garlic powder, cayenne, salt, and pepper to the white sauce. Incorporate cheeses one handful at a time, stirring until each addition melts completely before adding more. The residual heat melts the cheese without breaking the sauce—this is how you prevent graininess.
Step 6: Combine and Layer
Fold cooked pasta into the cheese sauce until every piece is thoroughly coated. The mixture should look almost soupy at this stage. Transfer to the prepared baking dish, spreading evenly to ensure consistent cooking.
Step 7: Create the Topping
Mix panko breadcrumbs with melted butter, Parmesan cheese, and smoked paprika. Sprinkle this mixture evenly over the mac and cheese for a golden, crunchy contrast to the creamy interior.
Step 8: Bake to Perfection
Bake uncovered for 25-30 minutes until the topping is golden brown and the edges are bubbling vigorously. Let rest for 5-10 minutes before serving—this allows the sauce to set slightly, making it easier to serve while maintaining that perfect creamy texture.
Why This Recipe Works: The Science Behind Perfect Mac and Cheese
The Roux Foundation
A properly cooked roux creates a stable emulsion that prevents cheese separation. The flour’s starches swell in the liquid, creating a smooth base that suspends the fat from the cheese. This scientific principle is why your mac and cheese stays creamy rather than becoming greasy with pools of separated oil on top.
The Cheese Ratio Strategy
Using three different cheeses isn’t just about flavor complexity—each serves a specific purpose:
- Sharp cheddar provides that classic tangy mac and cheese taste and bold flavor
- Gruyère adds nutty depth and exceptional melting properties
- Fontina contributes superior creaminess and helps prevent graininess
The combination creates a more stable, flavorful sauce than any single cheese could achieve alone.
Why Shred Your Own Cheese
This tip cannot be overstated: pre-shredded cheese contains cellulose (wood pulp) and other anti-caking agents that interfere with smooth melting. Best cheese for mac and cheese always means freshly shredded cheese that melts into a silky, cohesive sauce without the grainy texture that plagues many homemade versions.
The Role of Acid
That teaspoon of Dijon mustard isn’t just for flavor—the acid brightens the cheese’s taste and helps keep the proteins in the cheese from clumping together, maintaining that smooth, luxurious texture we’re all chasing.
Beyond the Classic: Popular Mac and Cheese Variations
| Variation | Key Difference | Best For | Prep Time |
|---|---|---|---|
| Stovetop Mac and Cheese | No baking required; ready in 20 minutes | Weeknight dinners, quick meals | 20 min |
| Instant Pot Mac and Cheese | One-pot cooking; pasta cooks directly in sauce | Minimal cleanup, pressure cooking fans | 15 min |
| Vegan Mac and Cheese | Cashew-based or nutritional yeast sauce | Dairy-free diets, plant-based eating | 30 min |
| Gluten-Free Mac and Cheese | Rice or corn pasta; cornstarch thickener | Gluten sensitivities, celiac disease | 35 min |
| Smoked Mac and Cheese | Cooked on grill or smoker for smoky flavor | BBQ gatherings, outdoor cooking | 60 min |
Stovetop Mac and Cheese Recipe (Quick Version)
For those rushed weeknight dinners when you need comfort food fast:
- Cook 1 pound pasta according to package directions
- In the same pot, create a roux with 4 tablespoons butter and 1/4 cup flour
- Add 2 1/2 cups milk, whisking until thickened
- Remove from heat and stir in 3 cups shredded cheese
- Add cooked pasta back to pot, stir, and serve immediately
Pro Tip: This stovetop mac and cheese version delivers creamy results in half the time, perfect for busy families.
Mac and Cheese Troubleshooting: Common Problems Solved
Why Is My Mac and Cheese Grainy?
Problem: Cheese separated or sauce has a gritty, sandy texture.
Solution: The sauce was likely too hot when you added the cheese, causing the proteins to seize and separate. Always remove from heat before adding cheese and use freshly shredded varieties. Temperature control is everything—patience prevents graininess.
Why Did My Baked Mac and Cheese Turn Out Dry?
Problem: After baking, your mac and cheese is dry and stiff instead of creamy.
Solution:
- Undercook your pasta initially (2 minutes less than al dente)
- Use enough sauce—it should look almost soupy before baking
- Don’t overbake; check at 25 minutes
- Cover with foil for the first 15 minutes if your oven runs hot
- Add an extra 1/2 cup of cream to the sauce for insurance
Why Is There Grease Pooling on Top?
Problem: Fat separated from the cheese sauce, creating an oily layer.
Solution: The cheese was added at too high a temperature, or the base sauce wasn’t thick enough to emulsify the fat properly. Ensure your roux-based sauce is properly thickened (coats the back of a spoon) before adding cheese, and always add cheese off heat.
How Do I Prevent My Mac and Cheese From Being Too Thick?
Problem: The sauce is thick and pasty rather than flowing and creamy.
Solution: Add more liquid—warm milk or cream works best. Start with 1/4 cup at a time, stirring until you reach desired consistency. Remember, the sauce will thicken slightly as it cools and bakes.
Best Cheeses for Mac and Cheese: A Complete Pairing Guide
Choosing the right cheese makes or breaks your dish. Here’s what works and why:
For Maximum Creaminess:
- Fontina (rich, buttery, melts beautifully)
- Havarti (mild, super creamy texture)
- Monterey Jack (excellent melting, neutral flavor)
For Bold Flavor:
- Extra-sharp cheddar (tangy, intense cheese flavor)
- Aged Gouda (sweet, caramelized notes)
- White cheddar (sharper than yellow varieties)
For Sophisticated Depth:
- Gruyère (nutty, complex, traditional French choice)
- Comté (similar to Gruyère with subtle sweetness)
- Emmental (mild, slightly sweet Swiss cheese)
The Cheese You Should Avoid:
- American cheese (too processed, artificial taste)
- Mozzarella alone (too stringy, lacks flavor)
- Parmesan as main cheese (too dry, though excellent for topping)
Pro Tip: Always include at least one excellent melting cheese (like fontina or Gruyère) in your blend, even if you want bold cheddar flavor. The ideal formula: 50% flavor cheese + 50% melting cheese = perfect creamy mac and cheese.
Gourmet Add-Ins to Elevate Your Mac and Cheese
Transform your classic mac and cheese recipe into a restaurant-worthy masterpiece:
Protein Add-Ins:
- Truffle Mac: Add 1-2 teaspoons white truffle oil and top with fresh truffle shavings ($$$)
- Lobster Mac: Fold in 1 pound cooked lobster meat before baking (special occasions)
- Bacon Mac: Mix in 8 strips crispy, crumbled bacon (crowd favorite)
- Buffalo Chicken Mac: Add 2 cups diced rotisserie chicken and 1/2 cup buffalo sauce
- Short Rib Mac: Top with braised short rib pieces (ultimate comfort food)
Vegetable Add-Ins:
- Roasted Vegetable Mac: Fold in roasted broccoli, cauliflower, or butternut squash
- Caramelized Onion Mac: Add sweet, jammy onions for depth
- Spinach and Artichoke Mac: Mix in sautéed spinach and chopped artichoke hearts
- Jalapeño Popper Mac: Add diced jalapeños, cream cheese, and bacon bits
Topping Variations:
- Crushed potato chips or Ritz crackers
- French fried onions for crunch
- Everything bagel seasoning
- Crushed cornflakes with brown butter
- Breadcrumb mixed with crushed pretzels
The Best Pasta Shapes for Mac and Cheese
While elbow macaroni is traditional, the best pasta shape depends on your sauce thickness and personal preference:
| Pasta Shape | Sauce-Holding Ability | Best Use Case |
|---|---|---|
| Elbow Macaroni | Medium | Traditional, even distribution |
| Cavatappi | High | Spiral ridges hold extra sauce |
| Shells | Very High | Sauce pools inside shells |
| Campanelle | High | Ruffled edges catch thick sauces |
| Penne | Medium | Tube shape holds sauce well |
| Orecchiette | Very High | Cup shape creates sauce pockets |
Pro Tip: Larger, ridged pasta shapes work best for baked mac and cheese because they hold more sauce and maintain texture during baking.
Instant Pot Mac and Cheese: The Modern Shortcut
This one-pot wonder delivers creamy results in record time:
Ingredients:
- 1 pound elbow macaroni
- 4 cups chicken or vegetable broth
- 2 tablespoons butter
- 1 teaspoon dry mustard
- 3 cups shredded cheese blend
- 1 cup heavy cream
- Salt and pepper
Instructions:
- Add pasta, broth, butter, mustard, salt, and pepper to Instant Pot
- Cook on high pressure for 4 minutes
- Quick release pressure
- Stir in cheese and cream until melted
- Let sit 5 minutes to thicken
This Instant Pot mac and cheese method cuts cooking time in half while delivering comparable creaminess to traditional methods.
Storage and Reheating: Keep It Creamy
Refrigeration Guidelines
Store leftover mac and cheese in an airtight container for up to 4 days. The sauce will thicken considerably in the refrigerator—this is normal and easily fixed during reheating.
Freezing Mac and Cheese
Can you freeze mac and cheese? Absolutely! Here’s how:
- Freeze unbaked mac and cheese for up to 3 months (best results)
- Use freezer-safe containers or heavy-duty aluminum pans
- Thaw overnight in refrigerator before baking
- Add 10-15 minutes to original baking time
- Cover with foil to prevent over-browning
Tip: Freeze in individual portions for quick single servings.
How to Reheat Mac and Cheese
Oven Method (Best):
- Preheat oven to 350°F
- Add 2-3 tablespoons milk per serving to restore moisture
- Cover with foil and bake 20-25 minutes
- Remove foil last 5 minutes to crisp topping
Microwave Method (Quick):
- Add splash of milk or cream
- Heat at 50% power in 30-second intervals
- Stir between intervals
- Continue until heated through (usually 2-3 minutes)
Stovetop Method (For Saucier Results):
- Place in saucepan over low heat
- Add 1/4 cup milk or cream
- Stir constantly until heated through and creamy
Vegan Mac and Cheese: Plant-Based Perfection
Create dairy-free comfort food that doesn’t compromise on creaminess:
Cashew-Based Sauce:
- 1 cup raw cashews (soaked 4 hours)
- 1 1/2 cups unsweetened almond milk
- 1/4 cup nutritional yeast
- 2 tablespoons lemon juice
- 1 teaspoon garlic powder
- 1 teaspoon onion powder
- 1/2 teaspoon turmeric (for color)
Blend all ingredients until silky smooth, then toss with cooked pasta. This vegan mac and cheese rivals traditional recipes in richness and satisfaction.
Gluten-Free Mac and Cheese Tips
Accommodating gluten sensitivities doesn’t mean sacrificing quality:
Key Adjustments:
- Use corn, rice, or quinoa pasta (cook very al dente)
- Replace flour roux with cornstarch slurry (3 tablespoons cornstarch + 3 tablespoons cold water)
- Add cornstarch mixture to hot milk slowly while whisking
- Use gluten-free breadcrumbs for topping (or skip entirely)
Best Gluten-Free Pasta Brands: Banza (chickpea), Barilla Gluten-Free, Tinkyada (brown rice)
Roux Masterclass: Perfecting Your Cheese Sauce Base
The roux is your foundation—master it for foolproof results every time:
What Is a Roux?
A roux is equal parts fat (butter) and flour cooked together to create a thickening agent. For mac and cheese, we use a “blonde roux” cooked 2-3 minutes until light golden.
Three Keys to Perfect Roux:
- Equal Ratios: Always use equal parts butter to flour by weight
- Constant Stirring: Prevents burning and ensures even cooking
- Right Temperature: Medium heat prevents scorching while cooking out raw flour taste
Common Roux Mistakes:
- Too Dark: Roux tastes burnt (start over)
- Lumpy Sauce: Added liquid too quickly (whisk more vigorously)
- Too Thin: Roux wasn’t thick enough before adding liquid (cook longer next time)
“A proper roux is the difference between amateur and restaurant-quality mac and cheese. Take your time with this step—it’s worth it.” – Professional Chef Advice
Smoked Mac and Cheese: Outdoor Cooking Excellence
Take your mac and cheese to the next level with smoky, BBQ-inspired flavors:
Method:
- Prepare mac and cheese as directed (don’t bake yet)
- Preheat smoker to 225°F using hickory or applewood
- Transfer to cast-iron skillet or disposable aluminum pan
- Smoke uncovered for 45-60 minutes
- Add topping and increase heat to 350°F for final 15 minutes
The result? Deeply complex, smoky flavors that complement the rich cheese sauce perfectly—ideal for summer cookouts and BBQ gatherings.
Mac and Cheese FAQ: Your Questions Answered
Q: How do you make mac and cheese creamy? A: Use a proper roux base, add cheese off heat, incorporate cream along with milk, and don’t overbake. The sauce should look soupy before baking.
Q: Can I make mac and cheese ahead of time? A: Yes! Prepare completely, refrigerate unbaked for up to 24 hours, then bake as directed (add 10 minutes to baking time).
Q: What’s the best cheese for mac and cheese? A: A combination works best: sharp cheddar for flavor, Gruyère for depth, and fontina for creaminess.
Q: Why is my baked mac and cheese grainy? A: Cheese was added at too high temperature or you used pre-shredded cheese with anti-caking agents. Always use freshly shredded cheese.
Q: How long does mac and cheese last in the fridge? A: Properly stored in an airtight container, it lasts 3-4 days. Reheat with added milk for best results.
Q: Can you freeze baked mac and cheese? A: Yes, but freezing unbaked yields better results. Baked mac and cheese can become slightly grainy when thawed. Freeze up to 3 months.
Final Thoughts: Become a Mac and Cheese Master
Mastering the perfect mac and cheese recipe is about understanding fundamentals while leaving room for creativity. Whether you stick with the classic baked mac and cheese or explore variations like stovetop mac and cheese, Instant Pot versions, or adventurous gourmet add-ins, the principles remain constant: quality ingredients, proper technique, and attention to that crucial cheese sauce.
This ultimate guide provides everything you need to become the mac and cheese expert in your circle. Start with the classic recipe, perfect your roux technique, experiment with different cheese combinations, and gradually explore variations that suit your taste and lifestyle.
Your Mac and Cheese Journey:
Week 1: Master the classic recipe exactly as written Week 2: Experiment with different cheese combinations Week 3: Try a variation (stovetop, Instant Pot, or vegan) Week 4: Add gourmet mix-ins and develop your signature version
The beauty of this creamy mac and cheese guide is its adaptability—use it as your foundation, then customize based on preferences, dietary needs, or available ingredients. With these expert tips, troubleshooting solutions, and scientific explanations, you’ll never settle for boxed mac and cheese again.
Take Action: Start Cooking Today
Ready to create the best mac and cheese of your life? Bookmark this guide, gather your ingredients, and start with the classic recipe. Perfect your technique, then experiment with the variations that excite you most.
Share Your Success: Have you tried this recipe? Post your results, variations, or questions in the comments below. Rate this recipe and let the community know which cheese combination worked best for you. Your feedback helps fellow home cooks achieve mac and cheese perfection!
Pro Tip: Pin this guide to your recipe board—you’ll reference these tips and troubleshooting solutions for years to come.
This comprehensive guide represents years of recipe testing, culinary science research, and real-world cooking experience. Every technique has been verified through repeated testing to ensure reliable, delicious results every time you cook.

ThGuide to Mac and Cheese: Classic Recipes, Irresistible Variations & Expert Tips
Course: DinnerCuisine: AmericanServings
6
servingsPrep time
15
minutesCooking time
30
minutesCalories
560
kcalIngredients
12 oz (340 g) elbow macaroni
4 Tbsp (56 g) unsalted butter
4 Tbsp (30 g) all-purpose flour
3 cups (720 ml) whole milk, warmed
1 tsp fine sea salt (plus more for pasta water)
1 tsp dry mustard powder
1/2 tsp garlic powder
1/4 tsp black pepper (to taste)
3 cups (about 12 oz / 340 g) sharp cheddar, shredded
1 cup (4 oz / 115 g) Gruyère or mozzarella, shredded
1/4 cup (20 g) grated Parmesan (optional, for extra savoriness)
Topping (optional but recommended)
1 cup (60 g) panko or breadcrumbs
2 Tbsp (28 g) melted butter
Pinch paprika
Pros
(Use this section only for editorial reviews — one per line)
Crowd-pleasing comfort food
Creamy, bakery-style sauce with simple staples
Easy to customize (add bacon, jalapeños, or broccoli)
Scales well for potlucks and holidays
Make-ahead friendly (assemble, chill, bake before serving)
Directions
- Heat oven & prep pan: Preheat to 350°F / 180°C. Butter a 9×13 in (23×33 cm) baking dish.
- Cook pasta: Boil macaroni in well-salted water until just al dente (about 1–2 minutes shy of package time). Drain; set aside.
- Make roux: In a large pot, melt 4 Tbsp butter over medium heat. Whisk in flour; cook 1–2 minutes until foamy (no browning).
- échamel: Gradually whisk in warm milk until smooth. Simmer 3–4 minutes to slightly thicken.
- Season & cheese: Stir in salt, mustard powder, garlic powder, pepper. Off heat, add cheddar, Gruyère/mozzarella, and Parmesan; stir until melted and silky.
- Combine: Fold in cooked macaroni. If too thick, loosen with a splash of warm milk.
- Topping: Mix panko, melted butter, and paprika. Spread mac and cheese in the pan; sprinkle topping evenly.
- Bake: 20–25 minutes until bubbling at edges and lightly golden on top.
- Rest & serve: Let stand 5–10 minutes for the sauce to set, then serve warm.